Showing posts with label finished quilt. Show all posts

Monday, 9 May 2016

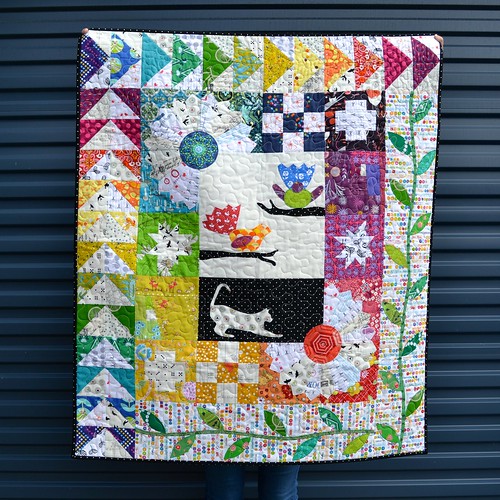
Garden for Birds - Rainbow version

Hello!  After a bit of a hiatus, I'm back!  I'm hoping to start posting with more regularity again, but, we'll see...

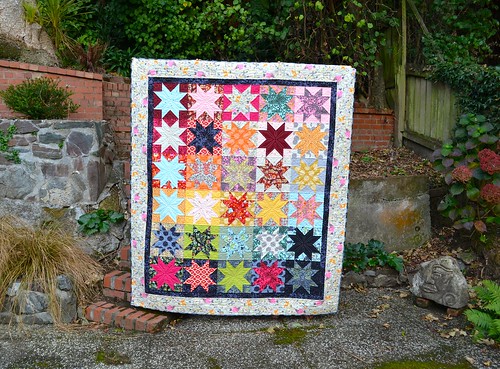
Anyway, this quilt has been finished for a while, but I haven't previously found the motivation to post about it.  It's the third quilt I've made from this pattern (my own).  This is the original Garden for Birds Quilt and this is the Garden for Birds Quilt 2.

I made this one over the course of last year as I taught this quilt pattern for the second time.  It was nice to sew along with my students (although all my stitching was done outside class time, of course).

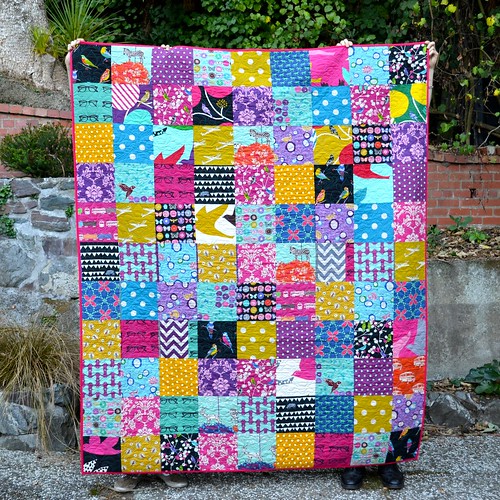
Garden for Birds 3 

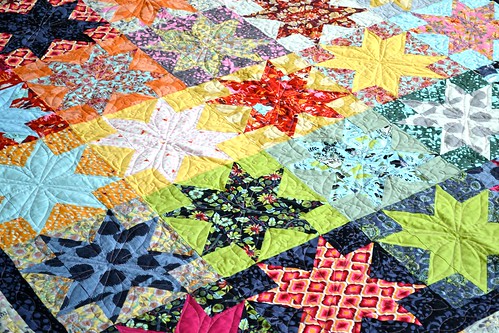
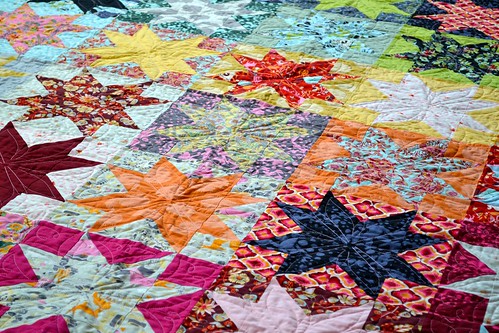
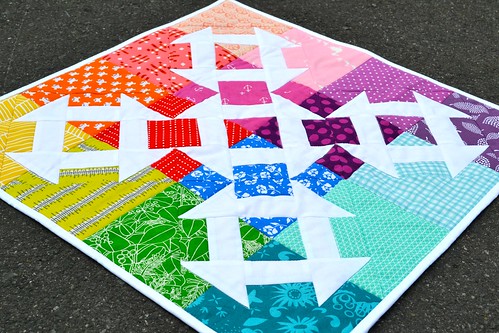
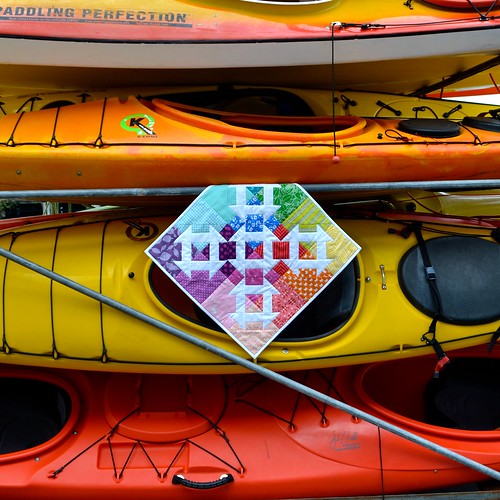
This time I went back to something slightly more along the line of my original quilt, with rainbow colours and a low volume background.  A little black sneaked in as well, since I was going high contrast with this quilt.

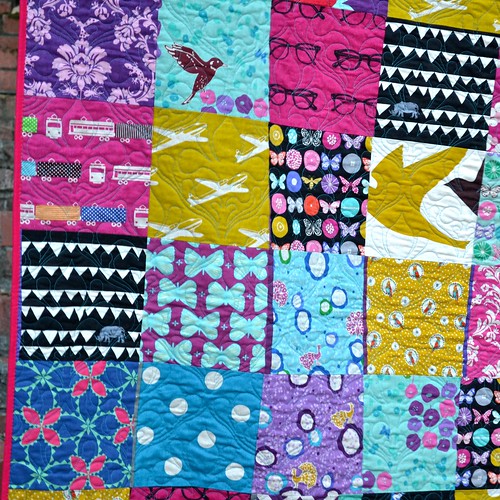
Simple quilting seemed to be the way to go, so I quilted a large scale meander design over the whole quilt, choosing Aurifil in my favourite colour, 2021.  To make the quilting stand out a little more, I went with a 40 weight thread instead of my usual 50 weight thread - its still subtle but just that bit heavier.

Garden for Birds 3

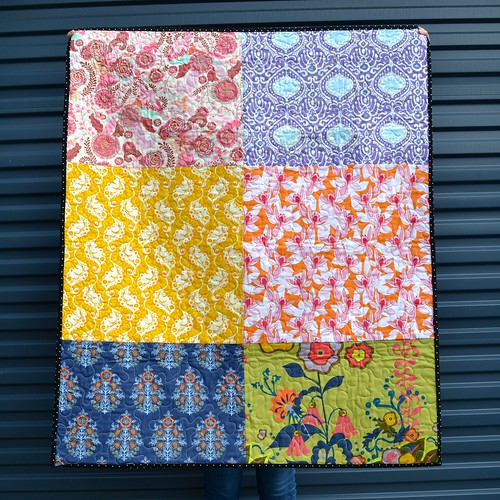
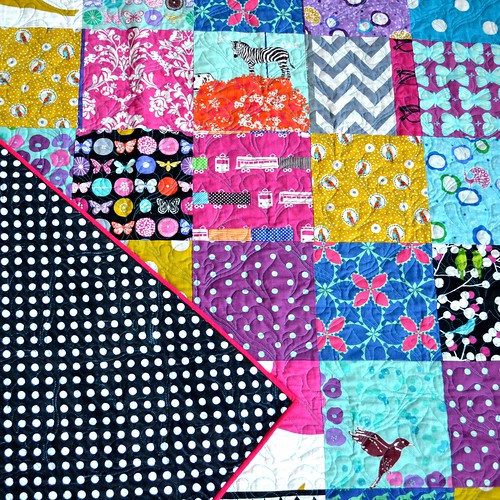
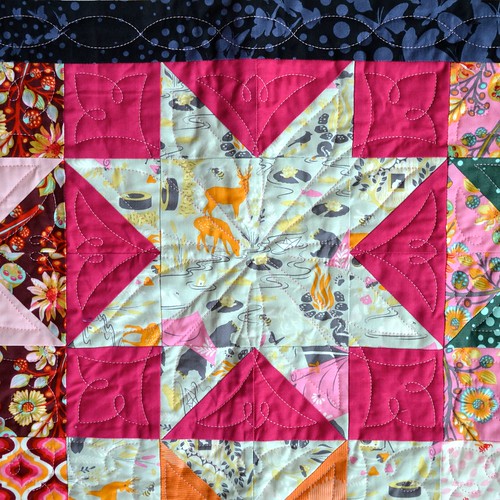
My stash is pretty out of control, so I have been trying to make quilt backs from fabrics in my stash rather than buying yardage for quilt backs.  Sticking with the rainbow theme, I used a selection of cheerful prints for the back of this quilt, which I rather like.

I'm about to start teaching this class again for the third time.  Every year, my students come up with fabulous and different interpretations of the pattern - I'm excited to see this year's batch of quilts!

Monday, 31 August 2015

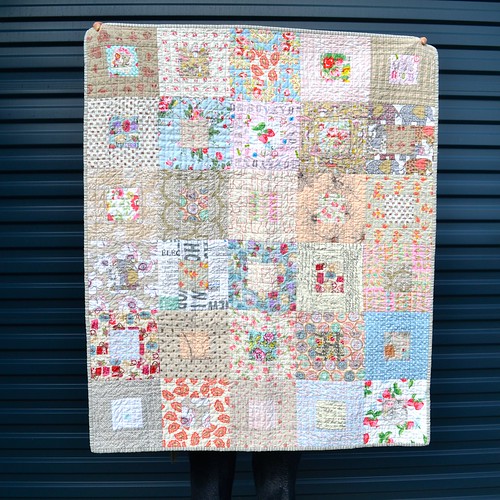
Strawberries and Sugar Quilt

Hello!  Don't fall off your chair, but I have an actual proper blog post for you today.  I finished this quilt a while ago, but I finally managed to get myself organised to take photos this weekend so I can share it here.

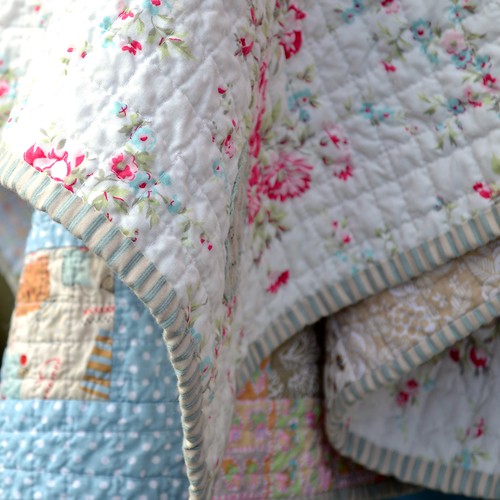
Strawberries and Sugar quilt

I started this quilt earlier in the year, when I was teaching a baby quilt class using this pattern.  It was a pretty quick sew, and I really enjoyed working with these lovely softly coloured fabrics.

Strawberries and Sugar quilt 

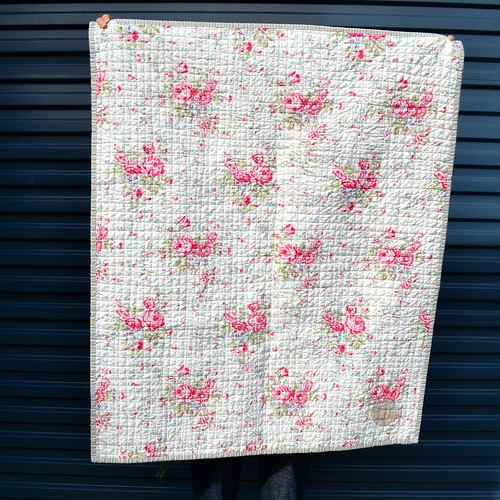
I quilted this quilt in an organic grid design, using fairly dense but not evenly spaced or perfectly straight lines. I used my trusty favourite Aurifil 2021 thread, but this time in a 40 weight, for slightly more distinct stitches.  The backing fabric is from stash, and is a pretty older Tanya Whelan fabric.

Strawberries and Sugar quilt 

I'm always delighted when a friend announces they are having a baby, and my lovely quilting friend Cathy announced earlier this year that she was expecting a girl.  Her baby shower was this weekend, so I washed and dried the quilt in anticipation of gifting it to her.  It crinkled up quite a lot due to the dense quilting - I really love that look.

Strawberries and Sugar quilt 

It's really hard for me to resist a striped binding, and that's exactly what I did here.  This striped fabric  from Stitchbird was the perfect fabric to finish off this quilt.

Strawberries and Sugar quilt

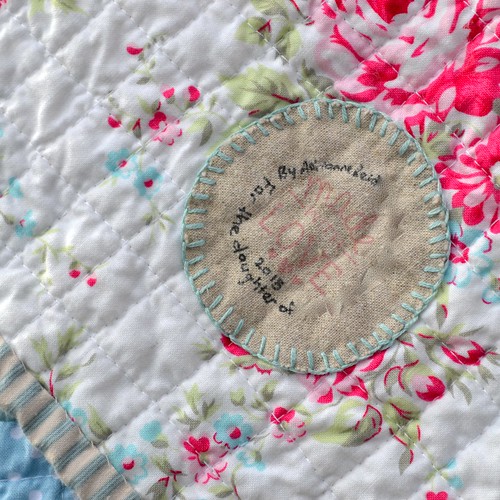
As usual, I stitched on a label before gifting.  I bought the "made with love" stamp from Typo last year, and I've used it a few times.  I've edited out the parents' names, but I think this will be my new go-to wording for baby quilt labels where the name of the baby is not yet known.  Baby is due in the next couple of weeks - I'm wishing Cathy a smooth and safe delivery and looking forward to meeting the newest member of her little family.

Follow on Bloglovin

Thursday, 4 June 2015

Drunk on blue and green

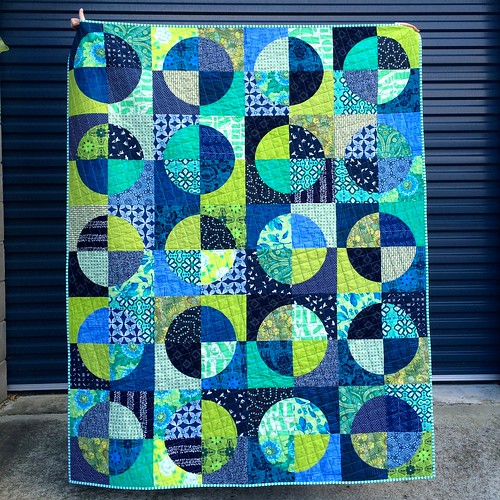
A few weeks ago I shared this blue and green drunkard's path quilt top.  I think I got it basted pretty quickly after that but it has taken me a while to get it quilted.

Drunk on Blue and Green 

For this quilt I used a kind of batting that I haven't tried before, Quilter's Dream Green Batting which is made from recycled bottles.  How cool is that?  I thought it went pretty well with the theme of the quilt.  I got this batting from Massdrop and a twin size package was more than enough to baste this quilt.  I used my usual pin basting method and I didn't have any major issues with it, although I use a hera marker to mark my quilts and I found this batting didn't take the crease as well as cotton batting usually would.

I decided to quilt a cross-hatch grid on a slightly wonky angle.  I wanted to keep the quilting simple but slightly off key.  I used about 5 or 6 different blue and green threads, including Wonderfil, King Tut and Mettler.  The colour differences are pretty subtle in the finished quilt.

Drunk on Blue and Green

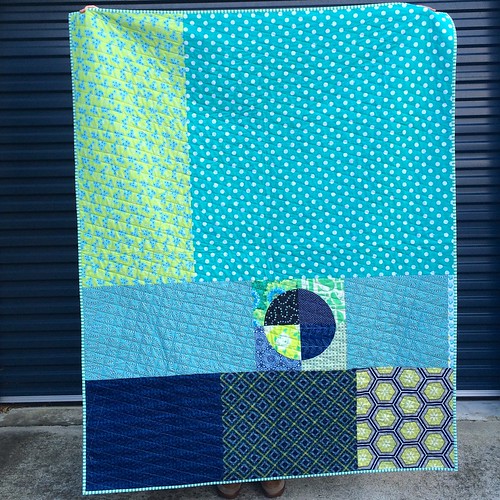
I'm pretty delighted with how this quilt has turned out.  It was a surprisingly easy, quick make, and the pieced back is a bit of fun.

This quilt was actually on my Q2 FAL list!  I think this is my first finish for this quarter - I need to get back to that list and make some progress!

2015 Finish-Along

Hopefully everyone else is doing better than me with their Q2 FAL lists!

Follow on Bloglovin

Wednesday, 15 April 2015

Echino Quilt #2

It's a bit of a mixed up week - even though it's Wednesday I'm sharing a finish rather than a WIP!

Echino Quilt #2 

I made an Echino quilt last year, for someone else, but I really loved it and wanted to make another one for myself.  It's super simple, just 8" finished squares.  I think the first one was slightly more successful than this one, probably because I kept the colour scheme a bit tighter.

Echino Quilt #2 

This quilt is pretty big at 72" by 88" (actually, I find this size totally enormous and I'm in awe of anyone who makes even bigger quilts!), and I loved the long-arm quilting on the last one, so I had the same done again by Sue Burnett.

Echino Quilt #2

With minky on the back and linen on the front, this is one soft and super heavy quilt.  It will be perfect for snuggling on the couch in winter.

Follow on Bloglovin

Monday, 30 March 2015

Moonshine Stars Quilt

Woohoo lovely readers - I am delighted to have a finished quilt to share with you today!

Moonshine Stars Quilt

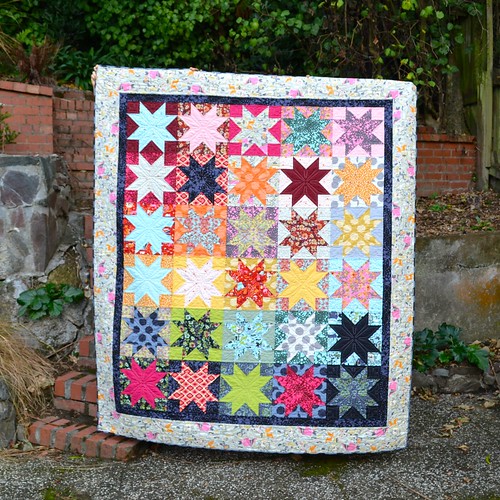
This quilt was made with a bundle of Tula Pink's Moonshine collection, and some co-ordinating solids that I pulled from my stash.  It's very similar to the Acacia Stars quilt I made last year, except this time I get to keep it!

Moonshine Stars Quilt

This quilt is pretty big, and I loved the star quilting that was done on my last quilt, so I sent it to Sue Burnett for quilting again.  I had the stars quilted with a star design, the narrow inner border quilted with a rope kind of design, and the outer border quilted with a border design that matches the stars.  I picked a light pink thread which blends on most of the fabrics, but shows up against some of the darker fabrics in this range.

Moonshine Stars Quilt 

I really love the Moonshine collection.  The colours and prints are a lot of fun, and I like that they allowed me to create a kind of rainbow effect with this quilt.

Moonshine Stars Quilt

Both the border fabrics and the binding are from the Moonshine collection as well.

Moonshine Stars Quilt

There are only a couple more days before the linky party for the 2015 Finish-Along opens on the 31st of March.  You have until the 6th of April to link up, so crank up those sewing machines and move on some WIPs.  I'm excited to see what everyone has been up to!  This was on my Q1 list and takes my list of finishes to, I think, four.

2015 FAL at On the Windy Side

I'll see everyone tomorrow for some linky party fun!

Follow on Bloglovin

Monday, 9 March 2015

Tough Titties (a quilt)

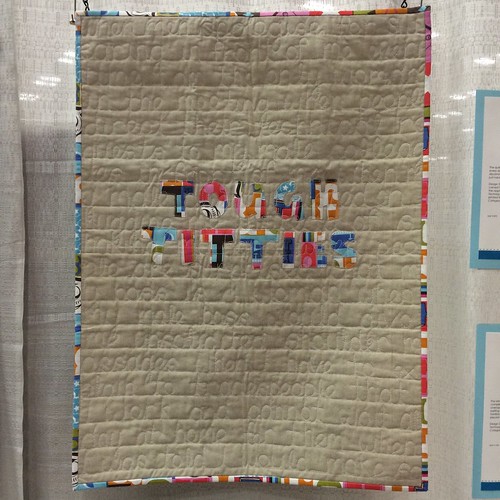
I entered three quilts in QuiltCon, and I was really stoked that one was juried into the QuiltCon exhibition.  I hadn't share the quilt online previously, because I originally made it (together with my sister) for the New Zealand quilting symposium, which required that it not have been published before.  It was one of a very few quilts which were rejected from Symposium, which meant I was a bit surprised when it was accepted into QuiltCon (which was MUCH more selective in terms of quilts entered compared to quilts accepted). 

Tough Titties by Adrianne Reid (Wellington, New Zealand)

This is my quilt hanging in the QuiltCon show.  It seems right to be sharing it on what will still be International Women's Day for many people, since it's a quilt with a feminist bent.

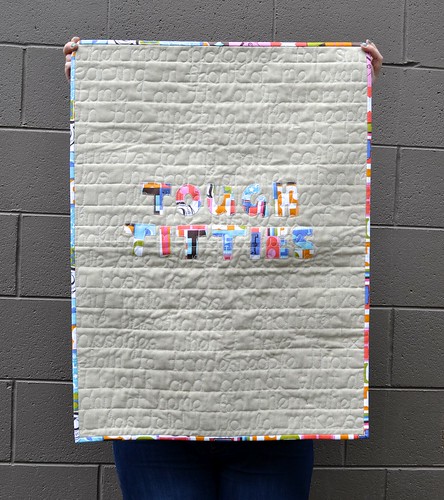
Tough Titties

I have to confess that I'm a little bit nervous about sharing this quilt here.  I try to keep the blog a nice happy place for sharing quilts and quilting techniques.  However, quilts are one of the ways I express myself, and this quilt reflects my thoughts from a time when I was thinking a lot about feminism (something I think about more or less depending on what is happening in my life and in the news).

Tough Titties

This is the description I gave for this quilt when I entered it in QuiltCon:

The quilting on this quilt recounts anecdotes of subtle but infuriating instances of every day sexism.  
"Tough Titties" is a reference to the way this kind of discrimination is often dismissed and women are made to feel that they should just harden up and get over it.  Don't miss the hand printed fabric on the back!

This quilt is a collaboration between me and my sister (who is not a quilter, but who is a feminist).  She carved a stamp (out of a potato, no less) and used it to stamp the fabric used for the backing of the quilt.  I did the appliqué and the quilting, and most of the binding (but I did insist that my sister hand-stitch one side of the binding so that she had a hand in the construction of the quilt).  The words on the quilt come from experiences we've had, and a couple of anecdotes contributed by friends.

Tough Titties

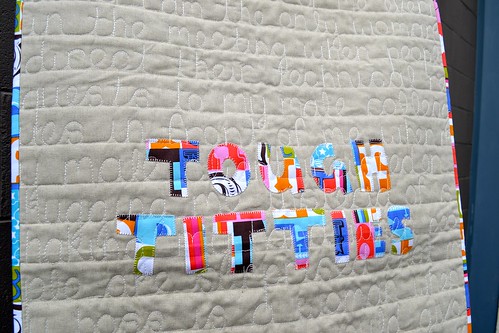
In construction, this quilt is pretty simple.  I appliquéd the words "Tough Titties" to a plain linen background, using the blanket stitch on my sewing machine.  I traced the capitalised letters from my own handwriting, because I felt a bit funny about using someone else's font for this quilt.

The quilting was done free-hand.  I experimented with marking the letters on fabric and then quilting over the marked lines, but found that I was happier with the result when I just stitched freehand.  I did mark some lines using my hera marker so that my writing didn't slope all over the place.  I used a heavier than normal thread, 28 weight Aurifil in my favourite colour 2021, on the front of the quilt, and my usual Aurifil 50 weight 2021 on the back.  I kept the thread colour quite similar to the fabric I was quilting on, so that people would have to get close to the quilt to read the words.
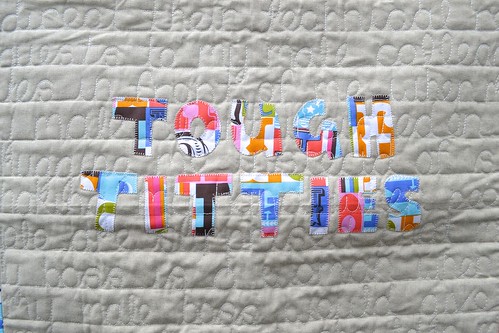
Tough Titties

One of the cool things about showing at QuiltCon is that you get feedback from the judges.  I was really pleased with the feedback on Tough Titties - the judges commented favourably on the craftsmanship of the quilt and suggested that the collaboration could be enhanced by creating a custom fabric for the appliqué as well as for the backing.  I think that's a great idea and I'm going to try it with the next similar quilt I make.  I definitely want to repeat the technique of quilting words on a quilt.  In a happy turn of events, I didn't bring Tough Titties home with me from QuiltCon.  It now lives with Gillian, and she apparently is going to hang it in her office which I think is seriously awesome.

So yeah, that's the quilt I had in the QuiltCon exhibition.  It didn't win any prizes, but it was a thrill just to have a quilt in the show.  It's pretty different from many of my other quilts, and I guess one of the things I've taken away from QuiltCon is that I'm still happy making a variety of quilts in different styles depending on what suits my mood at the time.

Follow on Bloglovin

Monday, 2 March 2015

Candy Dash - pattern available in Make Modern

Last year I was excited to learn that a group of enterprising Aussie crafters were launching their own online quilting magazine.  Make Modern includes patterns, articles, interviews and lots of interesting tidbits.  I don't buy a lot of quilting magazines, mainly because I think they aren't great value for money (so much advertising!), but Make Modern is really packed with content and well worth the very reasonable purchase price ($6.95).

I'm now very pleased to be able to let you know that I have a pattern in the newly released Issue Four of Make Modern.

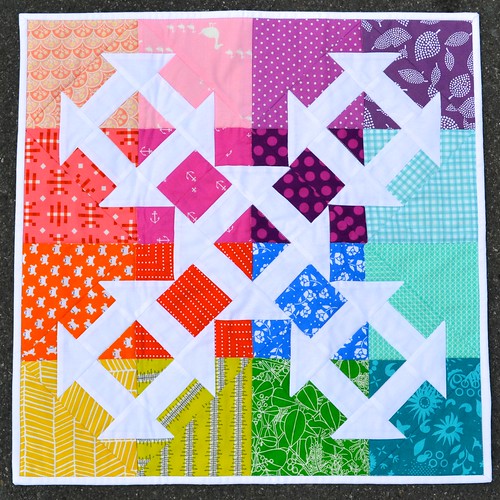
Candy Dash 

I really love the classic churn dash block and a couple of years ago now, I sketched out an idea to make the churn dash shape look like it was floating on a multi-coloured background.

Candy Dash 

This mini quilt, called Candy Dash, is the realisation of that idea.  It's paper pieced for accuracy, and although I made the background to my version out of a rainbow of blenders, you could use any combination of fabrics that took your fancy.

Candy Dash

You can preview Issue Four of Make Modern here, and if you like what you see, you can buy the issue (or a subscription) here.

P.S. A QuiltCon recap is coming soon!  

Follow on Bloglovin

Friday, 20 February 2015

Cherry Christmas Quilt

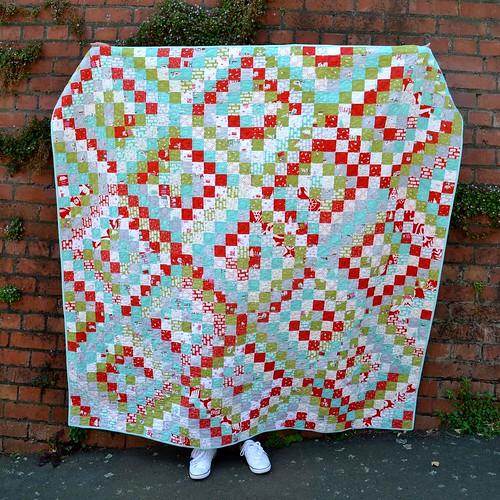
Woohoo - I finally have a finished quilt to share with you!  I started this quilt all the way back in July 2013 (in this post) - can you believe it?

Cherry Christmas 

It's not even that this was a massively time consuming project - it just kept getting pushed aside in favour of other things.  I used Aneela Hooey's Cherry Christmas line, with a couple of other random fat quarters thrown in to make up the numbers, and the scrappy trip along design that went viral a couple of years ago.

Cherry Christmas 

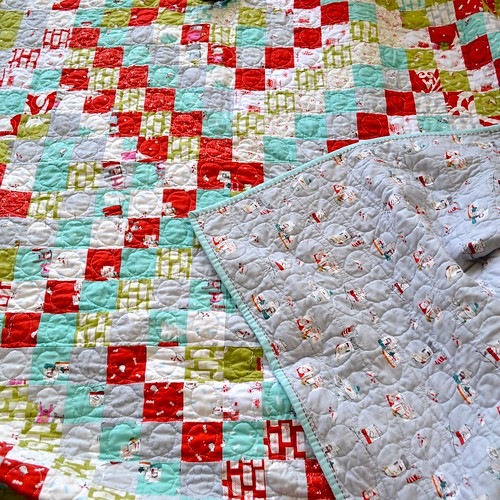
I had this quilt thread basted by Sue Burnett, a local long-arm quilter.  Seriously, if you have access to a long-arm quilter, ask them about this.  After trying it myself, I don't think I'd baste a large quilt again and many of my friends are converts now too.  It's generally not very expensive and such a time and hassle saver.  I then quilted the quilt myself on my Juki (for those who are curious, I didn't use the frame - this quilt was a bit big for it unless I added the extension).  I love the simple loops design - it's the one I start off with when teaching free motion quilting and I like to show that it's something I actually use on my quilts as well.

Cherry Christmas 

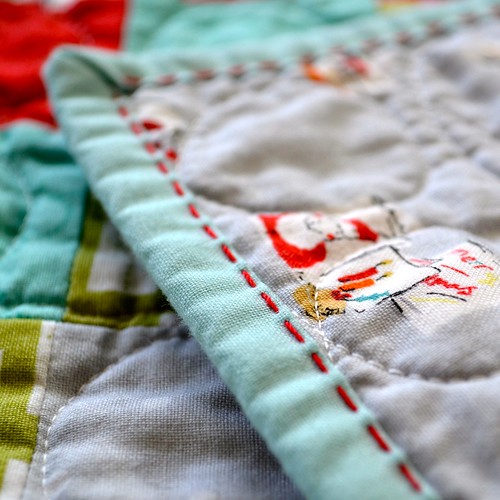
I like hand stitching my bindings and I usually do so in the normal way - with a simple ladder stitch that's nearly invisible.  On this quilt, I decided to do something different and stitch the binding down with Aurifil 12 weight thread using a running stitch.  It's probably not quite as secure (and it certainly took a lot longer) but it's oh so cute.  I will put together a little video tutorial on how to do this when I get back from QuiltCon (and I'm sure I've seen someone else use this on their quilt but I have no idea who - if you know, let me know!).

Cherry Christmas

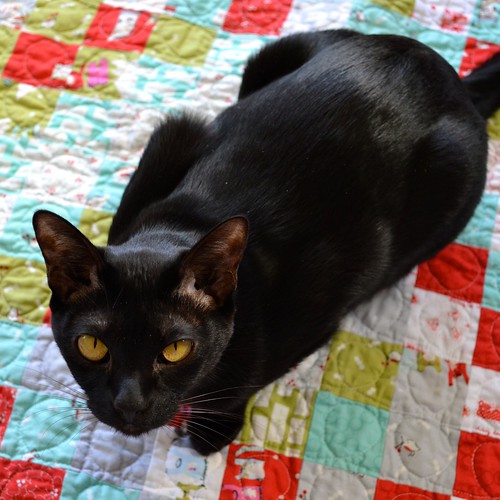
So now I have a Christmas quilt!  It's hanging out on my couch even though it's nowhere near Christmas time.  Luckily, Ivy approves.
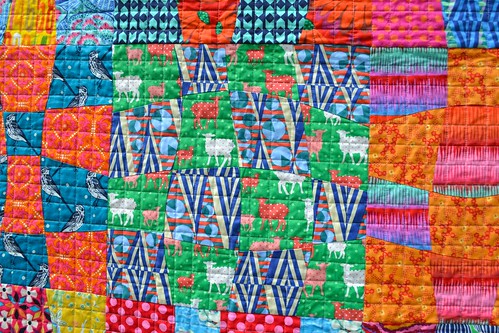
Anyone else working on something completely out-of-season?

This is the first item I've finished off my Q1 Finish-Along list.  I'm afraid my number of finishes for Q1 is going to be fairly unimpressive!  How is everyone else going?  

Follow on Bloglovin

Tuesday, 20 January 2015

Argh my eyes!

I've just been at Symposium, New Zealand's big national quilting conference, with workshops, lectures, social events and several exhibitions.  I entered two quilts in the exhibition, but only one was accepted (ultimately, it worked out for the best because the quilt that was rejected from Symposium was accepted into the QuiltCon exhibition).

Anyway, one of the rules for Symposium was that you could not have shown your quilt before, including on the internet.  I finished my quilt months ago, but I haven't been able to show it until now.  

Argh my eyes! 

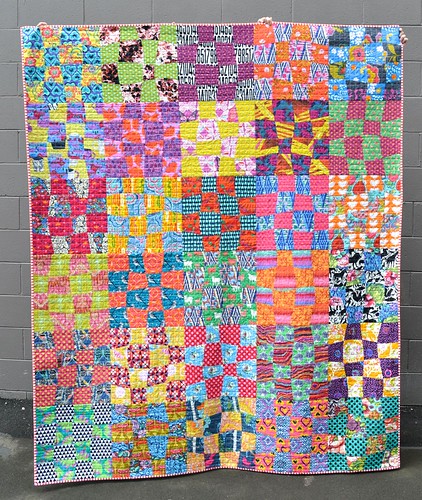
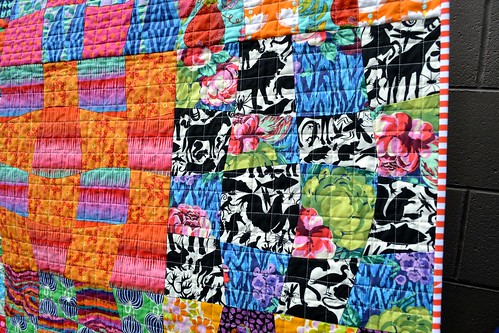
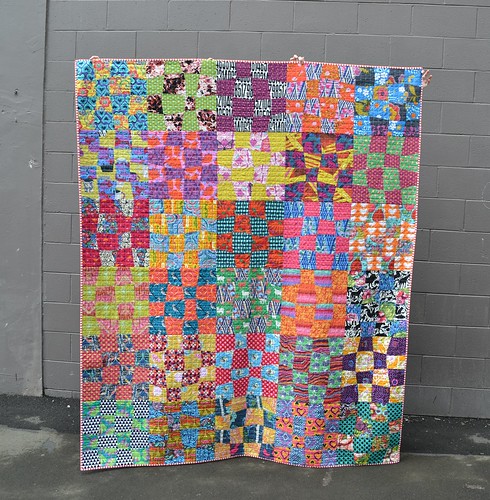
One of the exhibition categories was "alive with colour".  I decided to make a quilt to fit that brief.  When I first started quilting, I really struggled with quilts that were busy and full of colour.  I wanted to add a lot of white, or other neutral solids, and negative space.  As I've made more quilts, I have become much more comfortable with full-on colour and this quilt was my attempt to incorporate lots of bright, clashy, crazy prints while still creating an effect that is harmonious
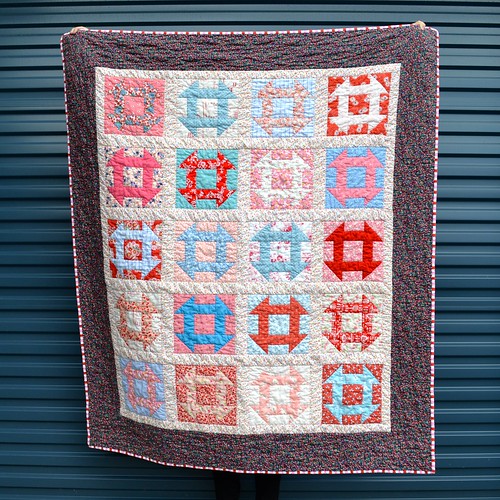
Argh my eyes! 

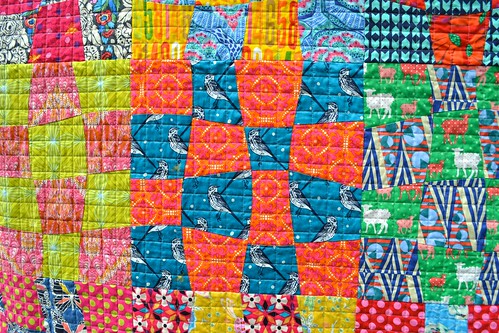
I've been enjoying experimenting with improvisational curved piecing lately, and this quilt uses curves cut without a ruler to add interest.  It's sort of a spin on the St Louis 16 Patch block that went crazy a couple of years ago, and is a great stash busting block.
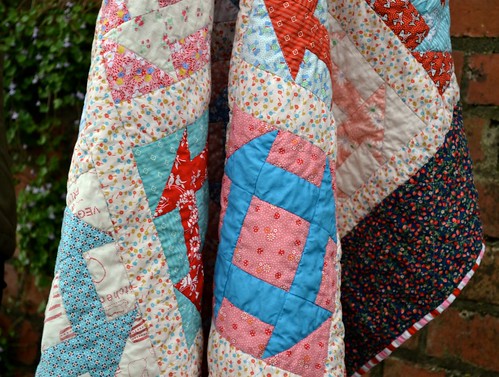
Argh my eyes! 

Honestly, making this quilt was more challenging than I thought it would be.  I had to raid my friend Anne's stash because I ran out of fabrics that were quite crazy enough.  I ended up making five or six blocks that weren't ultimately used in the quilt because they didn't look right.  The layout was shuffled around many times.  It's really hard to photograph and looked more like vomit crazy than good crazy in the photos I took while working on it.  But, when it was finished, it was one of my favourite quilts I've made.

Argh my eyes!

With a completely mad top, this quilt just needed simple quilting, so I stitched a 1" grid over the entire quilt top.  The red/orange and white stripe has been in my stash forever (I think it was in my first ever online fabric order!) so I was thrilled it made the perfect binding.

Argh my eyes!

Because of my teaching work, I had to enter this quilt in the professional category.  I really wasn't expecting to win any prizes - I just wanted to show my work.  For that reason, I was very thrilled to awarded a prize for best interpretation of the theme for this quilt.

I did a great workshop at Symposium, so I'll be sharing more about that soon, and I'll also be posting some photos of other quilts that caught my eye in the exhibition.

Quilt Stats 
Pattern: my own improv-ish design
Finished Size: 70" by 84"  
Fabric: 60 different fabrics - too many to list!
Backing: two different out-of-print Anna Maria Horner fabrics
Binding: Michael Miller Clown Stripe in Fire
Pieced and quilted by: me

I will be linking up at finish it up Friday at crazy mom quilts.

Follow on Bloglovin

Monday, 5 January 2015

Lucy's quilt

Earlier last year, a friend of mine was getting back into painting after a bit of a hiatus, and expressed an interest in doing a swap.  Now, I have no painting or drawing talent to speak of, so I have great admiration for those who do and I snapped up her offer very eagerly.

Lucy's quilt 

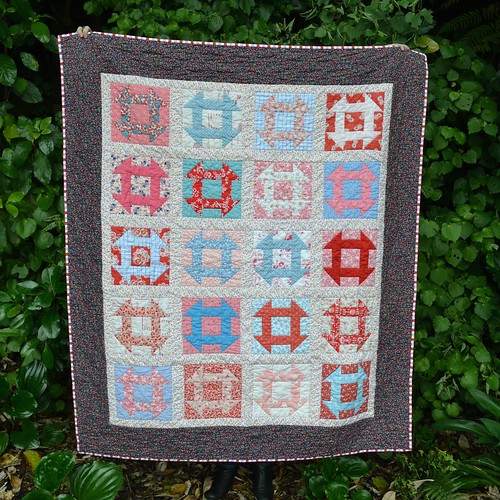
This is the quilt I made in exchange for an amazing painting, which I will blog about soon.  My friend asked for red, blue and pink to be used in the quilt, but otherwise gave me pretty much free reign.  She's a very sweet person, with a sense of style that's a mix of classic and quirky, and I wanted to try and bring those elements into the quilt as well.

The churn dash blocks are very traditional, and made in a combination of red, pink, blue and white 1930's prints, they were looking rather crisp and a bit preppy.  I wanted to add some softness and chaos, and as luck would have it, had just enough of the pale peach ditsy floral print to make sashing for the blocks.

Lucy's quilt 

The larger outer border is made from a print I've had in my sash for a long time, pretty much since I first started quilting.  It's a very small strawberry print on a dark navy background and is almost Liberty-esque (although it's definitely not true Liberty).

I wanted the quilting in this quilt to add to the traditional feel and leave the quilt soft and snuggly - perfect for a lazy afternoon nap.  I stitched in the ditch around each churn dash shape, and each churn dash block, and around the inner sashing.  The outer border was quilted in a fairly chunky diagonal crosshatch - I thought it might take forever with all that stopping and starting but it really wasn't that bad!  The quilt crinkled up beautifully when I washed it and put it through the drier.

Lucy's quilt

The binding is also from stash - a pink, white and red stripe that's been stowed away for a while but was just perfect for this quilt.  This quilt was quite challenging to photograph - I think it's the busy-ness of the sashing and border that makes it difficult.

Pink, red and blue cushion

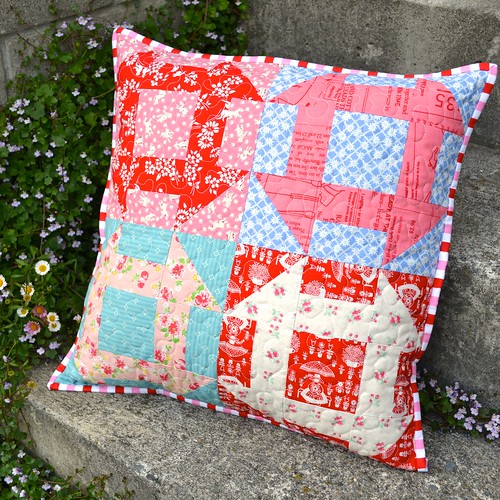
I made a few extra churn dash blocks as I was making the quilt, and turned them into this pink, red and blue cushion to go with the quilt.

It was really fun to do a swap with a real life friend whose creative skills are quite different to my own.  I would highly recommend it if you get the chance, and I would do it again for sure.  Have you done any skills swaps lately?

Follow on Bloglovin

Friday, 26 December 2014

Hadley Quilt

I finished stitching down the binding on my Hadley quilt a couple of weeks ago.

 Hadley Quilt

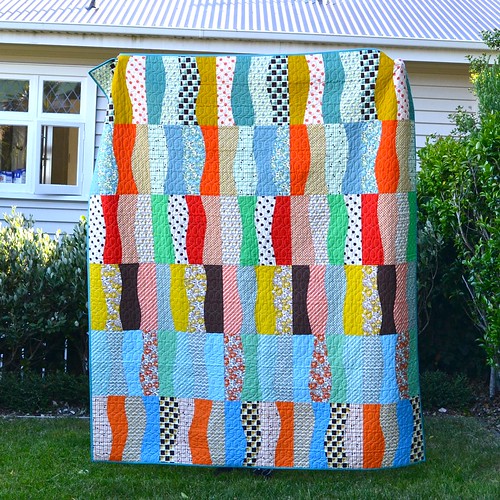
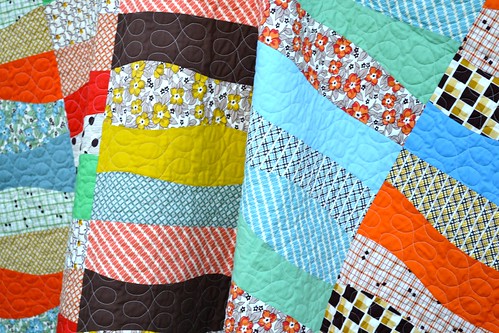
If you've been following the progress of this quilt, you've probably seen the front already (in this post). I'm really happy with how the front turned out - basically, for each row, I stacked five fat quarters and sliced them into four fairly even strips, creating improv curves as I did so.  I then trimmed the resulting blocks into nice even squares.  This trimming process left me with quite a few offcuts, which I used on the other side.

Hadley Quilt

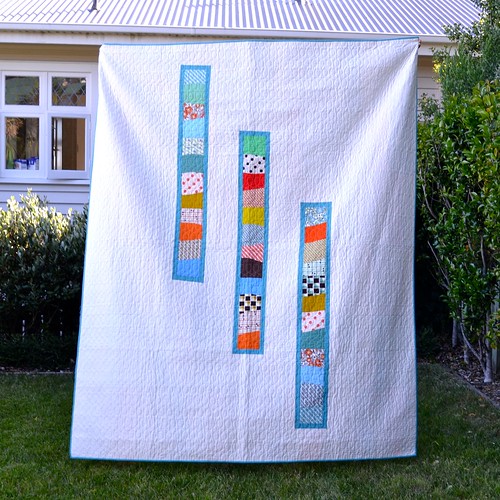
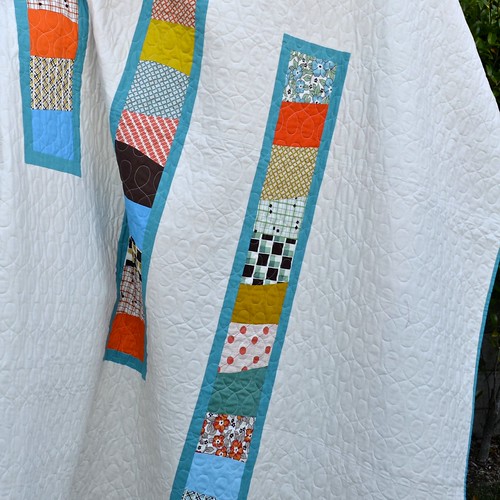
For this side, I really wanted to push the retro vibe I was getting from the Hadley prints.  At first I thought I would just set the pieced strips in the cream background fabric, but they didn't look quite right so I ended up framing them with a teal shot cotton.  Technically, this side is the back but I think I like it just as much as the front (and maybe more...).

Hadley Quilt

All that negative space meant that getting the quilting right was important.  This is a pretty big quilt (70" by 84") so I wasn't that keen to tackle it myself.  Instead, Sue Burnett quilted it for me using a digital pattern we found together.  I think the figure eight design is very characteristic of Denyse Schmidt's quilts and I thought it was right just with her fabrics.

Hadley Quilt

For binding, I used the same teal shot cotton that I used to frame the strips on the back.  It's a Kaffe Fassett shot cotton and super soft.  I don't know if I would want to use it for ultra precise piecing, but it makes the most lovely, almost silky, binding, and is a delight to hand stitch through.

Hadley Quilt

Finally, I thought I should include a photo of my quilt holder for these photos.  My youngest brother held this quilt up on his own (I made another quilt the exact same size recently, and my friend Lyndy and I could barely hold it up for photos working together - 84" is 7'!).  I think he is pointing at a speck of dust he wanted me to pick off the quilt.

Quilt Stats 
Pattern: my own improv-ish design
Finished Size: 70" by 84"  
Fabric: Hadley Fat Quarter bundle designed by Denyse Schmidt for Free Spirit Fabrics
Backing: I think it is Michael Miller Cotton Couture in Soft White
Binding: Kaffe Fassett Shot Cotton in Jade
Pieced by: me
Quilted by: Sue Burnett

I will be linking up at finish it up Friday at crazy mom quilts.

Follow on Bloglovin