Showing posts with label linen. Show all posts

Sunday, 21 May 2017

Tamarack Jacket in Navy Linen and Nani Iro

I made a quilted jacket!  Specifically, the Tamarack Jacket by Grainline Studio.


The exterior is a beautiful medium weight linen from The Fabric Store (pretty sure it's this one).


I used wool batting - the Quilter's Dream kind because it's lovely and doesn't smell like sheep.  It's getting pretty cold here now so the wool should keep me snuggly and warm.


On the outside this jacket is very "I am a serious person walking a dog".  On the inside it's much more "I'm a free spirit who makes her own clothes".  That dreamy fabric is Nani Iro that I bought in Melbourne with Erin last year.  It's pretty much impossible to find in this colourway, but the print is Komorebi if you want to try.


I could definitely fit more layers under this jacket.


I made a (US) size 4 based on my measurements.  This is a size smaller than I expected to make, but it's definitely the right size for me (even though I used relatively lofty batting).  I lengthened the body of the jacket by 1.5", and the sleeves by 1".  I would lengthen them even more if I made this again - I just really didn't have enough of the lining fabric to do so this time.


I finished the binding on the front of the jacket and at the back hem by hand.  The rest is all machine stitched, and I bound all the internal seams as well, for a really tidy finish.


Thank goodness for sewing friends.  Erin made this jacket at the same time as me (actually she decided to make it and I was like "me too!").  She made two practice pockets and walked me through the making of these welt pockets which were a bit intimidating for a first timer.  In the end they were totally fine - use both the pattern instructions and the sew-along for best results.


I cut four versions of the "upper pocket"piece so that I could have the right side of fabric both inside the pocket and visible on the inside of the jacket.


I didn't have quite enough of the Komorebi print so I used a different Nani Iro print for the inside of the pockets.  I squeezed the lining out of about 1.5m of Nani Iro which is definitely less than the recommended amount.  Don't try this at home kids.


The quilting is Aurifil 28 weight thread.  I guess I thought that if I was going to make a quilted jacket, I wanted to see the quilting.  I used a medium blue on the outside and a medium grey on the inside.


Yeah these photos are just gratuitous now.


Oh it's the inside of the pocket again.


If it wasn't for the fact that this limey green makes me look like a corpse, I would be tempted to wear this jacket inside out.


Just embracing my inner dork and the Wellington wind.

Wednesday, 15 April 2015

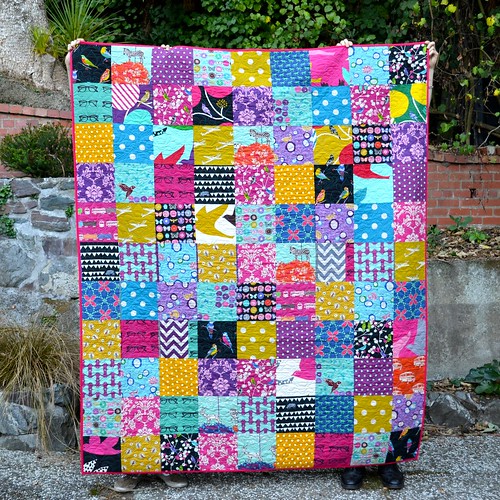
Echino Quilt #2

It's a bit of a mixed up week - even though it's Wednesday I'm sharing a finish rather than a WIP!

Echino Quilt #2 

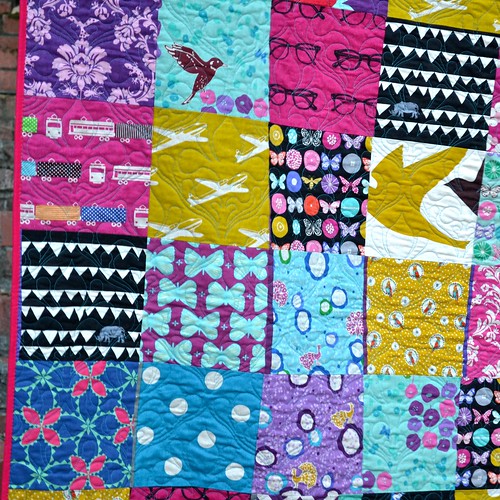
I made an Echino quilt last year, for someone else, but I really loved it and wanted to make another one for myself.  It's super simple, just 8" finished squares.  I think the first one was slightly more successful than this one, probably because I kept the colour scheme a bit tighter.

Echino Quilt #2 

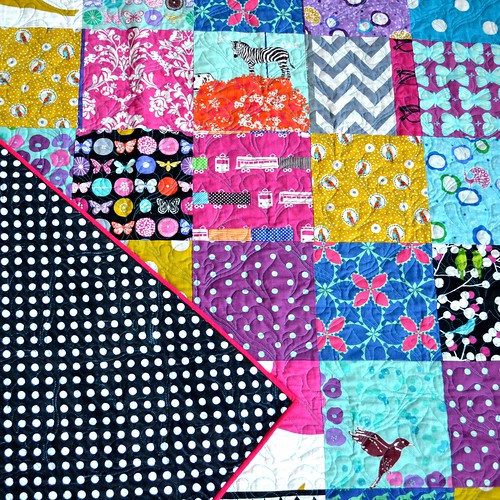
This quilt is pretty big at 72" by 88" (actually, I find this size totally enormous and I'm in awe of anyone who makes even bigger quilts!), and I loved the long-arm quilting on the last one, so I had the same done again by Sue Burnett.
Echino Quilt #2

With minky on the back and linen on the front, this is one soft and super heavy quilt.  It will be perfect for snuggling on the couch in winter.
Follow on Bloglovin

Monday, 9 March 2015

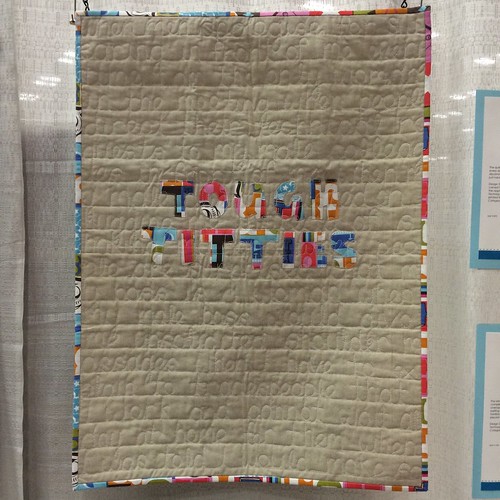
Tough Titties (a quilt)

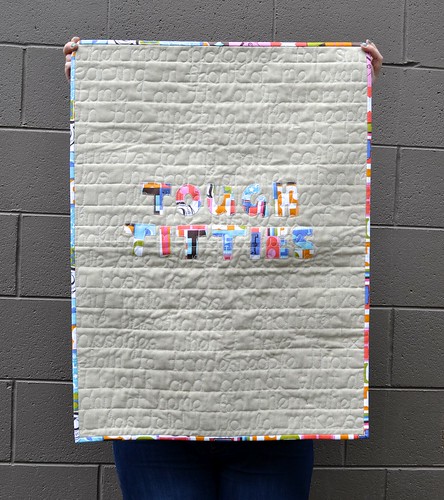
I entered three quilts in QuiltCon, and I was really stoked that one was juried into the QuiltCon exhibition.  I hadn't share the quilt online previously, because I originally made it (together with my sister) for the New Zealand quilting symposium, which required that it not have been published before.  It was one of a very few quilts which were rejected from Symposium, which meant I was a bit surprised when it was accepted into QuiltCon (which was MUCH more selective in terms of quilts entered compared to quilts accepted). 

Tough Titties by Adrianne Reid (Wellington, New Zealand)

This is my quilt hanging in the QuiltCon show.  It seems right to be sharing it on what will still be International Women's Day for many people, since it's a quilt with a feminist bent.

Tough Titties

I have to confess that I'm a little bit nervous about sharing this quilt here.  I try to keep the blog a nice happy place for sharing quilts and quilting techniques.  However, quilts are one of the ways I express myself, and this quilt reflects my thoughts from a time when I was thinking a lot about feminism (something I think about more or less depending on what is happening in my life and in the news).

Tough Titties

This is the description I gave for this quilt when I entered it in QuiltCon:

The quilting on this quilt recounts anecdotes of subtle but infuriating instances of every day sexism.  
"Tough Titties" is a reference to the way this kind of discrimination is often dismissed and women are made to feel that they should just harden up and get over it.  Don't miss the hand printed fabric on the back!

This quilt is a collaboration between me and my sister (who is not a quilter, but who is a feminist).  She carved a stamp (out of a potato, no less) and used it to stamp the fabric used for the backing of the quilt.  I did the appliqué and the quilting, and most of the binding (but I did insist that my sister hand-stitch one side of the binding so that she had a hand in the construction of the quilt).  The words on the quilt come from experiences we've had, and a couple of anecdotes contributed by friends.

Tough Titties

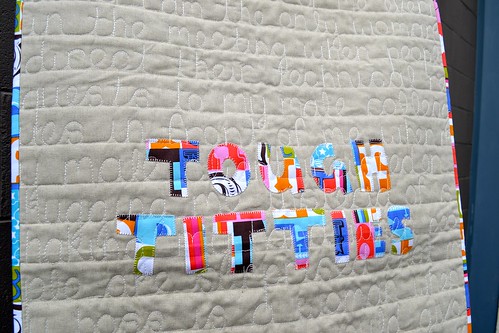
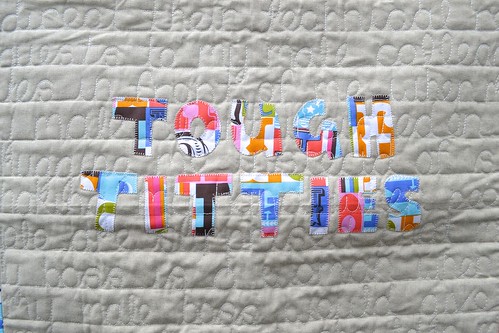
In construction, this quilt is pretty simple.  I appliquéd the words "Tough Titties" to a plain linen background, using the blanket stitch on my sewing machine.  I traced the capitalised letters from my own handwriting, because I felt a bit funny about using someone else's font for this quilt.

The quilting was done free-hand.  I experimented with marking the letters on fabric and then quilting over the marked lines, but found that I was happier with the result when I just stitched freehand.  I did mark some lines using my hera marker so that my writing didn't slope all over the place.  I used a heavier than normal thread, 28 weight Aurifil in my favourite colour 2021, on the front of the quilt, and my usual Aurifil 50 weight 2021 on the back.  I kept the thread colour quite similar to the fabric I was quilting on, so that people would have to get close to the quilt to read the words.

Tough Titties

One of the cool things about showing at QuiltCon is that you get feedback from the judges.  I was really pleased with the feedback on Tough Titties - the judges commented favourably on the craftsmanship of the quilt and suggested that the collaboration could be enhanced by creating a custom fabric for the appliqué as well as for the backing.  I think that's a great idea and I'm going to try it with the next similar quilt I make.  I definitely want to repeat the technique of quilting words on a quilt.  In a happy turn of events, I didn't bring Tough Titties home with me from QuiltCon.  It now lives with Gillian, and she apparently is going to hang it in her office which I think is seriously awesome.

So yeah, that's the quilt I had in the QuiltCon exhibition.  It didn't win any prizes, but it was a thrill just to have a quilt in the show.  It's pretty different from many of my other quilts, and I guess one of the things I've taken away from QuiltCon is that I'm still happy making a variety of quilts in different styles depending on what suits my mood at the time.

Follow on Bloglovin

Monday, 13 October 2014

Tote bag for my mum

I told you I was obsessed with tote bags...

Tote number five 

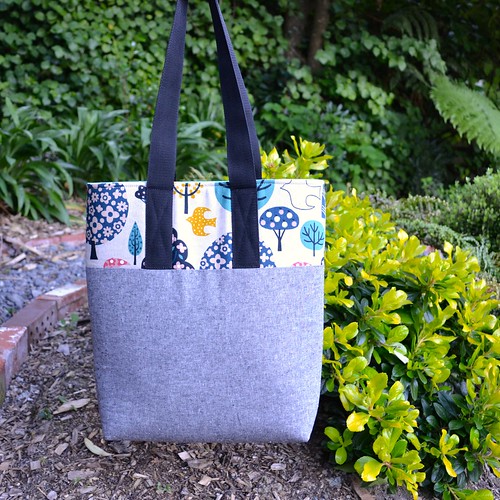
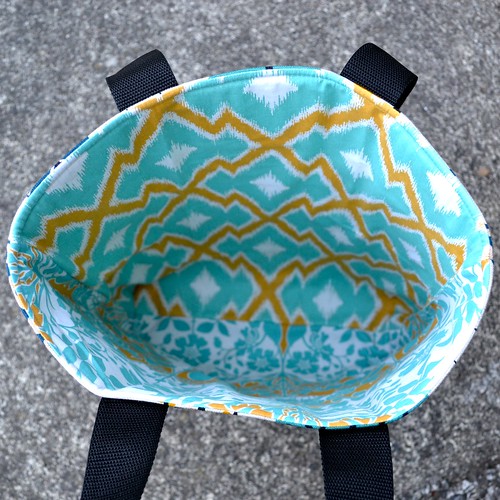
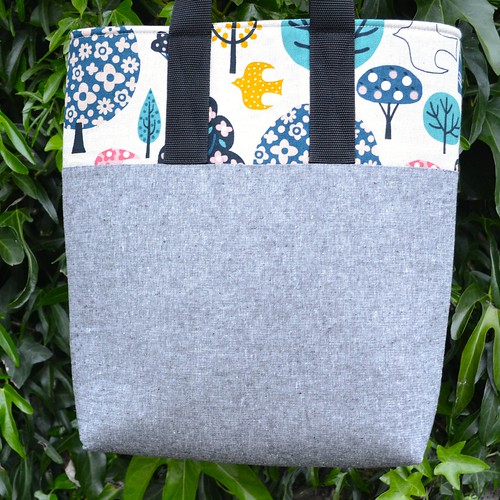
I made this one for my Mum for her birthday.  It's similar to, but not quite the same as, the last version I made.

Tote number five 

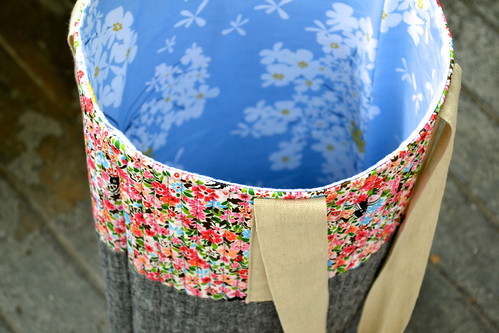
I didn't have a half yard of a single fabric I wanted to use to line this tote, so I used two fat quarters instead.  I rather like having two different fabrics for the lining.

Tote number five

If you'd like to make your own version of this tote, you can find the tutorial here.  I have fabrics picked to make one more, this time for myself, and I'm planning to make it giant so I can fit a whole bunch of quilting gear in there.  I have a reasonably formidable to-do list but these only take a couple of hours so I'm sure I'll find the time soon.

I'm going to link up this finish with crazy mom quilts.

Follow on Bloglovin

Monday, 19 May 2014

Bloggers Quilt Festival - Autumn with a Twist Quilt

AmysCreativeSide.com

I am revisting my Autumn with a Twist Quilt for the Bloggers Quilt Festival. I made this quilt as a sample for a class I'm teaching and it was just a delightful experience. The colour palette was inspired by some fabrics I picked up on a quilty roadtrip with a friend, and then I found the perfect backing at a local quilt shop (on sale, no less). I think it was just meant to be!

Autumn with a Twist Quilt

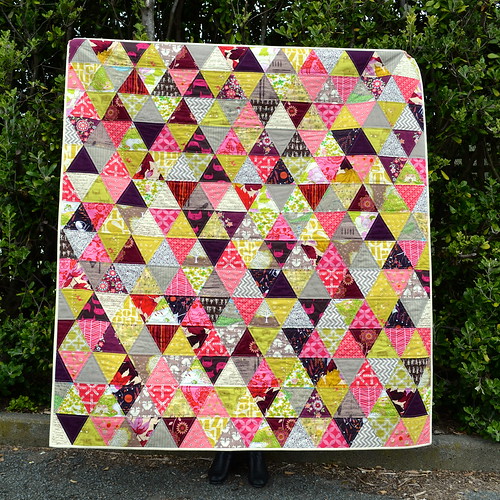
This quilt is just a simple equilateral triangle quilt.  It's the third one I've made and I'd make another tomorrow!  If you're interested in making your own, you can check out my tutorials on how to cut equilateral triangles and how to sew equilateral triangles.

Autumn with a Twist Quilt

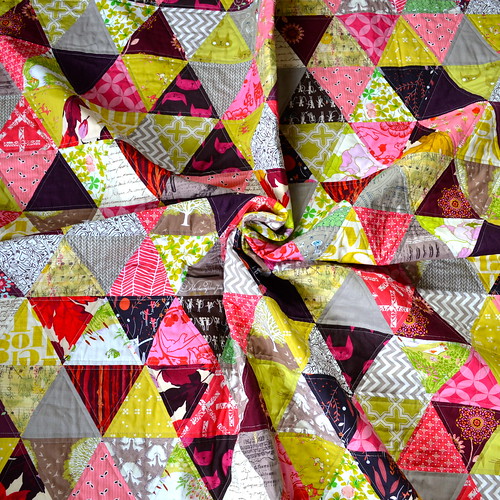
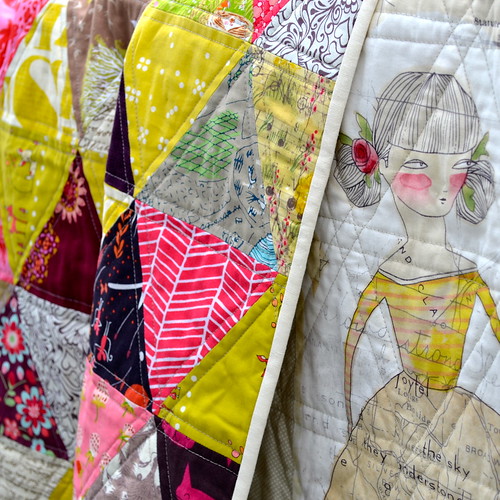
I've been wanting to make an autumnal quilt for a while, and I started on that with my Midnight at the Oasis quilt.  However, that project is on hold for the moment, so the need to make a sample for my class presented the perfect opportunity.  I've said before that if someone said they were putting chartreuse, plum, hot pink, grey-brown and cream together, I'd think of a hot mess, but I really love this somewhat unexpected colour combination.

Autumn with a Twist Quilt

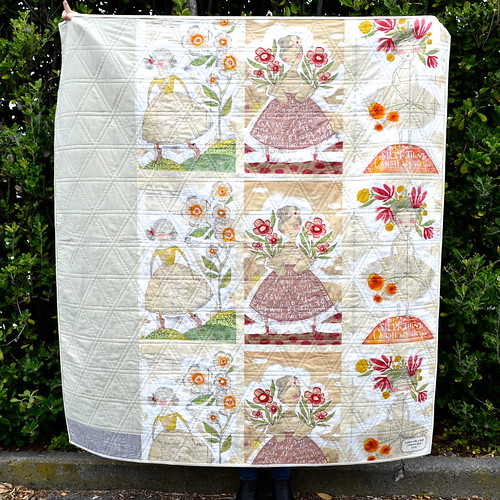
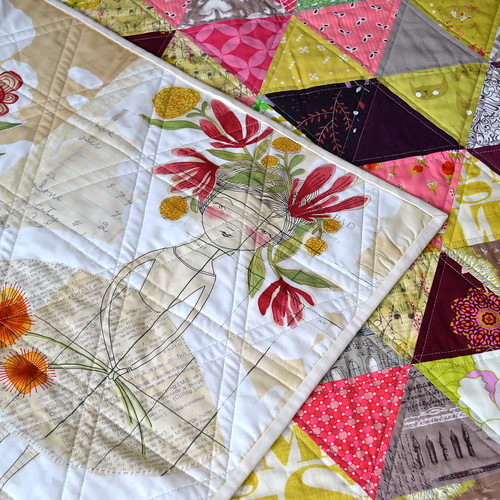
As much as I love the front, I think I like the back as much.  I used a really beautiful panel from Cori Dantini's Beauty is You line, and it ties in many of the colours from the front, in a much softer palette.  I'm really glad I managed to find this fabric, because I had in mind to use on the back once I started the front, and it's quite hard to find online.  I might have cleaned out the local quilt shop I found it at!

Autumn with a Twist Quilt

Even though cream linen binding is horribly impractical, it just seemed like the right choice for this quilt.

Autumn with a Twist Quilt 

For the quilting, I decided to go very simple so as not to compete with the quite busy quilt top (and because I loved the quilting on this equilateral triangle baby quilt that my mum made).  I simply stitched a quarter inch off each side of the seam lines.  It was much quicker and easier than I thought it would be, especially because I didn't need to mark any of the quilting lines, and just used my walking foot as a guide.  I actually used a different coloured thread on the top and in the bobbin, but the colour differences are very subtle (a very light beige on the back, and a slightly darker beige on the front).  It does make a very nice pattern on the back.

Autumn with a Twist Quilt

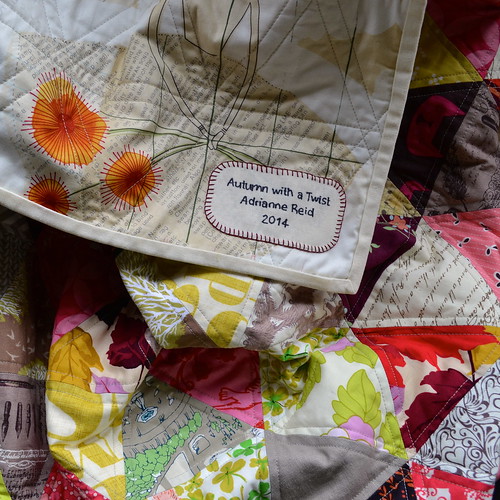
Of course, I added the label in my usual style.  I've found that curving the corners of my labels lets me blanket stitch around them a little bit more neatly, and they feel more secure without the points which can come loose.

At 238" inches around, my quilt just squeezes into the Small Quilt Category for the Bloggers Quilt Festival. Make sure you head over and check out the other quilts in that category and all the other categories!

Quilt Stats
Pattern: my own equilateral triangle quilt pattern
Finished Size: approx 56" by 63"
Fabric: various
Backing: panel from Beauty is You by Corin Dantini
Pieced and quilted by: me

Follow on Bloglovin

Monday, 14 April 2014

A tote bag for travelling handmade

Lately I've been looking for more ways to live a little more handmade.  I'm psyching myself up to make a "proper" bag (maybe a Super Tote) so I bought some Soft and Stable in anticipation.  It's something that I read about at Sew Sweetness, and boy does Sara know her bags, so I had to try it.

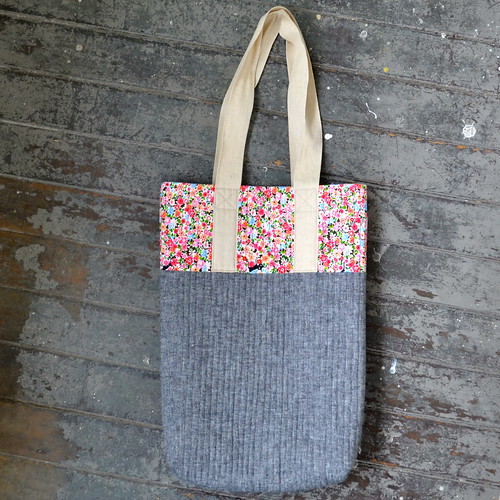
Tote bag (with cat fabric!) 

I'm a bit nervous about sewing proper fancy bags with zips and pockets and all that jazz, but I could picture how to make a simple tote bag so I thought I would experiment with the Soft and Stable to make just that.

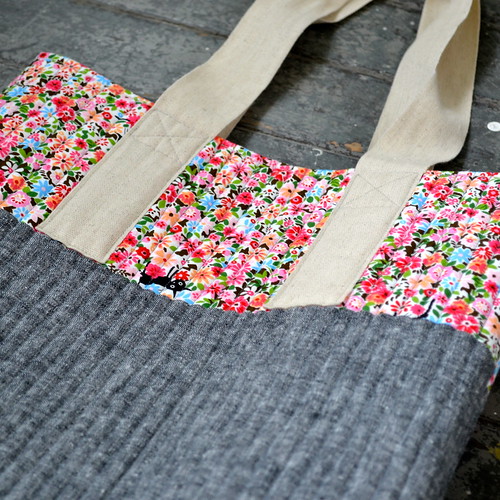
Tote bag (with cat fabric!) 

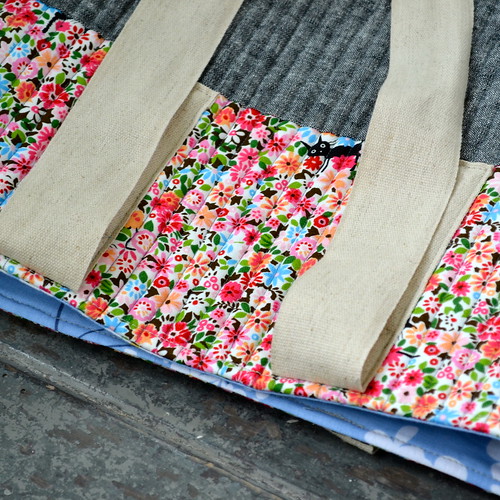
For this tote I used a relatively subtle cat fabric (which I really really love, in case you can't tell), together with Essex Yarn Dyed Linen in Black (another favourite).  I quilted the exterior fabric to the Soft and Stable with lots of vertical lines.  I then added the handles, leaving room to add the lining.  I slightly boxed the corners, then added a simple lining to match.

Tote bag (with cat fabric!) 

I was really impressed with the Soft and Stable - it was easy to work with, and it's given the bag enough body so that it can stand up by itself, without being stiff or heavy.

Tote bag (with cat fabric!)

I'm doing a lot of travel at the moment, and I'll be using this bag for my carry on luggage.  It fits my laptop nicely, with enough room for the miscellaneous junk that I need to carry on but can't fit in my handbag.  I'm kind of in love, and very relieved that my "make it up as you go along" method worked out well.

Have you tried Soft and Stable?  Do you have any specialty product recommendations?

Linking up with finish it up friday at crazy mom quilts and Sew Cute Tuesday at Blossom Heart Quilts.

Follow on Bloglovin

Friday, 11 April 2014

Orange peels mini quilt

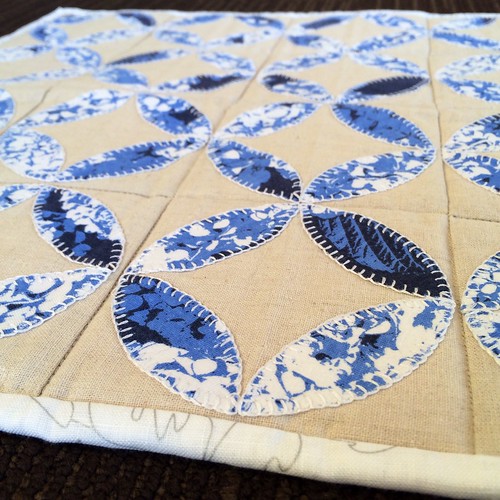
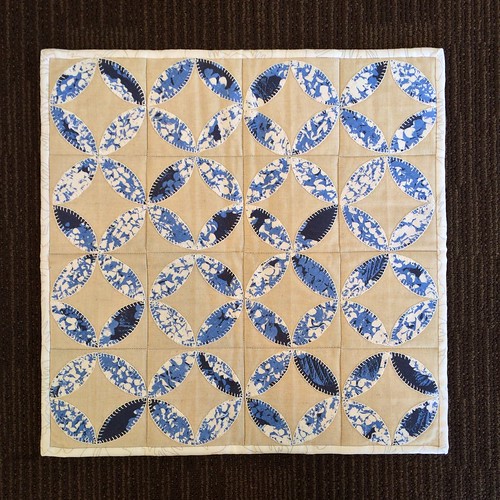
This mini quilt is quite a long term WIP.  I've instagrammed it quite a bit, but I don't think I've ever blogged about it before.  I had a print t-shirt from Karen Walker which I really loved, but which really never fitted me well, and I've been planning to use it in a quilt somehow for a while.  The need to make something for my blanket stitch appliqué class at Nancy's Embroidery gave me the perfect opportunity.

Blue orange rings 

This was quite a good way to use a cotton knit fabric in a quilt.  The fusible webbing stabilised the t-shirt fabric quite well, and the fact that it's not part of piecing meant that the stretch didn't really matter.  I don't know that I'd recommend using something highly stretchy for this technique, but this 100% cotton not very stretchy fabric was totally fine.

Overall, I'm happy with this mini, although it is really far from perfect.  When I made my AHM All Day Mini Quilt, I stitched the orange peels in a more traditional fashion, with the points in the centre and the corners.  If you press two diagonal lines across your fabric, you can line the petals up really neatly, so that when you stitch the different squares together, all the points meet nicely.  For this version, I stitched the petals in ring shapes, and I tried to get the positioning right by pressing my background squares into quarters.  However, things didn't line up as nicely and not all my points meet where they should - oops!  That's what happens when you experiment sometimes, and I'm happy to show my students what not to do!

Blue orange rings

I was thinking about quilting this to make the petals really pop out, but I ran out of time (and patience) in the end and simply quilted in the ditch.  I had some difficulty picking a binding for this mini, but in the end went for a white linen fabric with a subtle silver print which matched the white thread I used for the appliqué nicely.

Have you tried experimenting with your quilting lately?  How did it work out for you?

Quilt Stats
Finished Size: approx 16" by 16"
Fabric: Essex Linen in Natural, Karen Walker t-shirt
Binding: unknown white linen with silver print
Pieced and quilted by: me

Linking up with finish it up friday at crazy mom quilts and Sew Cute Tuesday at Blossom Heart Quilts.

Follow on Bloglovin

Monday, 7 April 2014

Autumn with a Twist Quilt

I am more than happy to have this finished quilt to share with you today.  The top had been basted for a couple of weeks and this weekend I finally had time to sit down and quilt it.  After a couple of weeks with almost no sewing going on, it was lovely to be at my machine.  Absence really does make the heart grow fonder!

Autumn with a Twist Quilt

This quilt is just a simple equilateral triangle quilt.  It's the third one I've made and I'd make another tomorrow!  If you're interested in making your own, you can check out my tutorials on how to cut equilateral triangles and how to sew equilateral triangles.  Also, if you're in Wellington, I am teaching a class on how to make an equilateral triangle quilt at Nancy's Embroidery - check out the class schedule on their website for details.

Autumn with a Twist Quilt

I've been wanting to make an autumnal quilt for a while, and I started on that with my Midnight at the Oasis quilt.  However, that project is on hold for the moment, so the need to make a sample for my class presented the perfect opportunity.  I've said before that if someone said they were putting chartreuse, plum, hot pink, grey-brown and cream together, I'd think of a hot mess, but I really love this somewhat unexpected colour combination.

Autumn with a Twist Quilt

As much as I love the front, I think I like the back as much.  I used a really beautiful panel from Cori Dantini's Beauty is You line, and it ties in many of the colours from the front, in a much softer palette.  I'm really glad I managed to find this fabric, because I had in mind to use on the back once I started the front, and it's quite hard to find online.  I might have cleaned out the local quilt shop I found it at!

Autumn with a Twist Quilt

Even though cream linen binding is horribly impractical, it just seemed like the right choice for this quilt.  I used a big cheat on the binding so I could hand this quilt over to Nancy's to be displayed pending my class.  I very much prefer to hand stitch bindings, but it does take a while.  I didn't want to machine stitch the binding on this quilt, so instead I used Roxanne's basting glue to glue down the binding.  It's not a permanent solution, but it lets the quilt look finished until I have time to hand stitch the binding down later.

Autumn with a Twist Quilt 

For the quilting, I decided to go very simple so as not to compete with the quite busy quilt top (and because I loved the quilting on this equilateral triangle baby quilt that my mum made).  I simply stitched a quarter inch off each side of the seam lines.  It was much quicker and easier than I thought it would be, especially because I didn't need to mark any of the quilting lines, and just used my walking foot as a guide.  I actually used a different coloured thread on the top and in the bobbin, but the colour differences are very subtle (a very light beige on the back, and a slightly darker beige on the front).  It does make a very nice pattern on the back.

Autumn with a Twist Quilt

Of course, I added the label in my usual style.  I've found that curving the corners of my labels lets me blanket stitch around them a little bit more neatly, and they feel more secure without the points which can come loose.

Is an equilateral triangle quilt on your quilty bucket list?

Quilt Stats
Pattern: my own equilateral triangle quilt pattern
Finished Size: approx 56" by 63"
Fabric: various
Backing: panel from Beauty is You by Corin Dantini
Pieced and quilted by: me

Linking up with finish it up friday at crazy mom quilts.

Follow on Bloglovin