Showing posts with label finish it up friday. Show all posts

Tuesday, 20 January 2015

Argh my eyes!

I've just been at Symposium, New Zealand's big national quilting conference, with workshops, lectures, social events and several exhibitions.  I entered two quilts in the exhibition, but only one was accepted (ultimately, it worked out for the best because the quilt that was rejected from Symposium was accepted into the QuiltCon exhibition).

Anyway, one of the rules for Symposium was that you could not have shown your quilt before, including on the internet.  I finished my quilt months ago, but I haven't been able to show it until now.  

Argh my eyes! 

One of the exhibition categories was "alive with colour".  I decided to make a quilt to fit that brief.  When I first started quilting, I really struggled with quilts that were busy and full of colour.  I wanted to add a lot of white, or other neutral solids, and negative space.  As I've made more quilts, I have become much more comfortable with full-on colour and this quilt was my attempt to incorporate lots of bright, clashy, crazy prints while still creating an effect that is harmonious

Argh my eyes! 

I've been enjoying experimenting with improvisational curved piecing lately, and this quilt uses curves cut without a ruler to add interest.  It's sort of a spin on the St Louis 16 Patch block that went crazy a couple of years ago, and is a great stash busting block.

Argh my eyes! 

Honestly, making this quilt was more challenging than I thought it would be.  I had to raid my friend Anne's stash because I ran out of fabrics that were quite crazy enough.  I ended up making five or six blocks that weren't ultimately used in the quilt because they didn't look right.  The layout was shuffled around many times.  It's really hard to photograph and looked more like vomit crazy than good crazy in the photos I took while working on it.  But, when it was finished, it was one of my favourite quilts I've made.

Argh my eyes!

With a completely mad top, this quilt just needed simple quilting, so I stitched a 1" grid over the entire quilt top.  The red/orange and white stripe has been in my stash forever (I think it was in my first ever online fabric order!) so I was thrilled it made the perfect binding.

Argh my eyes!

Because of my teaching work, I had to enter this quilt in the professional category.  I really wasn't expecting to win any prizes - I just wanted to show my work.  For that reason, I was very thrilled to awarded a prize for best interpretation of the theme for this quilt.

I did a great workshop at Symposium, so I'll be sharing more about that soon, and I'll also be posting some photos of other quilts that caught my eye in the exhibition.

Quilt Stats 
Pattern: my own improv-ish design
Finished Size: 70" by 84"  
Fabric: 60 different fabrics - too many to list!
Backing: two different out-of-print Anna Maria Horner fabrics
Binding: Michael Miller Clown Stripe in Fire
Pieced and quilted by: me

I will be linking up at finish it up Friday at crazy mom quilts.

Follow on Bloglovin

Monday, 7 April 2014

Autumn with a Twist Quilt

I am more than happy to have this finished quilt to share with you today.  The top had been basted for a couple of weeks and this weekend I finally had time to sit down and quilt it.  After a couple of weeks with almost no sewing going on, it was lovely to be at my machine.  Absence really does make the heart grow fonder!

Autumn with a Twist Quilt

This quilt is just a simple equilateral triangle quilt.  It's the third one I've made and I'd make another tomorrow!  If you're interested in making your own, you can check out my tutorials on how to cut equilateral triangles and how to sew equilateral triangles.  Also, if you're in Wellington, I am teaching a class on how to make an equilateral triangle quilt at Nancy's Embroidery - check out the class schedule on their website for details.

Autumn with a Twist Quilt

I've been wanting to make an autumnal quilt for a while, and I started on that with my Midnight at the Oasis quilt.  However, that project is on hold for the moment, so the need to make a sample for my class presented the perfect opportunity.  I've said before that if someone said they were putting chartreuse, plum, hot pink, grey-brown and cream together, I'd think of a hot mess, but I really love this somewhat unexpected colour combination.

Autumn with a Twist Quilt

As much as I love the front, I think I like the back as much.  I used a really beautiful panel from Cori Dantini's Beauty is You line, and it ties in many of the colours from the front, in a much softer palette.  I'm really glad I managed to find this fabric, because I had in mind to use on the back once I started the front, and it's quite hard to find online.  I might have cleaned out the local quilt shop I found it at!

Autumn with a Twist Quilt

Even though cream linen binding is horribly impractical, it just seemed like the right choice for this quilt.  I used a big cheat on the binding so I could hand this quilt over to Nancy's to be displayed pending my class.  I very much prefer to hand stitch bindings, but it does take a while.  I didn't want to machine stitch the binding on this quilt, so instead I used Roxanne's basting glue to glue down the binding.  It's not a permanent solution, but it lets the quilt look finished until I have time to hand stitch the binding down later.

Autumn with a Twist Quilt 

For the quilting, I decided to go very simple so as not to compete with the quite busy quilt top (and because I loved the quilting on this equilateral triangle baby quilt that my mum made).  I simply stitched a quarter inch off each side of the seam lines.  It was much quicker and easier than I thought it would be, especially because I didn't need to mark any of the quilting lines, and just used my walking foot as a guide.  I actually used a different coloured thread on the top and in the bobbin, but the colour differences are very subtle (a very light beige on the back, and a slightly darker beige on the front).  It does make a very nice pattern on the back.

Autumn with a Twist Quilt

Of course, I added the label in my usual style.  I've found that curving the corners of my labels lets me blanket stitch around them a little bit more neatly, and they feel more secure without the points which can come loose.

Is an equilateral triangle quilt on your quilty bucket list?

Quilt Stats
Pattern: my own equilateral triangle quilt pattern
Finished Size: approx 56" by 63"
Fabric: various
Backing: panel from Beauty is You by Corin Dantini
Pieced and quilted by: me

Linking up with finish it up friday at crazy mom quilts.

Follow on Bloglovin

Friday, 7 March 2014

Purple S-block Quilt (aka S is for Spurple)

Woohoo - I finally have a finished quilt to show you after what feels like quite a gap between finishes!  I started this quilt at the very start of February (in a class with Kaffe Fassett!!!), and I've been working on it fairly steadily ever since.

S is for Spurple 

Now that it's finished, I absolutely love it.  This is a quilt where I really pushed myself with colour and fabric choices, and I'm truly happy with the outcome.  The process has given me a boost of confidence and I feel like I'm a better quilter as a result.

S is for Spurple 

The s-block is so simple, but has such a graphic quality, especially when you follow Kaffe's advice and ensure that there is a good amount of contrast between the two fabrics used in each block.  I'm really pleased that I used fabrics that are representative of my stash, and there are lots and lots of favourites in there (including the border print, which I honestly wasn't expecting to use in a quilt - I thought I might use it for a bag!).

S is for Spurple 

There are a few Kaffe Fassett prints in the quilt top, but the back is where his fabric really shines. This flower tile print has a paler version of each colour from the front of the quilt, which means it works perfectly as a backing.  I'm also rather proud of the fact that I matched the print across the backing - yes, it is pieced, and I dare ya to find the seam.

S is for Spurple 

Most of my recent quilts have used a single fabric for the binding.  This quilt reminded me how fun a scrappy binding can be (and also I couldn't decide which colour to pull out of the quilt top to use for the binding).

S is for Spurple

With so much happening in the quilt top, this quilt really doesn't need fancy quilting.  I went with my favourite diagonal crosshatch, in a variegated purple thread.  This has given the quilt great texture without being too distracting (and also has the benefit of working well with my slightly dodgy piecing!).

2014 Pantone Quilt Challenge: Radiant Orchid

So, if I could enter the 2014 Pantone Quilt Challenge, this would be my entry (even though the purples are not necessarily particularly close to radiant orchid).  I'm really excited to see what everyone has been up to when Anne from Play Crafts and I open up the linky for entries in a week's time!  Remember, entries are open until 11pm PST on 21 March 2014, so you still have time to make something (as well as quilts, we have categories for mini quilts and quilt tops).  Click here for all the details, including the rules, our wonderful sponsors and our fantastic judges.

Quilt Stats
Pattern: S-block quilt from Kaffe Fassett's books Country Garden Quilts and Kaffe Quilts Again
Finished Size: approx 72" square
Fabric: various, Echino Flower Bed in Purple for the border
Binding: various
Pieced and quilted by: me

Linking up with finish it up friday at crazy mom quilts.

Follow on Bloglovin

Thursday, 19 December 2013

If you go down to the woods today (a baby quilt)

A colleague of mine is expecting his first child soon.  He and his wife haven't found out the baby's gender, so something suitable for a boy or a girl was called for.

If you go down to the woods today quilt 

The top of this baby quilt is possibly the quickest quilt top I've ever made (mainly because it is made up of only eight pieces of fabric!).  I really wanted to use the awesome Kokka cheater print featuring bears and bunnies and other woodland creatures - preferably without cutting it up too much.  Apart from just liking it as a big piece, it is also a slightly heavier linen/cotton blend, and I didn't want too many seams which might end up being bulky.  

If you go down to the woods today quilt 

Really, how cute is this fabric?  I haven't seen it around too much, but Stitchbird has it in another colour way.

If you go down to the woods today quilt 

Since the top was so simple, I decided to do something a little bit special for the quilting - woodgrain!  I learned this technique in Angela Walters' Craftsy class, and have been wanting to try it ever since.  It's not the easiest design to do on a domestic machine though, because you need to move the quilt around a lot, rather than working on a small area at a time.

If you go down to the woods today quilt 

That said, I am really pleased with how the woodgrain quilting came out, and it was easier than I thought it would be.

If you go down to the woods today quilt 

I had a little bit of the feature fabric left over, so I used it to make a label.  Sometimes simple is best.

By the way, these photos are taken after the quilt was washed and dried (on the line, not in a dryer).  I didn't pre-wash any of the fabrics (including the linen blends used on both the front and the back) and the quilt crinkled up just the right amount (phew!).  I did give it a light press to get out the crease from hanging, but that didn't take the crinkle out (and nor would I want it to!).

If you go down to the woods today quilt

I took these photos around 6pm - you can see that it is well and truly still light, but the sun was starting to go down, and in trying to get a nice tree-filled background for my shot I ended up capturing the sunlight instead.

I'm thinking this kind quilt might be my new go-to baby gift for when I don't have a lot of time.  You only need a half yard of your feature fabric and then a few co-ordinating fabrics, and it's so speedy to put together.  I did mine all from stash, and even if you don't have an insaneextensive stash like me, I bet you could too!  It's so simple that it almost doesn't need instructions, but would anyone be interested in a tutorial on how I put mine together?
 
Quilt Stats
Finished Size: approx 36" by 45"
Fabric: various
Binding: Skinny Plaid in Blue from Laura Gunn's Cosmos collection
Pieced and quilted by: me

Linking up with finish it up friday at crazy mom quilts and Sew Cute Tuesday at Blossom Heart Quilts.

Monday, 11 November 2013

Christmas Leftovers quilt - finished

Almost exactly a month after I posted about the quilt top, my Christmas Leftovers quilt is finished.

Christmas Leftovers quilt 

I'm really really pleased with how this quilt turned out.  It's a good omen for my Cherry Christmas scrappy trip along quilt, particularly since I'm planning to quilt it in the same way.  The quilt top is mainly made up of Aneela Hoey's Cherry Christmas collection, with a couple of other fabrics in similar colours thrown in to make up the numbers.

Christmas Leftovers quilt 

On the back I used a few half yards that had been hanging around  in my stash for a while - I'm not sure what the grey is but both red fabrics are older DS Quilts.  Now that I've used the bottom red fabric I wish I had more - isn't that always the way?

Christmas Leftovers quilt

 I used a loop the loop quilting pattern - following the grid of the quilt top helped keep it nice and even. Of course, I used my new go to thread - Aurifil 2021 50 weight - for the quilting.  These photos were taken after the quilt was washed and run through the dryer, and I really really love the texture of the quilting.  Quilting this way was pretty quick and it has left the quilt soft and not stiff at all, so I'll definitely be using it on other quilts.

Christmas Leftovers quilt

For some reason it looks extra Christmassy with all the colours showing through the batting and backing like stained glass.

Quilt Stats
Pattern: 2" finished postage stamp squares
Finished Size: approx 36" by 48"
Fabric: mainly Aneela Hoey's Cherry Christmas fabric
Backing: various
Binding: Free Spirit Designer Solid in Carribean
Pieced and quilted by: me

Linking up with finish it up friday at crazy mom quilts and Sew Cute Tuesday at Blossom Heart Quilts.

This quilt is the third of my fourth quarter finishes. I'll be linking up with Leanne at she can quilt as part of the 2013 Finish Along in due course.

she can quilt

Follow on Bloglovin

Friday, 18 October 2013

My design wall

So, way back when I first started reading quilting blogs, people would write about their "design walls" and I was pretty skeptical.  I mean really, isn't taking over a whole wall in your house just for quilting stuff a little bit excessive?


And then I got sick of laying quilts out on the floor and the cats running over my careful layouts and disturbing them, so I made this really excellent "temporary" design wall with batting and painter's tape.  Well, my skepticism ended pretty quickly after that.  It's wonderful having a vertical surface to lay quilts out on!  

So that "temporary" design wall became essentially a permanent fixture.  There were two problems though - it was too small, and from time to time the painter's tape would give out and I would come home to find the whole thing (and usually a quilt layout) on the floor.  Not ideal.  So I decided to bite the bullet and put up something more permanent.

My new design wall

This is my nice big new permanent design wall.  It's 85" high by 100" wide, so has plenty of space to lay out a large project (or to work on several small projects as I'm doing here).  I stuck with batting as my surface of choice - I did think about using a flannel sheet or similar but fabric doesn't stick as well to flannel as to batting and I didn't want to have to pin everything on.

I don't have much in the way of DIY skills but I'm willing to give things a go, and for that reason I was quite proud of my efforts at making this design wall.  In case anyone else is interested, I'll describe my method because it was pretty easy and did not require help from anyone else (well, the nice chap at Bunnings (the hardware store) helped me find stuff, but that doesn't really count, does it?).

This design wall is hung in essentially the same way as you might hang a quilt, using a hanging sleeve, a long skinny piece of wood and a couple of brackets on the wall.  So, first I added a really rough hanging sleeve to my batting.  Unlike a quilt hanging sleeve this is not beautifully finished because no-one will ever see it.  I just cut a strip of muslin into 3 pieces approximately 30" by 4", and sewed them to the back of the batting leaving a gap in between each.  I used the longest stitch length of my sewing machine so that if I ever want to use this batting in a quilt, it will be easy to unpick the stitching.

Design wall 2

I then measured the distance between the two gaps in the hanging sleeve.  This was important because it dictated where my brackets should go.  I then marked the points on the wall where the brackets should go, using a tape measure to ensure they were the right distance apart and a level to make sure they were the same height.  I then screwed a plasterboard/drywall anchor (like this one) into the wall at each point.  I don't have a drill so I just used a screwdriver for this bit - it took some effort but it really wasn't too hard.

With the help of the nice man at Bunnings (who didn't look at me like I was totally insane when I explained what I wanted to do), I found some curtain brackets that were just the right size to slot the piece of wood I bought into.  I screwed them to the wall, slipped the wood through the hanging sleeve, and clipped the wood into the brackets (which conveniently line up perfectly with the gaps in the hanging sleeve) and Bob's your uncle.  Excluding the batting, the total cost of making the design wall was less than $30 and it took me a couple of hours, including the trip to Bunnings.  Totally worthwhile, and in the absence of any particularly vicious cat attacks, this design wall should last a long time.

So tell me - do you have a design wall?  Is it permanent like mine or do you move it around, or maybe you just have a design floor, like I did for the longest time?

Linking up with finish it up friday with crazy mom quilts.

Friday, 4 October 2013

A Letter from Lotta Quilt - Finished!

I'm embarrassed to say that I've had this quilt top made from Lotta Jansdotter's gorgeous Glimma fabric (available here and here) sitting around, unfinished, since January.  January, people.  That's months and months ago and in the end it took me about 2 and a half hours to quilt it up.

Letter from Lotta Quilt

I did have fun with the quilting.  I wanted to make sure the quilting emphasised the envelope design, and I used tiny pebbles to outline the "address window". 

Letter from Lotta Quilt

Lots of different sized pebbles quilted in the envelope part make it feel like one of those padded envelopes.  I love imagining that there's a special treat inside.

Letter from Lotta Quilt

To go with the envelope theme, I quilted mini envelopes in the border (totally inspired by this quilt).

Letter from Lotta Quilt

All the quilting is done with Aurifil 50 weight thread (colour 2600).  Quilting this quilt was my first time using Aurifil (although I've since used Aurifil for my Blackberry Winter Blossom Quilt) and I had been saving it to use for quilting.  I will probably do a more complete review of Aurifil once I've spent a bit more time with it, but on an initial encounter, I'm quite smitten.  First, this colour is fantastic - it seems to go perfectly with all the fabrics in the quilt top and the backing.  Secondly, I can see why people say Aurifil is really good value for money.  This quilt made a much smaller dent in the spool than I was expecting (and we all know that pebble quilting uses HEAPS of thread), plus the bobbins seemed to last for a lot longer than usual.  Happy.

Letter from Lotta Quilt

I think Nat's post about zigzags and chevrons influenced my choice of backing fabric, and I'm so glad it did, because I think this print from Cloud 9 Fabrics Simpatico collection is just right.

Quilt Stats
Pattern: my envelope quilt pattern
Finished Size: Approximately 30" by 40"
Fabric: Lotta Jansdotter's Glimma collection, Robert Kaufman Essex Yarn Dyed Linen in Black 
Backing: Chevron in Minty from Cloud 9 Fabrics Simpatico collection
Binding: Pearl Bracelet in HiHo Silver
Pieced and quilted by: me

Linking up with finish it up friday at crazy mom quilts.

This quilt is the sixth and final of my third quarter goals that I've finished.  Six out of eight ain't bad!  Link up now with Leanne at she can quilt as part of the 2013 Finish Along - the link up is open until 7 October, so you have a little time.

she can quilt

Follow on Bloglovin

Friday, 6 September 2013

The Jeanie Quilt

Ok, I hope you're in the mood for a long post. There are lots of lovely quilts for you to look at so you won't get bored, but feel free to grab a cuppa before you start!

Earlier this year a group of my friends and I took a class through Capital Quilter's guild, taught by fellow guild member Jeanie O'Sullivan.  Jeanie is a very talented quilter who combines a flair for colour with incredible technical skills and a level of attention to detail that I really admire.  Jeanie's quilts often have a traditional vibe with a playful touch that makes them really appealing, plus they are always beautifully beautifully made.

Jeanie was teaching us to make her Majoring in Botany quilt, the pattern for which has been featured in NZ Quilter magazine.  Majoring in Botany is a great name, but it's a bit of a mouthful, so we ended up calling this the Jeanie quilt (as in "how is your Jeanie quilt coming along?"). 

The general idea of Jeanie's Majoring in Botany quilt is to choose a feature fabric that is a large scale print with lots of colours in it.  Then you pull other large scale print fabrics in those colours to create the large borders, and choose a contrasting print for the narrow borders.  One of my favourite things about this pattern is how different the quilt can look depending on your fabric choices - it really lends itself perfectly to personalisation.  Happily, I've got photos of lots of different versions of this quilt to show you so you can see what I mean!

Jeanie O'Sullivan's original Majoring in Botany Quilt

Jeanie was kind enough to give me photos of her Majoring in Botany quilts and answer a few questions for the blog.  My questions are in bold and her answers are below.

How long have you been quilting?
I have been quilting for about 15 years but have always sewn (clothing, furnishings, embroidery).

How did you come up with the idea for your Majoring in Botany quilt?
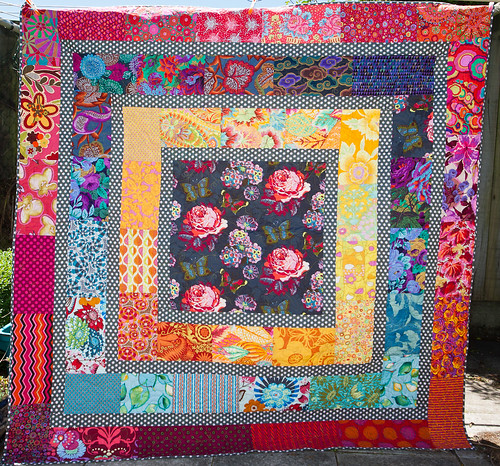
One of the themes in my work is using big pieces of large scale patterned fabric in medallion style quilts. These are usually antiquey looking but I decided to try a more modern look as I had a lovely collection of large scale modern fabrics. Botany came out of this and was quite a restrained colour mix to suit the tastes of the recipient. I had so much fun making it that I soon made the second quilt in a much more exuberant colour mix. What I love about this quilt style is that you get to play extensively with colour and pattern without worrying about a detailed construction.

How many different versions have you made?
I have only made the two Botany style quilts but they are related to a number of my other medallion quilts. I am currently planning a red themed one.

What's your favourite part of quilting?
Its a bit hard to pick the best part... but probably that point where you have made part of the quilt and start to play with the blocks/sections - often I find at this bit that the quilt will start to tell me what it wants to do!

I totally relate to what Jeanie says about the quilt telling her what it wants to do!  I've definitely had that experience before.

I think the second version of this quilt that Jeanie made really shows the versatility of this pattern. It's so different to the original but still works with the same idea.

Jeanie's second quilt

My friend 
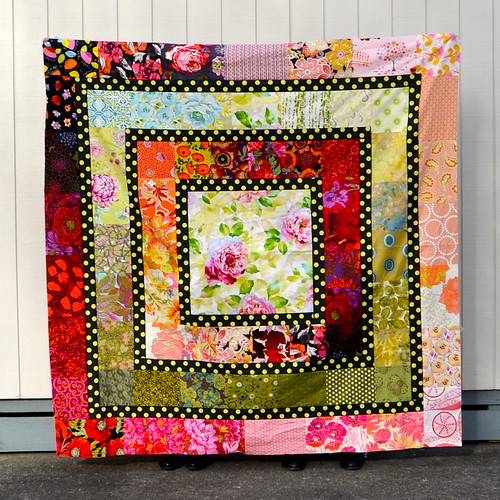
Anne made a version of Jeanie's quilt a couple of years ago.  This version is called A Rose in Grandma's Garden and was given to Anne's mother when she became a grandma.  I really really love the Anna Maria Horner print in the centre (I am hoarding some of this fabric) and the grey polka dot borders are very Anne (grey is her signature colour!).

A Rose in Grandma's Garden 1
A Rose in Grandma's Garden by Anne

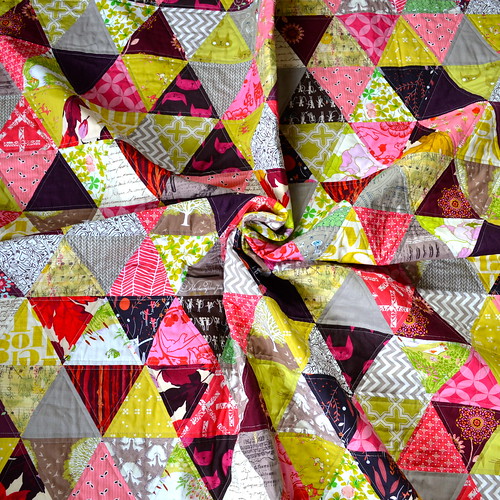
Anne made a second version of this quilt in the class this year.  I really adore this version - it manages to be soft and punchy in a way that is very beautiful.  I think the central fabric was an excellent choice because it gives so many colours to work with in the borders.  Plus Anne's (very) extensive stash means she has been able to incorporate lots of absolutely gorgeous fabrics.

Anne's Quilt
Anne's second version of this quilt
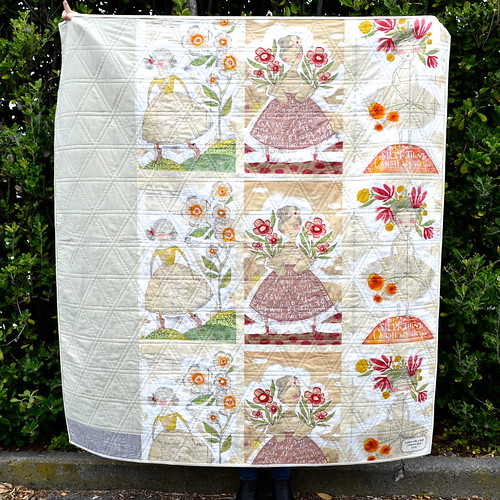
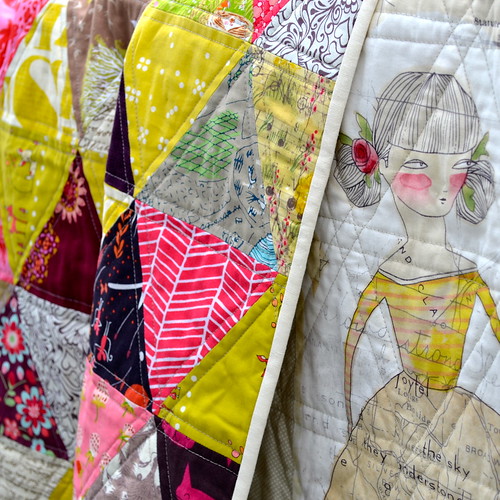
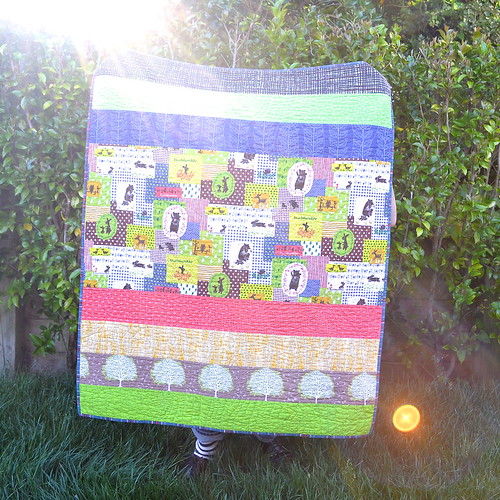
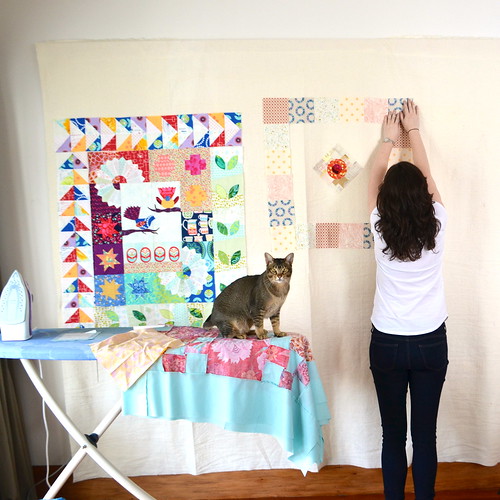
My friend Helen also took the class this year and she has created this beautiful quilt top (it's not quilted yet because it's waiting in the queue of...well, let's just say many, quilt tops in Helen's closet).  I love how Helen really made the most of all the subtle colour variations in her feature fabric.  It's very fresh and light but looks totally at home in this warm and almost mediterranean feeling quilt.  Helen also did an amazing job of bringing in fabrics from both sides of her stash - both modern and traditional.

Helen's Quilt
Helen's quilt

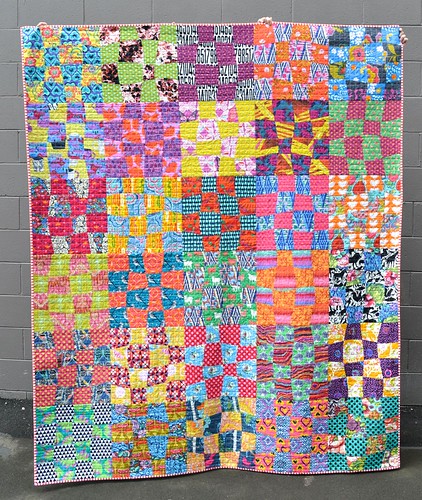
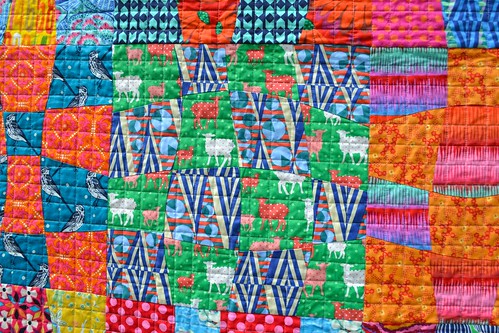
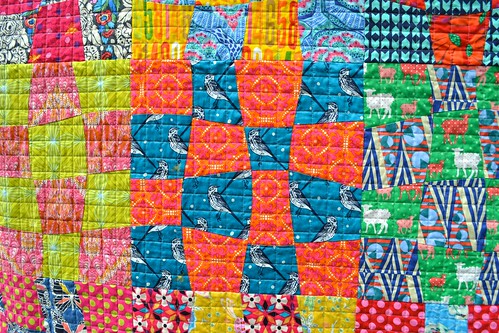
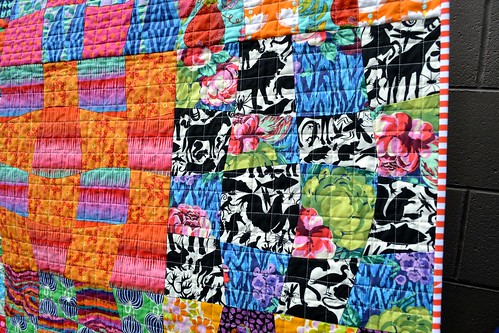
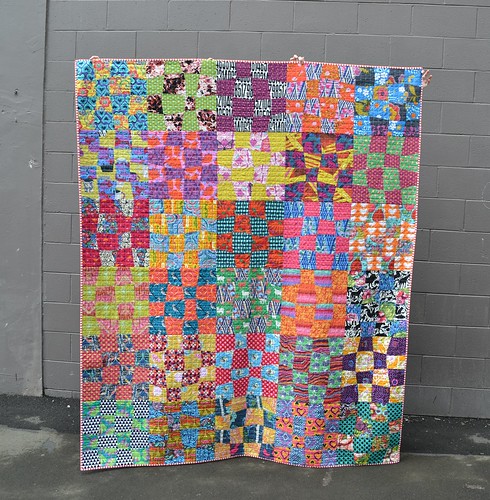
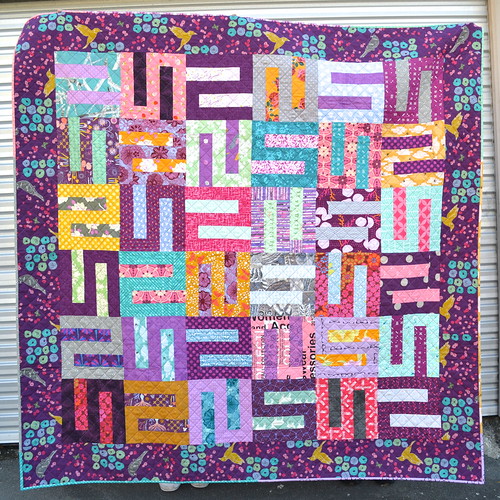
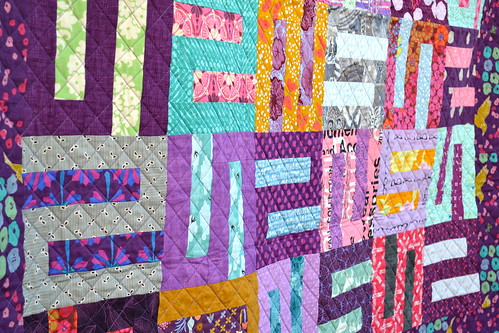
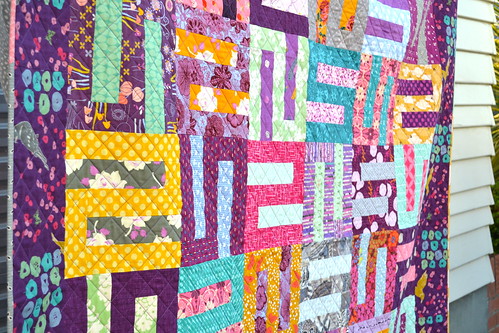
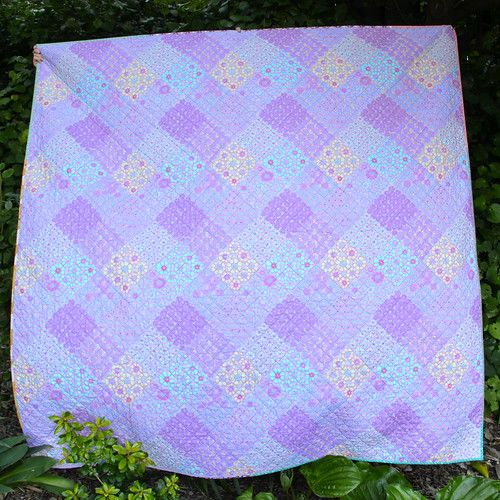
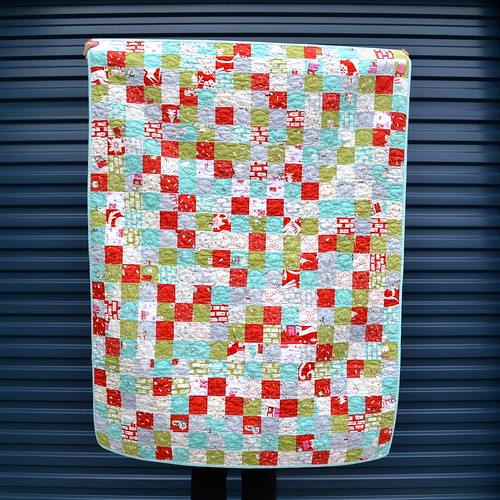
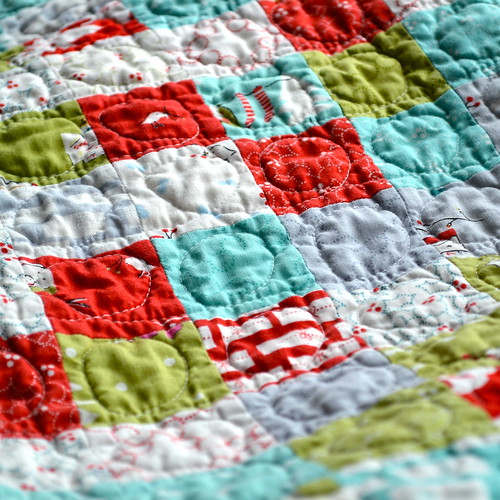
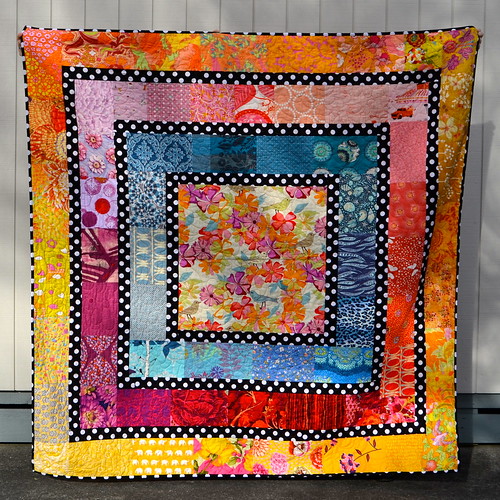
This is my version of the quilt.  When I came to pick fabrics for this quilt, I realised that I am very inclined to buy smaller scale prints with a small number of colours in them.  Of course, this meant shopping, and I actually think this quilt helped balance my stash out a bit better.  Blenders are very useful but sometimes you want the larger scale prints for interest.  Anyway, my feature fabric is a Valori Wells print on a cotton/linen blend fabric - I really like it and I have more so it will definitely be making another appearance.  This quilt did take me a bit out of my comfort zone in the sense that it is super bright and very high contrast with the black and white polka dot borders, but I love it.

Ring a Ring o' Roses Quilt 

A great part of making this quilt in a class was getting to swap fabrics with other people, and all three of the quilts Anne, Helen and I made have fabrics from the other two in them.

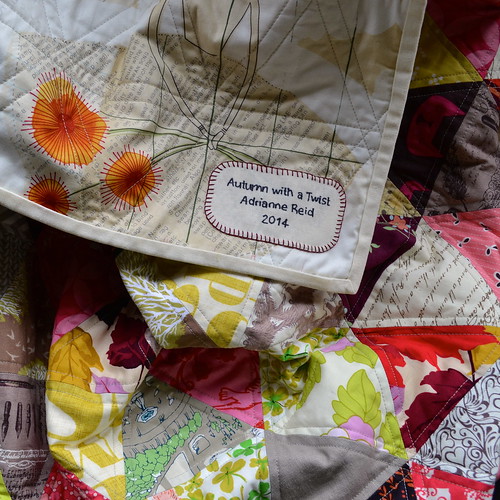
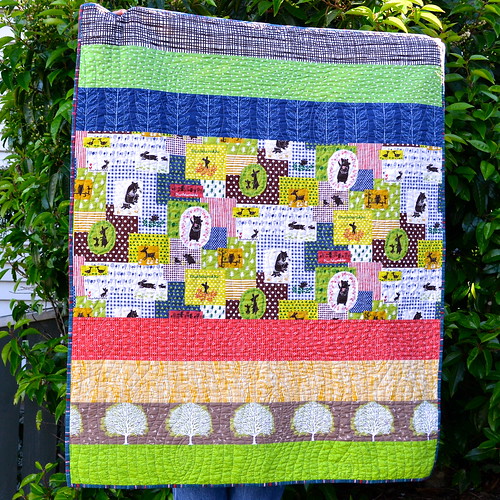
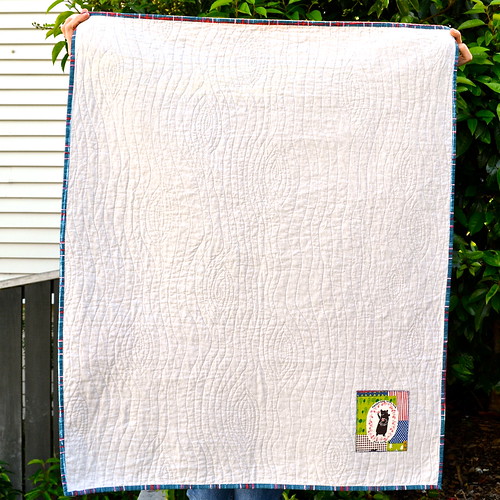
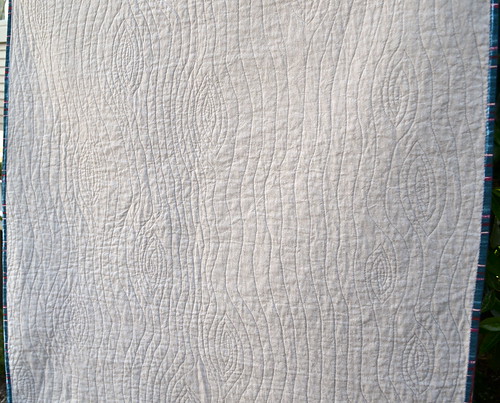
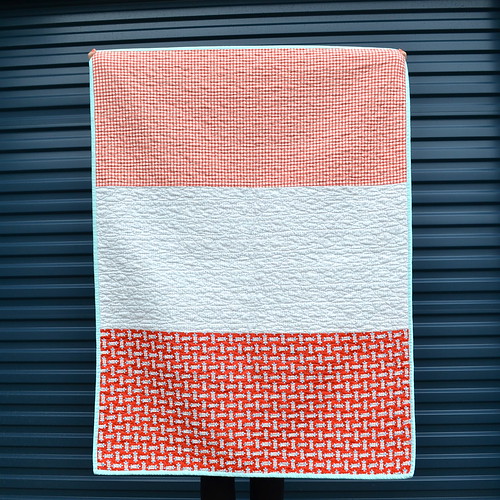
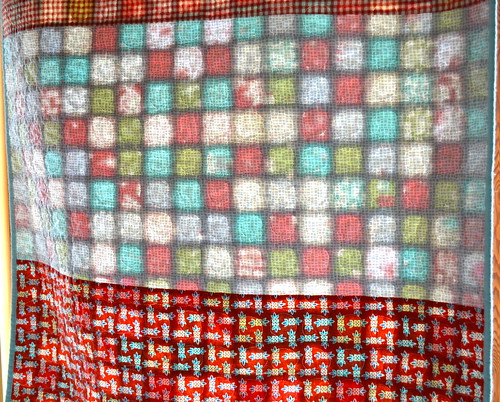
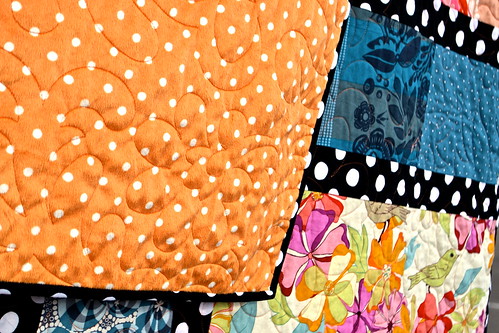
Now, I have to show you the back of my quilt for two reasons.  One, it's minky!  I used batting as well so this is a lovely heavy soft snuggly quilt.  Two, I had to show you the quilting.  I'm not insane enough to try and quilt a large minky-backed quilt on my machine so Sue Burnett did the quilting on this one as well.  I can't remember was the quilting design is called, but it's lovely.

Ring a ring o' Roses Quilt - back

I really had a lot of fun making this quilt and I can definitely see myself making another version (or more!).  I just need to collect a few more fabrics that could work for the centre.

Quilt Stats
Pattern: Jeanie O'Sullivan's Majoring in Botany pattern
Finished Size: Approximately 70" square
Fabric: too many to name - ask me if you want to know what anything is! 
Backing: orange polka dot minky from Spotlight
Binding: Riley Blake Medium Dots in Black
Pieced by: me
Quilted by: Sue Burnett.

Linking up with finish it up friday at crazy mom quilts.

This quilt is the fifth of my third quarter goals that I've finished - yay!  I'll be linking up with Leanne at she can quilt at the end of September as part of the 2013 Finish Along.

she can quilt

Follow on Bloglovin