Showing posts with label denyse schmidt. Show all posts

Friday, 26 December 2014

Hadley Quilt

I finished stitching down the binding on my Hadley quilt a couple of weeks ago.

 Hadley Quilt

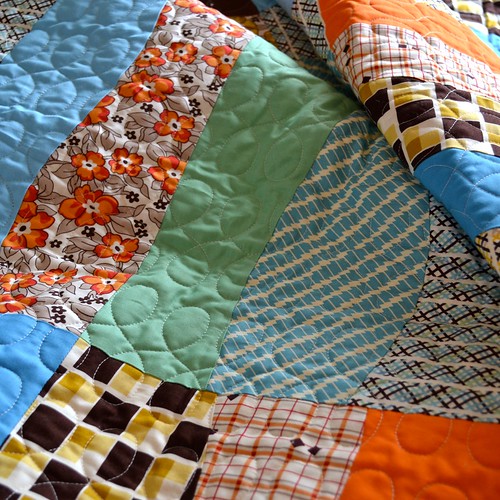
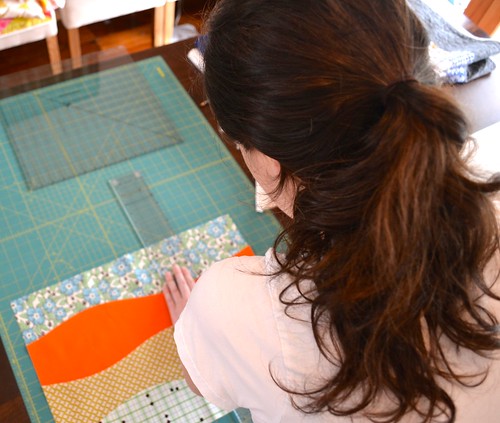
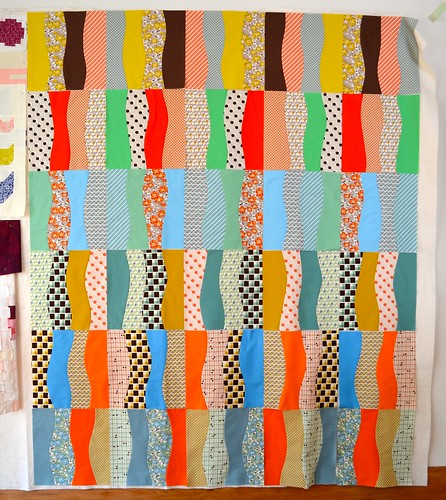
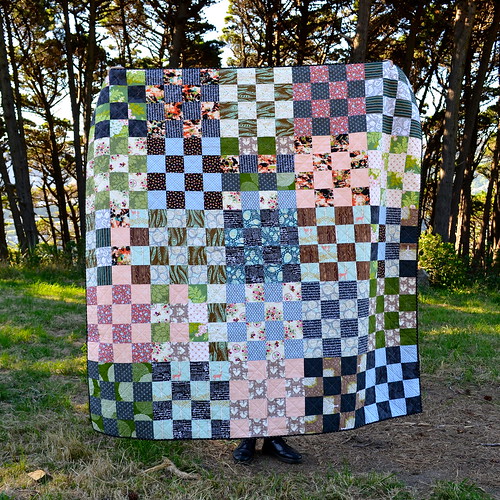
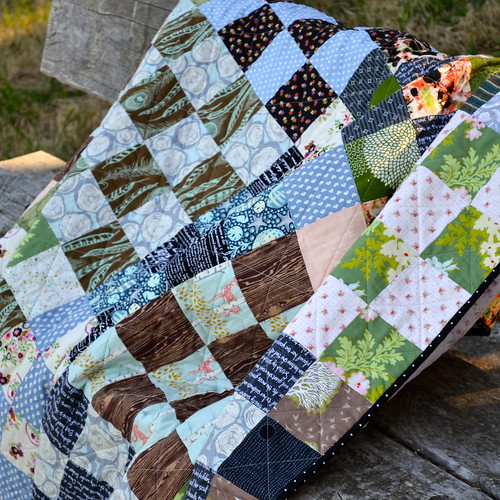
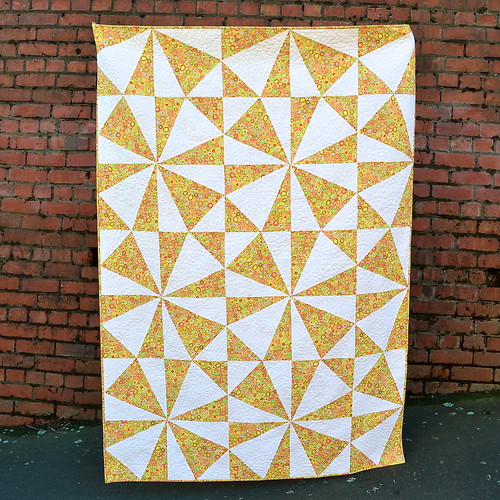
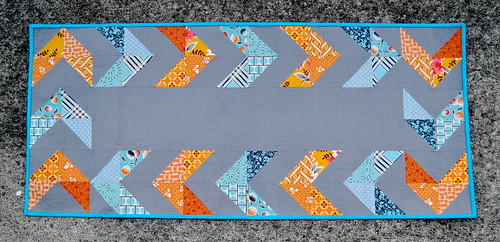
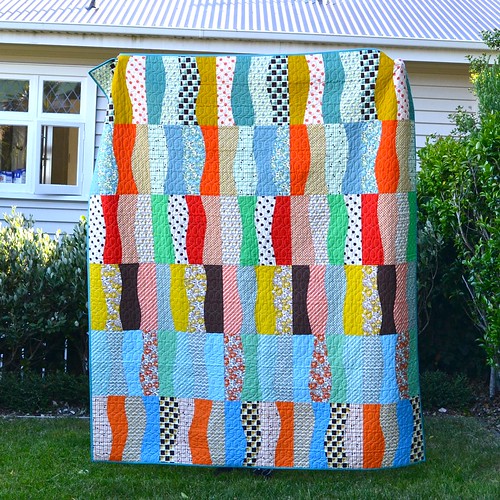
If you've been following the progress of this quilt, you've probably seen the front already (in this post). I'm really happy with how the front turned out - basically, for each row, I stacked five fat quarters and sliced them into four fairly even strips, creating improv curves as I did so.  I then trimmed the resulting blocks into nice even squares.  This trimming process left me with quite a few offcuts, which I used on the other side.

Hadley Quilt

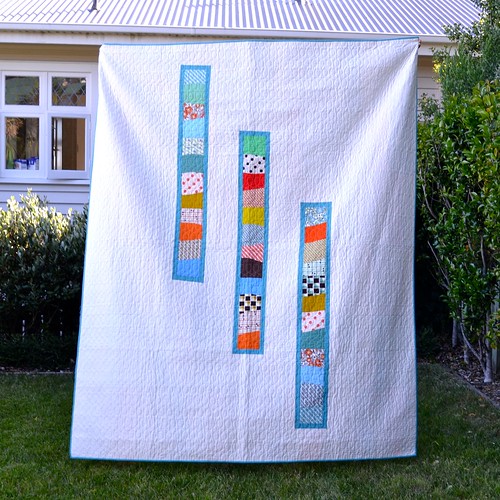
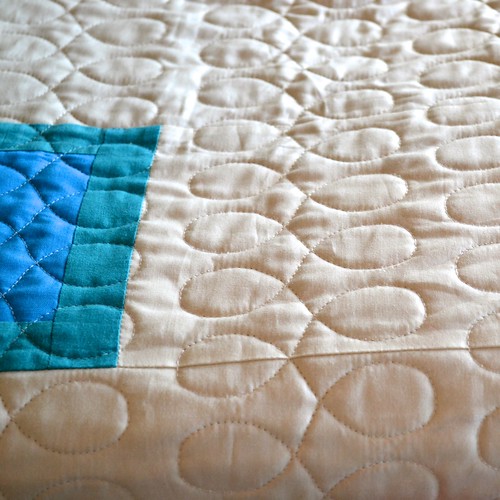
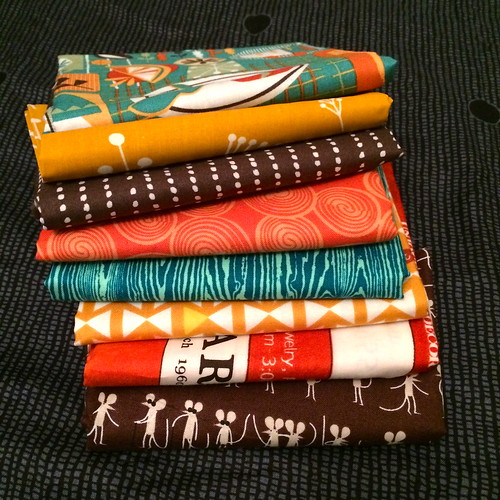
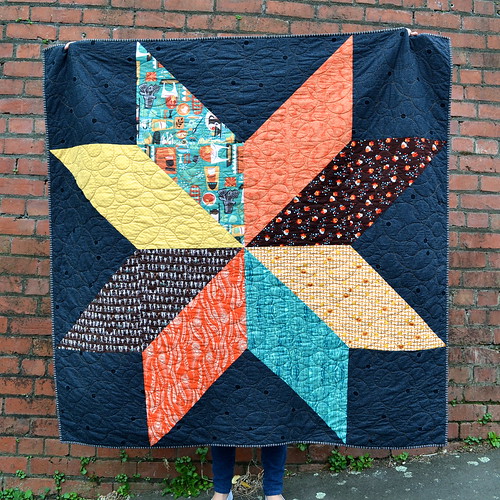
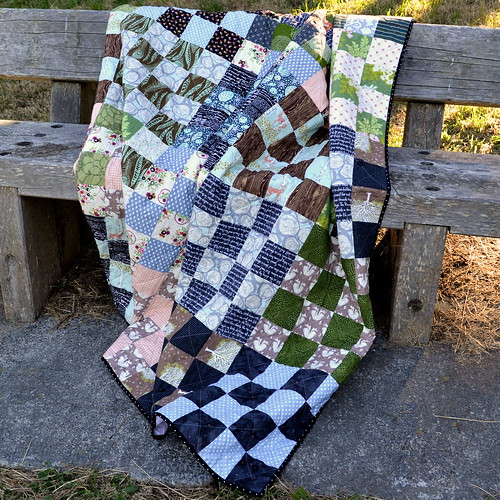
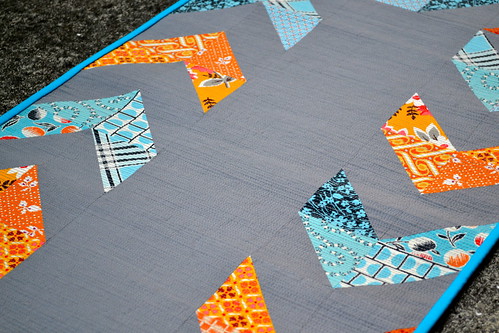
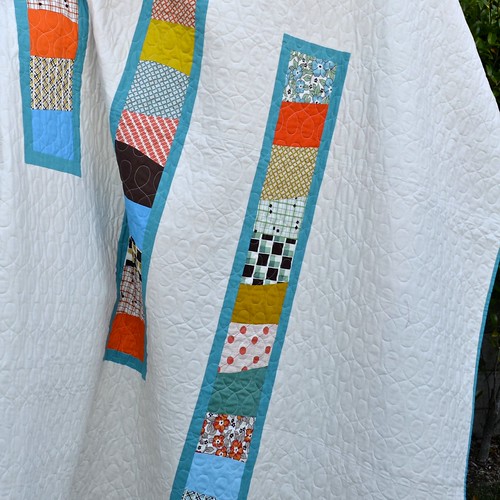
For this side, I really wanted to push the retro vibe I was getting from the Hadley prints.  At first I thought I would just set the pieced strips in the cream background fabric, but they didn't look quite right so I ended up framing them with a teal shot cotton.  Technically, this side is the back but I think I like it just as much as the front (and maybe more...).

Hadley Quilt

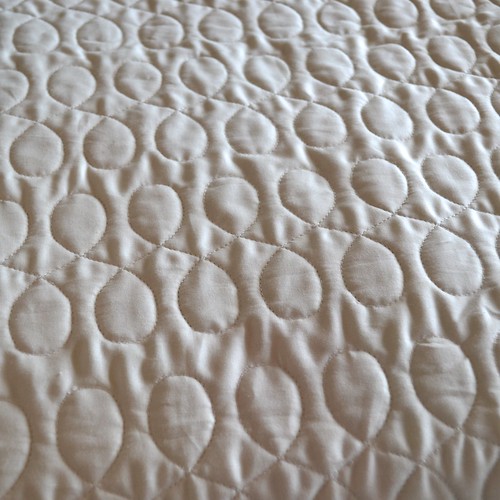
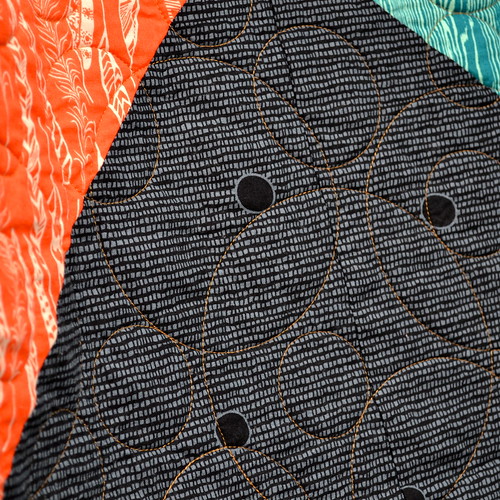
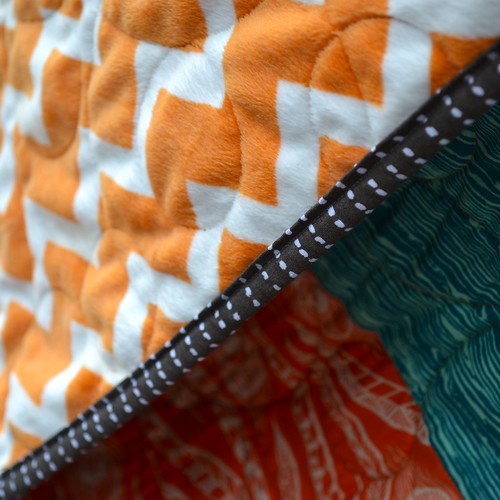
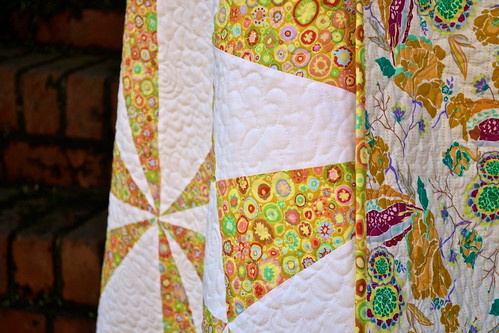
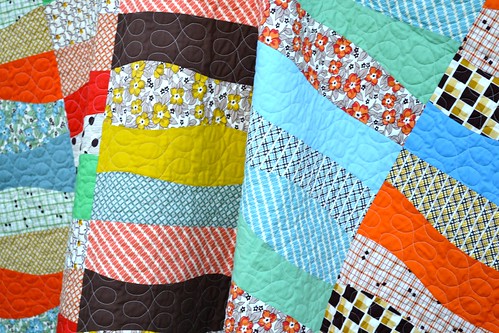
All that negative space meant that getting the quilting right was important.  This is a pretty big quilt (70" by 84") so I wasn't that keen to tackle it myself.  Instead, Sue Burnett quilted it for me using a digital pattern we found together.  I think the figure eight design is very characteristic of Denyse Schmidt's quilts and I thought it was right just with her fabrics.

Hadley Quilt

For binding, I used the same teal shot cotton that I used to frame the strips on the back.  It's a Kaffe Fassett shot cotton and super soft.  I don't know if I would want to use it for ultra precise piecing, but it makes the most lovely, almost silky, binding, and is a delight to hand stitch through.

Hadley Quilt

Finally, I thought I should include a photo of my quilt holder for these photos.  My youngest brother held this quilt up on his own (I made another quilt the exact same size recently, and my friend Lyndy and I could barely hold it up for photos working together - 84" is 7'!).  I think he is pointing at a speck of dust he wanted me to pick off the quilt.

Quilt Stats 
Pattern: my own improv-ish design
Finished Size: 70" by 84"  
Fabric: Hadley Fat Quarter bundle designed by Denyse Schmidt for Free Spirit Fabrics
Backing: I think it is Michael Miller Cotton Couture in Soft White
Binding: Kaffe Fassett Shot Cotton in Jade
Pieced by: me
Quilted by: Sue Burnett

I will be linking up at finish it up Friday at crazy mom quilts.

Follow on Bloglovin

Wednesday, 10 December 2014

WIP Wednesday

I got my Hadley quilt back from the long-arm quilter this weekend, so this is a nearly finished WIP (but a WIP all the same).  Since I used Denyse Schmidt fabric to make a Denyse Schmidt-esque quilt, I decided it needed to be quilted a la Denyse Schmidt as well, with that figure eight design she uses on a lot of her quilts.

Hadley quilt 

I am completely and utterly in love with the quilting.  It was done by Sue Burnett using a digital quilting pattern and it turned out even better than I expected.

Hadley quilt 

I really wanted to make this quilt double sided, and as much as I like the front, I really can't wait to reveal the "back", which I haven't shown yet.  The quilting in cream thread looks particularly nice on the cream fabric I used on the back.

Hadley quilt

Now I just need finish binding this quilt and then find the perfect place to photograph it!

I'm linking up with Lee at Freshly Pieced:

WIP Wednesday at Freshly Pieced

Follow on Bloglovin

By the way, if you're looking for my giveaway, it is here and still open!

Wednesday, 22 October 2014

WIP Wednesday

This weekend I started a totally new quilt - I have plenty of other things to be getting on with but couldn't resist.  I've decided to make a series of quilts using improv curves.  I've finished one improv curve quilt so far (I haven't shown it on the blog because it's for an exhibition where the rules require it not to be shown online), so this is the second, and I have ideas for a third quilt and a fourth quilt as well.

Hadley quilt in progress

I bought a bundle of Denyse Schmidt's latest line, Hadley, from Massdrop when they had it on sale.  I've seen quite a few people saying they don't love the inclusion of solids in this collection, but the solids were actually one of the things that sealed the deal for me.

Hadley quilt in progress

This is where my quilt is at so far.  I think I'll rearrange the order of the rows, but I'm liking the kind of crazy vibe.  I have quite a lot of offcuts from these blocks and I'm planning to put them together with some cream yardage to make a double sided quilt.

Have you ever made a series of quilts as a way of exploring a technique or idea?

I'm linking up with Lee at Freshly Pieced:

WIP Wednesday at Freshly Pieced

Follow on Bloglovin

Monday, 10 March 2014

Retro Giant Star Quilt

A few weeks ago I learned that a colleague and friend was facing some health challenges.  I've worked with him for several years and he's always looked out for me.  I think many quilters will understand that when there's nothing else you can really do, you make a quilt.  I went straight for my go to pattern for when I want a quick but beautiful quilt, which is the Giant Vintage Star Quilt Tutorial from In Color Order.

Giant star bundle

I wanted to make something masculine but cheerful, so I had a look through my stash and found the top print which has a fun retro kitchen vibe.  The colours in that fabric led me to the other fabrics and then Denyse Schmidt's Ladder Dot fabric provided the perfect serious base to let everything else shine.

Retro Giant Star Quilt 

You'll see that there were a couple of tweaks to get to the final quilt.  This was the result of a bit of experimentation and not settling for "good enough".

Retro Giant Star Quilt 

Sue Burnett quilted this on her long-arm for me, in record time. I dropped it off on a Saturday and she had it ready to be picked up by Wednesday.  I love the circle pattern - I think it works well with the slightly retro vibe of the quilt and it left the quilt super soft and squidgy.  The thread colour was a bit of a surprise - on the spool it is a slightly ugly brown/gold colour, but once sewn it transformed into shining loveliness that blended really well with all the fabrics (and it only shows up on the background like this when you get up close).

Retro Giant Star Quilt 

Of course, what would you put on the back of a comfort quilt other than minky?!  Has anyone else noticed that the blokes are particularly fond of minky?  Expect to see this orange chevron again - I have  a pretty big chunk left over from this quilt.

Retro Giant Star Quilt

I machine stitched the binding on this quilt - it's not something I do often but I didn't have a heap of time.  I used my clover clips for this binding and they made a huge difference (I generally used the Red Pepper Quilts Machine Binding method, except with clips instead of pins).  I wanted to show the result - it's still nowhere near as neat as my hand stitched binding method.

I went to visit my friend this weekend and I think he was very pleased with his quilt.  He's on the mend and seemed to be feeling a lot better so I was very pleased too!

Quilt Stats
Pattern: Giant Vintage Star Quilt Tutorial from In Color Order
Finished Size: approx 62" square
Fabric: various
Backing: orange chevron minky from Spotlight
Binding: Dots and Stripes in Smudge from Up Up and Away
Pieced by: me
Quilted by: Sue Burnett

Linking up with finish it up friday at crazy mom quilts.

Follow on Bloglovin

Monday, 3 February 2014

Top of the Lake Quilt

Way back in May last year, I was inspired to make a quilt featuring the colours of the TV show Top of the Lake.  I used the St Louis 16 Patch tutorial to make my blocks and the quilt top went together at the speed of light.  I threw in a few rogue blocks for interest and to use my fabric to maximum efficiency - they blend into the top surprisingly well,

Top of the Lake Quilt 

I basted the quilt pretty promptly, but since then it has sat and sat in my cupboard waiting to be quilted. Initially, I started quilting 1/4" off the seams, but I really didn't like how it was looking, so I ripped that quilting out.  Then I had grand ideas about tracing the pattern of the fabric on the back of the quilt using free motion quilting, but I realised that there was so much happening on the front of the quilt, the quilting wouldn't really show up anyway.

Top of the Lake Quilt 

I ended up quilting a simple diagonal crosshatch grid, using a light grey Aurifil thread (#2600) on the top, and my trusty off-white Aurifil #2021 in the bobbin.  They both just melt into the quilt leaving a great texture.  This quilting has also left the quilt beautifully drapey and soft - I can't wait to wash it and see whether it crinkles up much.

Top of the Lake Quilt 

For me, this quilt is full of unexpected fabric combinations and contrasts, with soft and pretty florals mixed with dark, graphic and challenging fabrics. For the back of the quilt, I wanted to continue this unexpectedness by clashing the front, which is full of slightly off, dirty colours, with fabric that looks like soppy sweet old-fashioned wallpaper.  I ended up with this floral stripe from Spotlight, which is so not my usual type of fabric but I love it on this quilt.

Top of the Lake Quilt

I pretty much want to put this black and white pin dot binding on every quilt!  In my original post, I described this quilt as deliberately un-pretty.  I still think it's brooding and a bit dark, but I have come round to thinking it is pretty as well.

Have you ever had a quilt grow on you as you've worked on it?

Linking up with finish it up friday at crazy mom quilts.

Follow on Bloglovin

Friday, 28 June 2013

Letty's Quilt

I recently finished this quilt for my maternal grandmother.  My family is not all that traditional, so my siblings and I call most of our grandparents by their first names - hence the name, Letty's Quilt.  (Incidentally, Letty is a twin, and her twin sister's name is Betty.  I'm sure that was really fun when they were growing up!).

Letty's quilt 

Letty lives in Tauranga, so I don't see her all that often.  Despite being in her mid 80's, she is still fairly independent and travels around the country visiting friends and family quite regularly.  Letty was staying with my parents a couple of months ago and I asked if she would like me to make a quilt for her.  We looked through a few of my quilting books together, and she picked the Shoeman's Puzzle pattern from Denyse Schmidt's book Denyse Schmidt: Modern Quilts, Traditional Inspiration. I've stuck to the pattern pretty faithfully, apart from making fewer blocks to end up with a single bed size quilt. 

Letty's quilt 

I even used templates (i.e., you trace a shape off a sheet and then use that to cut your pieces) as instructed by the pattern.  I have to say I was pretty nervous about using templates.  They don't seem like the most accurate way to make a quilt (for me, anyway), so I have avoided using them in the past.  However, I was inspired by what Denyse wrote in the book about using templates:

"In the end, try not to get hung up on making everything perfect. Take a good long look at those antique quilts that have so much life and warmth. You'll notice that most often they are not the most perfectly constructed quilts with tidy, matching seams and corners. What I like best about these beautiful quilts are the so-called mistakes. Accidents and imperfections never look right when you do them purposefully, so celebrate them while they're happening naturally."

It's very encouraging, right?  There are certainly plenty of imperfections to celebrate in this quilt.

Letty's quilt 

I quilted this quilt with an all-over flower design from Angela Walters' book Free-Motion Quilting with Angela Walters.  I really like how the quilting design mimics the bubbly look of the print in the solid sections, but seems to disappear in the print sections.  The quilting also made my piecing look much better than it did before - when people say mistakes "will quilt out", this is what they mean! 

Letty's quilt

I backed the quilt with a fabric from Bari J's new collection for Art Gallery Fabrics, Bijoux.  I love the colours in that fabric and I thought it complemented the quilt top without being matchy matchy. I hope my grandmother will like this quilt - my mum is planning a visit soon so I will send the quilt with her.

My final thoughts on templates - I could have made a much more accurately pieced quilt using paper piecing, but it would have taken longer and used more fabric.  In the end I'm happy with the piecing, even though I wasn't very pleased with it before quilting.  I'm definitely not ruling out using templates again, and my decision will probably depend on the project (do I want a high degree of precision, how much time to do I have, how much fabric am I willing to commit to the project).  What are your thoughts on using templates - do you love em or hate em?

Quilt Stats
Pattern: Shoeman's Puzzle from Denyse Schmidt: Modern Quilts, Traditional Inspiration
Finished Size: Approximately 54 inches by 75 inches.
Fabric: Moda Bella Solid in White, Kaffe Fassett Paperweight in Yellow
Backing: Divine Gypsy in Ivory from Bari J's Bijoux collection for Art Gallery Fabrics
Binding: Kaffe Fassett Paperweight in Yellow
Pieced and quilted by: me, on my domestic sewing machine.

Linking up with finish it up friday at crazy mom quilts.

Thursday, 28 March 2013

Modernista Homemade Swap - Finished!

So I finished up my items for the Modernista Homemade Swap.  This is my first round in this swap, but it is the third round it has been running, and each time the participants make something for a specific room in the home, plus a little extra bonus item.  This round is for the living room, so I made a table runner for my main item, and a zipper pouch in co-ordinating fabrics for the bonus extra.


I had a request via flickr for details on the fabrics and patterns I used, so I thought I would share them here.  Starting with the pouch, I used my favourite pouch tutorial, the open wide zipper pouch from Noodlehead, with a couple of tweaks.

Items for Modernista Homemade

First, I pieced the body of the pouch using scraps from making the table runner.  The little blue and orange squares are 1 1/2" square (2" cut), with a solid grey strip 1/4" wide (3/4" cut) on either side.  Those pieced strips ended up a little longer than the 10" recommended for the open wide zipper pouch, but left it at that length, and  added the charcoal sketch fabric to either side to build the height up to around 7".

Pouch for Modernista Homemade

I pieced the lining of the pouch out of 4" squares, and then trimmed it down to the same size as the outer pieces.  From then, I followed the instructions in the open wide zipper pouch tutorial, except that I did not box the corners.  I like boxed corners on a pouch, but leaving it flat just felt like the right thing to do for this pouch.

Items for Modernista Homemade

I didn't use a pattern for the table runner, but it's pretty simple to put together.  I cut 4" squares of the solid grey (I think it's Freespirit Designer Solid in Slate Grey) and 4" squares of an assortment of blue and orange fabrics (mostly DS Quilts, with a couple of Denyse Schmidt fabrics thrown in there).  I used those to make half square triangles, which I trimmed down to 3 1/2" square - so that the finished half square triangles in the table runner are 3" square.

Table Runner for Modernista Homemade

Creating the chevron design with the half square triangles is pretty simple, and you could definitely expand or reduce this design to fit whatever you're making, from a table runner, to a pillow, to a quilt.

Table Runner for Modernista Homemade

I backed the table runner with a Denyse Schmidt fabric from the re-printed Flea Market Fancy collection.  And yes, that dense dense quilting (sometimes called matchstick quilting) did take ages (each 6" section took about an hour to quilt).  I did learn a couple of tricks while doing it, so will post a tutorial with my thoughts in the next couple of weeks.

So I hope that's helpful - feel free to ask questions in the comments if you have any!

Linking up with Finish it Up Friday at Crazy Mom Quilts and TGIFF.

Saturday, 12 January 2013

How far will you go? Not very!

Last year, Jess at The Elven Garden put together a great Quilt Along, the How Far Will You Go? Quilt Along.  I didn't exactly follow along, but I was very inspired by the Tippecanoe block, and particularly Jess' use of it to make this cushion.

I used elements of the tippecanoe block in the Dat Star block I designed, which I quilted lightly and turned into a cushion for my brother.


The Linky Party for finished quilts and quilted items is now open, and with Jess' encouragement am entering my cushion in the small quilted items category.  Head over and check out the lovely things people have made!

Sunday, 30 December 2012

Handmade Christmas Revealed - Day 3

Warning - this post does not contain any actual swear words, but it does contain references to swear words, and putting swear words on handmade items.  If that offends you, please stop reading now.  Come back the day after tomorrow for a totally swear word free project (except for the ones I let out when making it!).

My Dat Star block is finally incorporated into a finished project.


I originally made this to be one side of a pillow for my brother.  Then I got scared of putting in an invisible zipper, and decided to make two pillows instead.  To bring the pillow front up to size, and to add a bit of lightness and brightness, I sashed the existing block with the On Point in Golden print from Michelle Engel Bencsko's Simpatico collection.


This block is already pretty busy, so I kept the quilting simple by straight line quilting about 1/8 of an inch off the outline of the star, and doing some very simple free-motion quilting in the border.

The back is part of a pillowcase from Ikea, with a zipper cover in the same Simpatico fabric I used for the front border.


The other pillow in this pair is a very rude pillow made following a family discussion about sweary sewing, and at my brother's request.  I have blurred out the swear word (it's really really offensive), but if you know Azealea Banks' song 212, you will know what it says.  If you don't know the song, don't google it unless you are ok with all the swear words (and lots of words that aren't really swear words but that are pretty offensive nonetheless).  It is definitely NSFW (but a very catchy beat!).


Anyway, I rather enjoyed making this offensive pillow, so I see more in my future.  I think I needed greater contrast between the background and the fabric used for the words, but it does have the upside that you can't really read it unless you look close.

I used the same fabrics for the border and the back.  I love that I can get two pillow backs from one pillow case, which were in the duvet cover set I originally bought to use for quilt backings.  Very economical.


Friday, 14 December 2012

The biggest needle book in the world

A while ago, I participated in the Scrappy Swap, run by Kat (Diary of a Flutter.Kat), with able assistance from Karen (Sew Peachey).  It was my first swap, and a really great one to start with.  The idea was to swap a FQ of scraps, a small handmade item and a small local item. 

My swap partner said her favourite colour was orange, so this was my initial fabric pull for the small handmade item:


I decided that the third print from the left had a bit much white in it to give the kind of rainbow effect that I wanted, so I used it as the lining of the needle book I made.


Umm, I'm not sure if you can tell from the scale of my embroidery scissors on the needle book, but it is the biggest needle book in the world.  Like 6 inches square.  That's what happens when you make things up as you go along, people.  Its also pretty floppy, because I only interfaced the exterior and not the lining.  On the plus side, you can fit a lot of stuff in the middle of it.  I know, I stuffed all my scraps and another FQ of fabric (my local item) into it before sending!

But, also this happens.  Improv piecing.  Sort of - the lines were all straight and ruled and I had an idea of where I was going with it.  Comments from my swap partner lead me to orange scraps and Essex Yarn Dyed Linen in black - it wasn't what I initially intended, but it worked so well!  I put another border of the same background fabric around this before it was finished, so the proportions worked a bit better.


I'm sorry this is such a crummy picture.  It was taken at night, with my phone, and then instagrammed.  I did take pictures of the exterior in daylight at the same time as I took the photo of the lining inside, but I don't have them any more.  I'm quite gutted, because I was pretty pleased with how this turned out (even with its enormousness and other imperfections), and wanted to show it off.

And what did I get in return?  Well, the person I made for also made for me.  Bree (My Crafty Crap) made me this super lovely needle book with teeny tiny EPP hexagons, and yellow, and hand stitching, and gnomes!  I love it, and I'm also looking forward to not losing all my needles anymore.


Yellow EPP Needlecase

Bree also sent me some super lovely scraps, a cute little card case and a keyring from her home state (which was snapped up by an American-sports-mad guy).

All in all, this was a great experience, and I look forward to my next swap.  Have you had any swapping experiences lately, and how did they go?