Saturday 31 October 2015

Caturday Wisdom #144

Black does not always attract heat. Ivy

Here Ivy is facing a conundrum the cats often encounter: they were sitting in the sun. The sun has moved. They are left contemplating how they might will the sun back to them or how they will move their sun-drunk selves back into the sun. It is honestly the closest you will get to seeing a cat inebriated.

Wednesday 28 October 2015

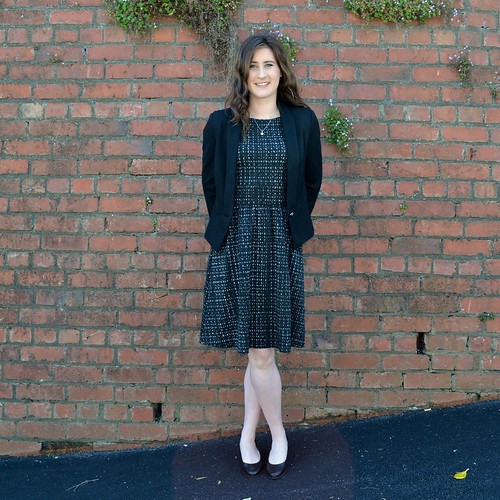
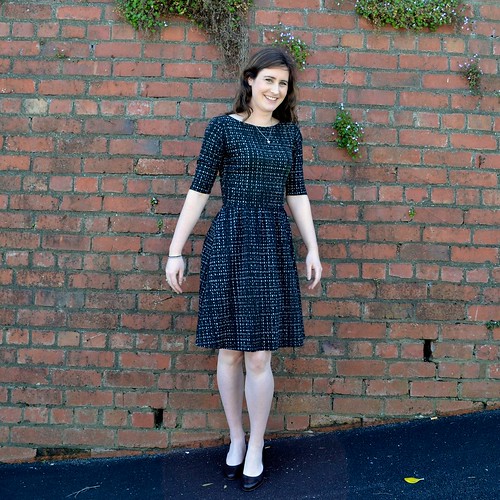
Moneta Dress - Black Double Knit

After making my first Moneta dress on Saturday, on Sunday I whipped up another one, using a few things I learnt from the first one.  This time I used a heavier black double knit fabric from The Fabric Store, with a white messy dot print on it.  Although this fabric is definitely not 100% cotton, it is quite heavy and stable so it was nice and easy to sew with like the Anna Maria Horner fabric I used for the last version.

Black Moneta

I am really thrilled with this dress and will definitely be wearing it to work!  With blazer, most likely.

I asked people for questions about sewing with knits on my last post, and I've had a few.  I want to say that I am by no means an expert at sewing with knit fabrics, but I'm happy to share what I learnt.

Black Moneta

I made a few adjustments for this dress, based on my experience with the last dress.  The waist in the purple dress is pretty tight on me, so still used a size small bodice for this one, but graded up a size (to a medium) for the waist.  Now I can eat lunch in this dress!

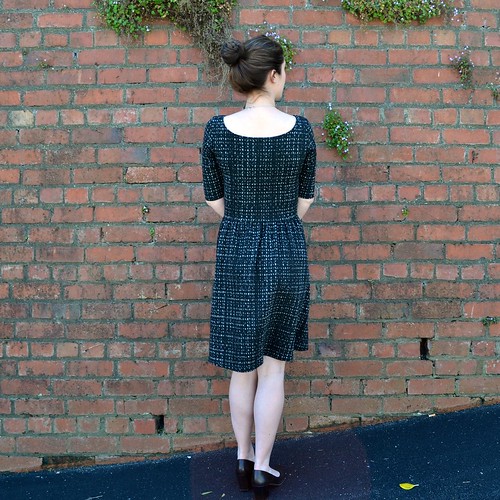
Other tweaks - I only lengthened the bodice by .75", which I think looks better on me.  I also used the size xs neckline, because the neckline on the other dress tends to show my bra straps (not ideal for something I want to wear to work!).  Because the fabric is quite heavy, I kept the size small skirt, which means it is not quite as heavily gathered.  I also omitted the pockets, which I kind of regret now!

Black Moneta

I wasn't super stoked with the neckline on the last dress - it was my first time sewing with a twin needle and I didn't do the greatest job.  

This time, I used a technique to stablise the fabric before hemming, not only on the neckline but also on the sleeves and hem.  Basically, I cut narrow strips of fusible webbing (1/2" for the neckline and sleeves, and 3/4" for the bottom hem), and ironed them right at the edge that I wanted to hem.  I then turned the hem over and pressed it in place, before stitching as usual with the twin needle.  The fusible webbing made it easy to get a consistent hem width, held the hem in place, and kept everything stable so I didn't stretch out the neckline (but also didn't prevent the knit fabric from stretching entirely).  I used Steam-a-Seam Lite, because that is what I happened to have on hand, but I expect other fusible webs would work equally as well.

Black Moneta

Here are my thoughts about sewing with knit fabrics as a beginner:

- Do yourself a favour and start with a knit fabric that will not make your life hell.  Choose something that is thick-ish (but not super thick), and stable (i.e., not super stretchy and not too prone to shifting).

- Use a solid colour or a print you do not have to match.  No stripes (at least, not until you're feeling more confident).

- Pre-wash your fabric.  I almost never pre-wash fabric for quilting, but I always pre-wash fabric for making garments.  It's just not worth the heartache of making a perfectly fitting garment that shrinks the first time you wash it!

- It's worth taking the time to trace the pattern onto something you can re-use.  Erin made me do this and it was so worth it.  We used a very light weight interfacing but apparently Swedish tracing paper is the thing (but expensive / hard to find in New Zealand).

- I used pins to pin my pattern to the fabric, before cutting.  I just used a normal amount, not heaps.  I also used the same pins that I use for quilts - nothing special.  You could probably use pattern weights instead - I had to use weights (actually the hot pads the cats sleep on in winter) to hold my fabric on the table because it was long and kept wanting to slide off!

- I used scissors to cut my fabric.  I believe you can also use a rotary cutter.  I know from cutting curved pieces for quilts that a smaller blade (i.e., 28mm rather than 45mm) is better when cutting curves with a rotary cutter.

- If you can get your hands on an overlocker / serger, do it! Beg, borrow, or steal.  I think it made the experience MUCH simpler and easier.

- If you are going to use a sewing machine, use ballpoint needles.  There is a reason the instructions say to do this!

- Be really careful with your twin needle.  Apparently they are prone to breaking.  I had a backup one, just in case, but didn't break mine (phew!).  Also, if you can get your hands on a wider one, I think it gives a more professional finish (I used a 4mm one).

- I used clover clips to hold the pieces together when constructing the dress, rather than pins.  This is because overlockers + pins = BAD.  It also meant I avoided putting any necessary holes in my dresses.

- Again, if you are planning to make a Moneta dress, I would highly recommend reading the Colette Moneta sew-along and this post about using clear elastic.

Ok, that is all from me for now!  If you have other questions, let me know!

Follow

Monday 26 October 2015

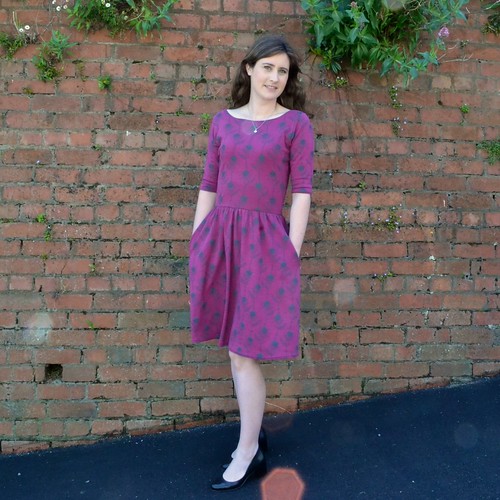
Moneta Dress - in Anna Maria Horner fabric

I've recently been inspired to sew garments again.  I think it's the influence of several things, including Cath's beautiful Bondi Top, and meeting Lizzy House and new kiwi / Canadian ex-pat Erin Charter, both of whom have amazing handmade wardrobes.

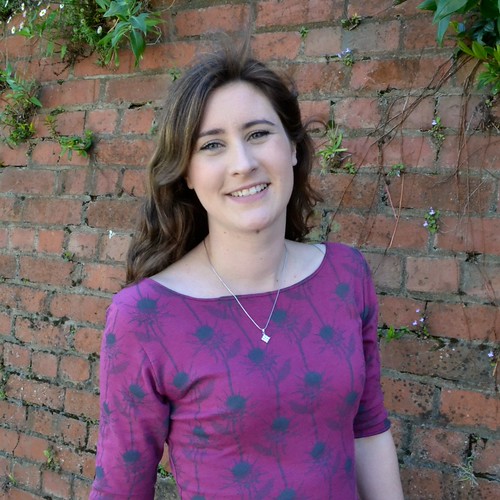
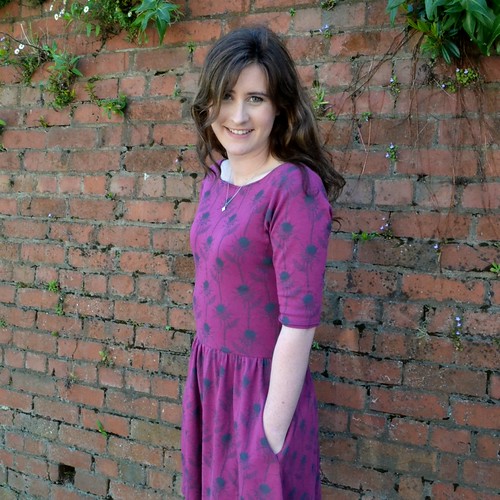
Anyway, I bought several yards of this lovely purple knit designed by Anna Maria Horner last year when I was sewing garments, and then never did anything with it.  Since it was a long weekend here, and I had Erin to help me, I pulled it out to make a dress using the Moneta pattern by Colette Patterns.  One of my lovely IG friends, Nancy, responded to my call for help and lent me her overlocker / serger for the weekend, which made things MUCH easier.

Purple Moneta Dress 

The Moneta is one of the most made and blogged indie patterns out there, so it was really helpful when I was deciding what to make to read everyone else's posts about it.  For the sake of being helpful to other people who might want to make it, I am 5'8" and in this version made a size small, but lengthened the bodice 1.5".  I didn't alter the skirt at all.

Purple Moneta Dress 

I had read Karyn's post which mentioned the issue with excess fabric under the arms.  I took the armpits in 1/2" but you can see there is still a bit of excess fabric there.  I didn't have this issue on the second version (which I will show in another post), so I suspect it might be partially caused by this fabric not having amazing recovery (it's 100% cotton which made it easy to sew with but it doesn't spring back into shape as easily as fabric with a nylon or other polyester type content).

Purple Moneta Dress 

You can see here that the neckline is lower on the back than on the front - pretty cute!  These photos were taken in slightly challenging light, hence all the sparkles (and I would like to blame my glowing white skin on the light as well but I suspect that is just me...).

Purple Moneta Dress

So, yeah, I'm pretty happy with this dress.  It will be a cute weekend outfit for me as the weather starts to warm up, and it's super comfy.  Colette describes the pattern as being for beginners, and generally I would agree with that - the only thing I found slightly tricky was attaching the top of the skirt to clear elastic, and hemming the neckline.  I'm sure it would have been quite a bit more work without an overlocker though.  If you are planning to make this dress, I would highly recommend reading the Colette Moneta sew-along and this post about using clear elastic.

When I share the other dress I made, I'll include a few more details on the tweaks to the pattern that I made which resulted in a better outcome for me, and the technique I used to get a much nicer result on the hems.  If you have any questions, shout out and I'll try and include the answers in that post!

Follow

Saturday 24 October 2015

Caturday Wisdom #143

A good balance of light and dark is imperative. Ralph
 
Ralph has found the ideal spot squished between the couch cushions and Adrianne's jumper. All he ever really wants is someone to sit still enough for him to fall asleep on them. He may be in luck this weekend as it's supposed to rain the whole time.

Thursday 22 October 2015

2015 Finish-Along Q3 Winners!

Well done to everyone who entered a finish for Q2 of the 2015 Finish-Along.  My wonderful team of cheerleaders and I have visited all the links and we were so impressed with what everyone accomplished.

Without further ado, here are the winners for Q2:


The winner of the $30 gift voucher from Rachael from imagine gnats is Heather from Quilting and Beyond with this cute baby quilt:


The winner of 3 patterns of her choice from Sara from Sew Sweetness is Celine from Espritpatch with this adorable embroidered hoop:


The winner of 3 patterns of her choice from Sew Bittersweet Designs is Cathy from Sane, Crazy, Crumby quilting with this totally stunning quilt:


The winner of a $25 gift voucher from Becca from sew me a song is Jennie from Porch Swing Quilts with these super sweet cherry pillow shams:


The winner of a $25 gift voucher from Green Fairy Quilts is Kathleen from Rose Prairie Quilts with this lovely retro flying geese quilt:


The winner of a $30 gift voucher from Mad About Patchwork is @kellyfairy on instagram with a super cute house mini which you can see here.


The winner of 3 patterns of her choice from Juliet from Tartankiwi is Iris from Crazy Dutch Bird Quilts with this lovely name-tag holder:


The winner of a pattern from Alyce from Blossom Heart Quilts is Judy from Quilt Paradigm with this striking masculine quilt:


The winners of a copy of the current issue of Make Modern are Susan at Super Mom No Cape with this monochromatic writing tote:


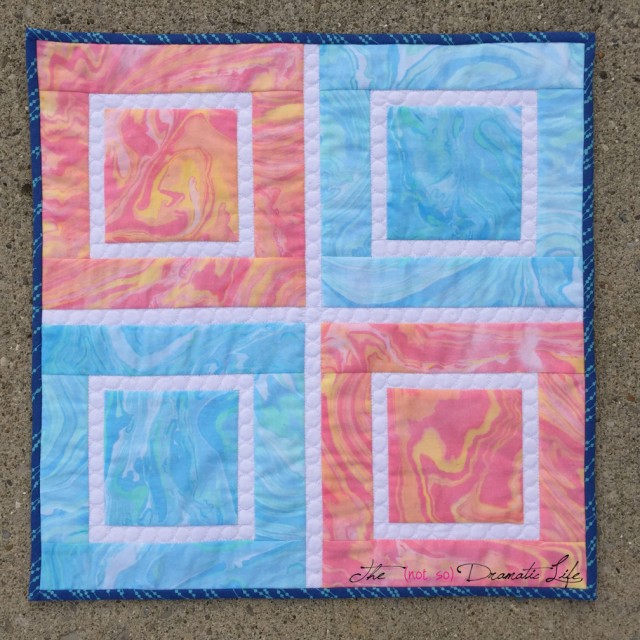
and Cassandra from The (not so) Dramatic Life with this fun marbled mini:


The winners of two patterns of their choice each from Porch Swing Quilts are Vicki from Vicki's Crafts with this wonderful wintery table runner:


Gina at Quilts and Cakes with this beautifully quilted mug-rug:


and Deb from Life in the Dog House with this truly amazing log cabin variation quilt:


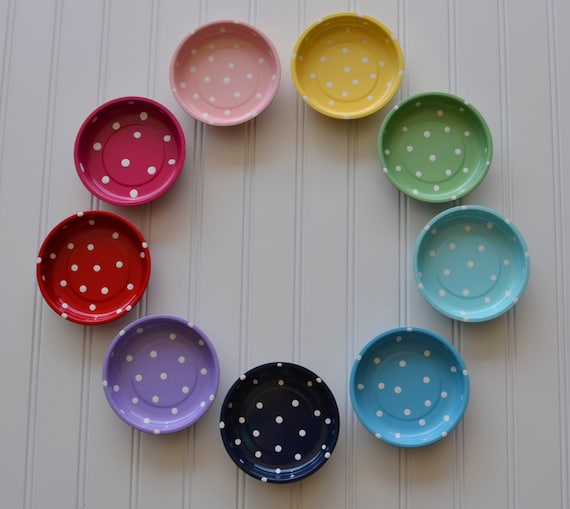
The winner of two magnetic polka dot bowls from Laurel Bee Designs is Vera from Negligent Style with this rainbow scrappy cushion:


On the Windy Side

And the winner of my high tea pattern is Sally from Quimble with this comfy looking doggy duvet:


All the winners were drawn using the random number generate at random.org. Congratulations to all the winners - I'm in the process of sending out emails to hook you up with your prizes so you should be hearing from me very soon!

Follow

Tuesday 20 October 2015

Aussie Aurifil Club - Cloudy Day Bundle

I think you guys know that I love Aurifil thread, so when Melissa from Ms Midge asked if I wanted to pick colours for her Aussie Aurifil Club earlier this year, I was totally into it.


My bundle is called Cloudy Day, because all the colours are slightly greyed out.  

I started with my absolute favourite grey - 2605.  It's the perfect medium - not too light and not too dark.  I love it for both piecing and quilting.  Then I added brass, 2975, because I just cannot get enough of that delicious mustardy yellow.  Smokey blue (4644) and mulberry round out the bundle, providing depth and a nice foil to the brass.


I'm so delighted by how this bundle looks all together, and I can't wait to stitch with it.  As you can see, I've chosen to receive this bundle from Melissa in the 28 weight thread, because these are colours I want to SEE when I use them for quilting.  And, let's be honest, I'm more likely to actually use this thread if I can run it through the sewing machine than if I need to use it for hand quilting!


It's been so nice watching the #aussieaurifilclub selections go out over the course of this year.  I know Melissa is very focussed on making sure people get a great range of different colours so that the club is really useful and enjoyable.  If you want to get your hot little hands on these threads, you can sign up for the club here.

Saturday 17 October 2015

Caturday Wisdom #142

Happy paws don't have to make everyone happy. Ralph
 
Ralph and Ivy are actually both pretty good at using gentle paws on bare skin. In summer when we have bare legs and shoulders they tend not to climb on us as much and only really scratch us accidentally when they get over-excited while playing chasing games with each other.
On this day Ralph joined me for a couch nap where I found his sleeping position less comfortable than he did...

Saturday 10 October 2015

Caturday Wisdom #141

Always watch your back. Jackal
  
Jackal got into some trouble with the another neighbourhood cat that led to a trip to the vets and a poodle-style trim. How embarrassing.

Friday 9 October 2015

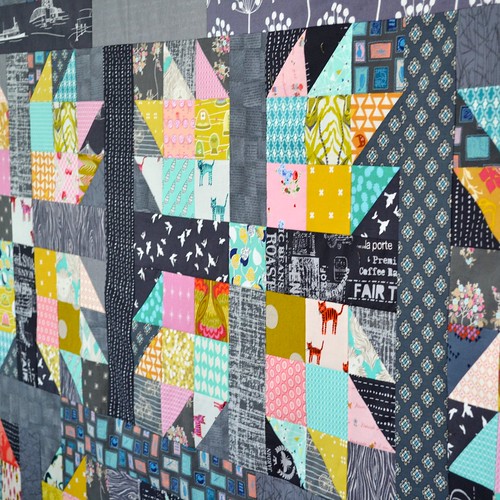
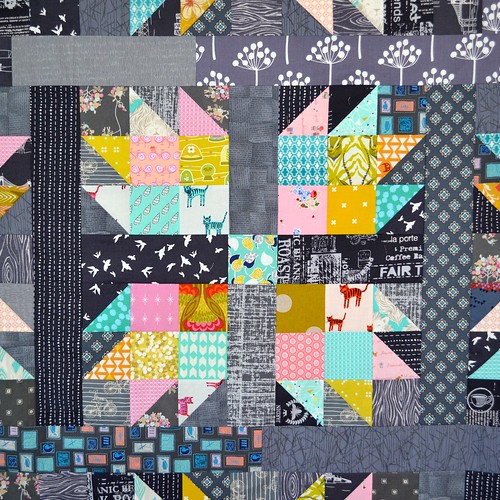
Squid Ink and Sorbet Quilt top

While I'm pulling together my list for Q4 of the 2015 Finish Along, I thought I would share my most recent quilt top finish.  I don't think I've blogged about this quilt top yet, although I have certainly shared a few progress photos on instagram.

This year is the 30th anniversary of my local quilt guild, Capital Quilters.  To celebrate, my friend Anne had the idea to run a block challenge involving our guild logo, the hand of friendship / bear paw block.  Lots of people have joined in - you can see their blocks by checking out the tag capitalquilters30th on instagram.  If you want instructions on how to make these blocks (which are 21" square, you can find them here).

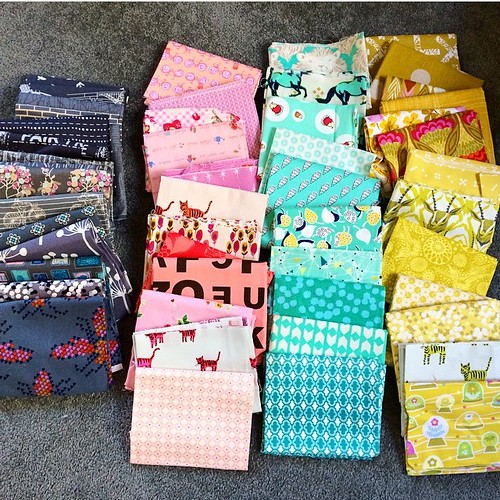
Anyway, I started with this group of fabrics, with the idea of making brightly coloured bear paws on a dark grey backgound.

Untitled

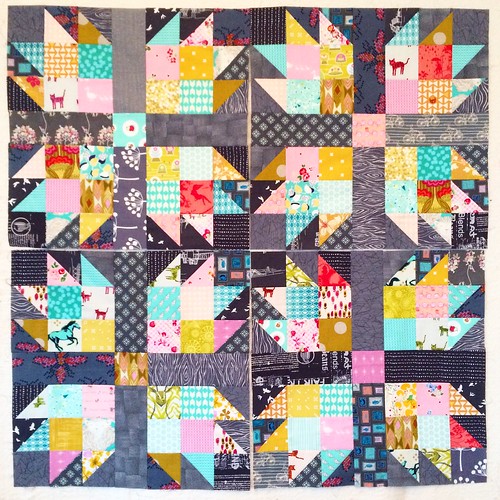
To keep the scrappy factor high, I mixed pink, aqua and mustard fabrics within each block.  The first four blocks went together quite quickly, as I made one a month.

Untitled

Then I had a long break between blocks but managed to get the rest of the blocks done and the quilt top put together last weekend.

Squid Ink and Sorbet Quilt top 

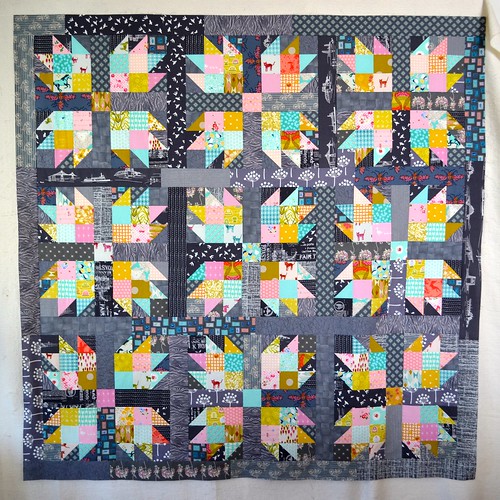
I wasn't entirely sure how that scrappy sashing would work, but I'm happy with the result!

Squid Ink and Sorbet Quilt top 

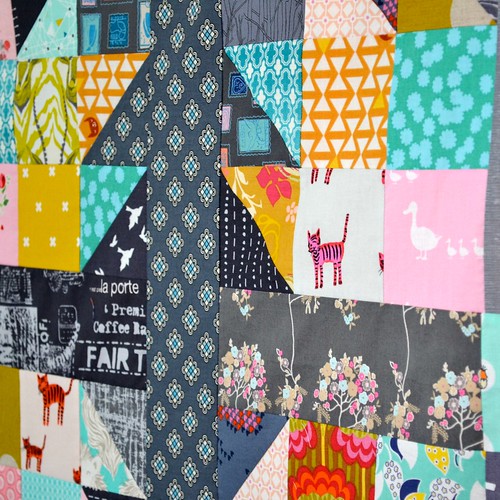
There are lots of creatures in these blocks!

Squid Ink and Sorbet Quilt top 

The top finished at 75" square, so I have sent this quilt off to be long-armed.  I've chosen some super cool fabric for the back, so I'm excited to get it back and finished off.

Squid Ink and Sorbet Quilt top

Guild members are invited to bring their quilts to the November meeting (whether finished or not), and hopefully I will be able to share a whole lot of different scrappy bear paw quilts with you then!

Follow on Bloglovin

Thursday 8 October 2015

2015 Finish Along - Q4 Now Open!

Hi everyone - sorry this post is a day late.  To make up for it, I'm extending the linky by a day, so you still have a full week to link up your lists.

Q3 is traditionally a quieter quarter for the Finish-Along, and this year was no exception.  But, you guys still brought so many finished projects to the table! There were 360 finished projects linked up for Q3, which is amazing!  My totally awesome team of Finish-Along cheerleaders Rhonda, Leanne, Wendy, Kirsten and Helen and I are working through your finishes right now, and I'll pick winners once we're done.

After several super busy months at work, I am back to quilting and am on a finishing kick.  I really really want to start 2016 with less WIPs, so I'm (mostly) holding off on starting new things, and knocking off those long-standing projects in a fairly ruthless way.  I hope you're excited to join me and kick some WIP-butt.  My own Q4 list post is coming soon.  Last year, Q4 saw 358 finishes - let's blow that out of the water this year!

As a quick reminder, if you are ever looking for it, you can find all the information on the 2015 Finish-Along on the 2015 Finish-Along Page.

The Rules:

- At the start of each quarter there will be a linky party for you to link up your proposed list of finishes. You must link up in order to be able to be eligible for those prizes at the end.  Please only enter ONE blog post or flickr photo or instagram photo at this starting link-up.

- In order for your projects to be eligible, they must at least be a tangible project at the start of the quarter.  That means, at the very least, a pile of fabric pulled along with a pattern, or a quilt top needing to be quilted, or a half knit jumper. I love seeing your bee blocks, but they won't count unless you happen to be turning them all into a fully completed quilt!

- As you complete each of your projects on your list, write a post all about it, or a description of a Flickr pic.

- At the end of the quarter, link up each individual post/Flickr pic (please link back to your original list in some way). For each finish/link you complete, you get an entry into the draw, and therefore it's in your best interest to write up a separate post for each!

- A finish is defined as a completely finished project, eg a quilt, quilted and bound, a bag that's fully lined and functional, or a jumper that one could wear out in public. I'm happy for you if you get a quilt top completed in one quarter, but hold onto it for the next quarter and see if you can get it quilted and bound before entering please.

- You won't be punished if you don't finish your entire list, so feel free to make a big list and roll projects over from one quarter to the next if you need to.

- All qualifying finishes will be put into a prize draw, and the names drawn at random for each of the prizes donated by our sponsors for that quarter.

- The finish link party will be open for a week, and then the next quarter will open on the following day.

- During the week that the finish link party is open, there will be a series of tutorials appearing here on the blog. If you'd like to contribute a tutorial, please drop me an e-mail at adrianneonthewindyside at gmail dot com.

- The FAL is open to anyone, anywhere in the world.

I'd love if you'd spread the word about the FAL by popping my button in your post or on your blog.  You can grab the code for a large button or a small button below:

2015 FAL at On the Windy Side

2015 FAL at On the Windy Side


The awesome prizes for Q4 of the 2015 Finish-Along, provided by our wonderful sponsors:


Rachael from imagine gnats is providing a $30 gift voucher.


Sara from Sew Sweetness is providing 3 patterns of the winner's choice.


Becca from sew me a song is providing a $25 gift voucher.


Green Fairy Quilts is providing a $25 gift voucher.


Mad About Patchwork is providing a $30 gift voucher.


Juliet from Tartankiwi is providing 3 patterns of the winner's choice.


Alyce from Blossom Heart Quilts is providing a copy of one of her gorgeous patterns.


The team at Make Modern are providing a copy of the current issue of their magazine for two winners.


Jennie from Porch Swing Quilts is providing three lucky winners with two patterns of their choice each.


Laurel from Laurel Bee Designs is providing two pin dot magnetic pin bowl in the winner's choice of colours.

On the Windy Side

And finally, I will be providing a copy of each of my self-published patterns to a winner (full disclosure - at the moment there is only the one!).

Before you link up:

If you haven't used a link-up tool before, Katy from The Littlest Thistle did a post which explains how to use it really well - you can find it here.

If you're planning to use instagram to link up, Katy from The Littlest Thistle has done another tutorial on how to link from instagram using your computer (here).  If you are working on your phone or your tablet, Rhonda's tutorial on how to link from instagram (here) is for you.

I am super excited to see your lists of proposed finishes for Q4.  I bet you have a heap of amazing things on the go and I really hope the Finish-Along helps you find the motivation to finish them (because there's something just so satisfying about a finish - for me, the prizes are just gravy).

However, I am asking you to please only enter ONE blog post or flickr photo or instagram photo at this starting link-up.  If you enter multiple links, it creates a heap more work for me at the end of the quarter when I have to go through and try and match the actual finishes with the list of proposed finishes.  If you are linking from flickr or instagram, I'm happy for you to write the list (on your computer or on a piece of paper) and post a photo of the list.  Alternatively, you can take a photo of all your WIPs and write the list in the comment on the flickr photo or instagram photo.

Finally, this link-up theoretically runs from 8 October 2015 to 15 October 2015. Because I am in New Zealand, and time zones mean that our 15 October 2015 will end before most other people's, I have decided to leave the link-up open until 11:00 p.m. 15 October 2015 PST.  The link-up tool below should tell you how much time the link-up has to run BUT if you need to know the closing time in your country, I find World Time Buddy a really excellent visual way to see different time zones.

Phew - that's enough from me I think.  Have fun making your lists and linking up, and let me know if you have any questions!