Showing posts with label star. Show all posts

Monday, 30 March 2015

Moonshine Stars Quilt

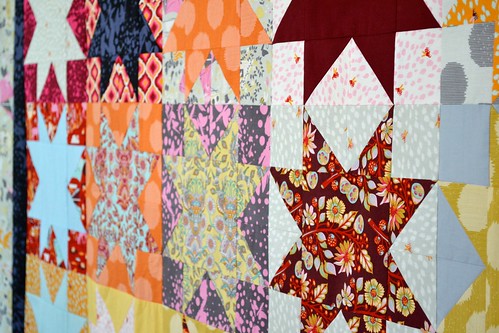
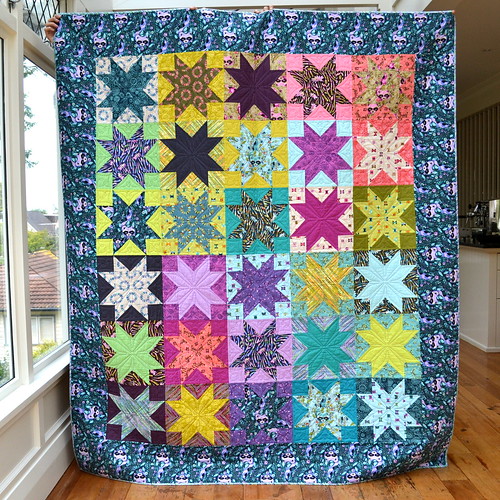
Woohoo lovely readers - I am delighted to have a finished quilt to share with you today!
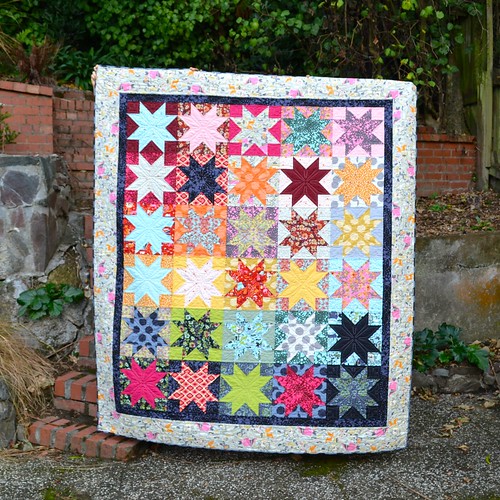
Moonshine Stars Quilt

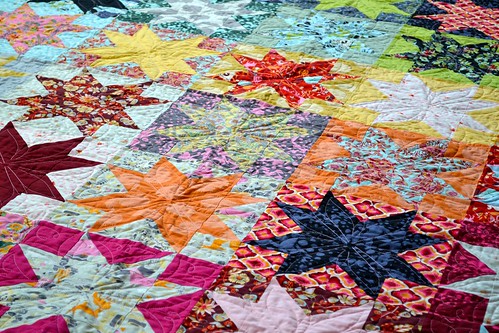
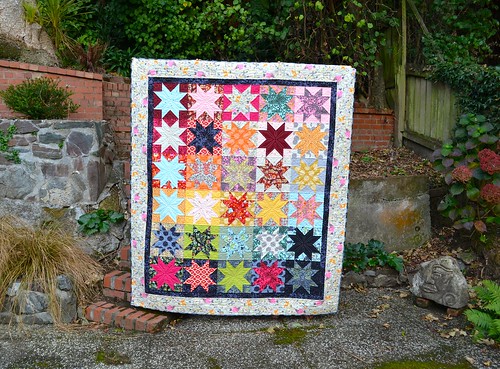
This quilt was made with a bundle of Tula Pink's Moonshine collection, and some co-ordinating solids that I pulled from my stash.  It's very similar to the Acacia Stars quilt I made last year, except this time I get to keep it!
Moonshine Stars Quilt

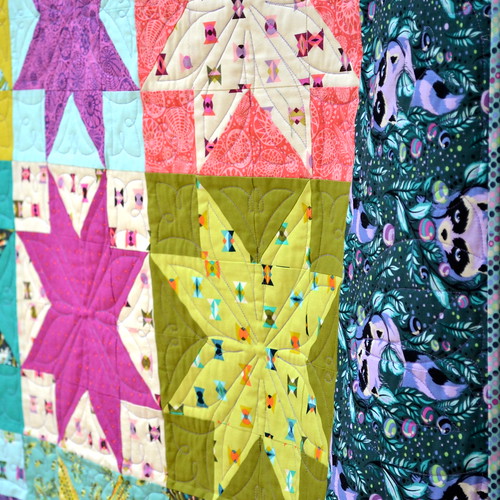
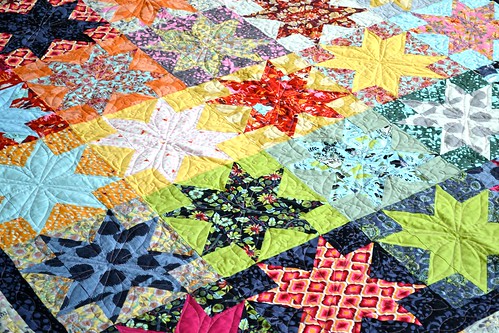
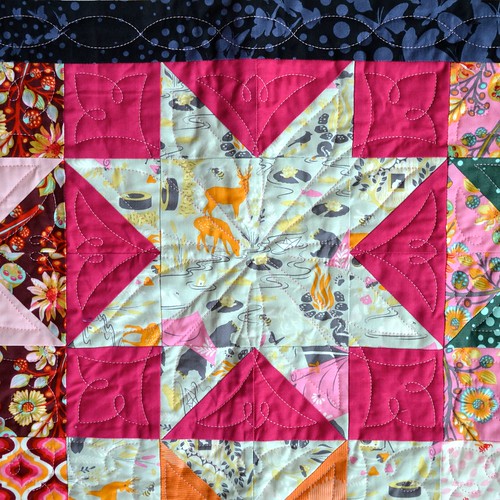
This quilt is pretty big, and I loved the star quilting that was done on my last quilt, so I sent it to Sue Burnett for quilting again.  I had the stars quilted with a star design, the narrow inner border quilted with a rope kind of design, and the outer border quilted with a border design that matches the stars.  I picked a light pink thread which blends on most of the fabrics, but shows up against some of the darker fabrics in this range.
Moonshine Stars Quilt 

I really love the Moonshine collection.  The colours and prints are a lot of fun, and I like that they allowed me to create a kind of rainbow effect with this quilt.
Moonshine Stars Quilt

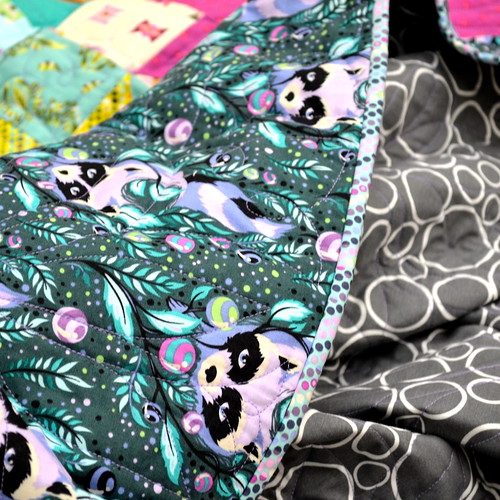
Both the border fabrics and the binding are from the Moonshine collection as well.
Moonshine Stars Quilt

There are only a couple more days before the linky party for the 2015 Finish-Along opens on the 31st of March.  You have until the 6th of April to link up, so crank up those sewing machines and move on some WIPs.  I'm excited to see what everyone has been up to!  This was on my Q1 list and takes my list of finishes to, I think, four.

2015 FAL at On the Windy Side

I'll see everyone tomorrow for some linky party fun!

Follow on Bloglovin

Monday, 12 January 2015

Moonshine Stars quilt top

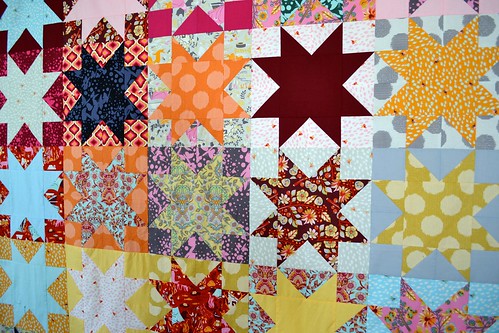
Last year I bought a fat quarter bundle of Tula Pink's Moonshine collection.  I really liked the bold colours in it, and the use of black and grey.  I was really happy with how my Acacia Stars quilt turned out last year, and since it's now with the lucky winner of the raffle, I wanted to make another starry quilt for myself.

Moonshine stars quilt top

This is the quilt top, and I'm really thrilled with how it turned out.  I combined the fat quarter bundle with a variety of coordinating solids from my stash, and I think they keep it from being completely overwhelmingly busy.

Moonshine stars quilt top 

The inner and outer borders are both from the Moonshine collection as well.

Moonshine stars quilt top

Since this quilt is pretty big at 76" by 88", I've sent it off for long-arm quilting.  I'm excited to get it back and finish it up - it's been in my head for a long time and it's wonderful to have finally realised my idea.

I'll be linking up with Lee at Freshly Pieced:

WIP Wednesday at Freshly Pieced

I'm also in the process of making my list for Q1 of the 2015 FAL and this quilt is definitely on it!
2015 FAL at On the Windy Side

The link-up is open for a few more days, so if you haven't made your list and linked up yet, get on it and you you can find the link-up here.  For those who have linked up, I am working through your posts and loving all the beautiful projects people are working on.  I'm aiming to look at and comment on 20 posts a day until I get through all of them, so if I haven't made it to you yet, never fear, I'm on my way!

Follow on Bloglovin

Monday, 18 August 2014

Scaled stars (a quilt block tutorial)

 A few weeks ago, I enjoyed making some Scrappy Star blocks using Clover and Violet's awesome tutorial.  I used them in this quilt chunk which now lives with Jess from The Elven Garden.


Anyway, at the time I was doing my block a day July challenge, and I decided to scale down this star block to 6 1/2" so I could use it in my quilt.


This is my 6 1/2" version, liberty on a low volume background.  It's actually a slight variation on Jennie's original block, because it was easier for me to figure out that way.  As a result, my 12" version of this block is slightly different to Jennie's.  (If you're curious, my block is a true nine patch, with all nine patches being squares of the same size.  Jennie's is a variation on a nine patch - there are nine patches which come together to form the block, but they are not all the same size).

Anyway, a couple of people have asked me for my method for making this block and Jennie from Clover and Violet has very kindly agreed to let me link back to her original tutorial, so here are the measurements for a variety of different scaled star block sizes.


12" finished block - cut:

4 - 4 1/2" background fabric squares
1 - 4 1/2" star fabric square
8 - 2 1/2" by 4 1/2" background fabric rectangles
8 - 2 1/2" star fabric squares

9" finished block - cut:

4 - 3 1/2" background fabric squares
1 - 3 1/2" star fabric square
8 - 2" by 3 1/2" background fabric rectangles
8 - 2" star fabric squares

6" finished block - cut:

4 - 2 1/2" background fabric squares
1 - 2 1/2" star fabric square
8 - 1 1/2" by 2 1/2" background fabric rectangles
8 - 1 1/2 star fabric squares

3" finished block (for the truly insane) - cut:

4 - 1 1/2" background fabric squares
1 - 1 1/2" star fabric square
8 - 1" by 1 1/2" background fabric rectangles
8 - 1" star fabric squares

The method for constructing the block is exactly the same as that set out in the original Clover and Violet scrappy stars tutorial.  Once you have made the block it will measure 12 1/2", 9 1/2", 6 1/2" or 3 1/2" as applicable - the finished size above is once the block is stitched into a quilt.

Please let me know if you make a scaled star block using my measurements and Jennie's tutorial - I'd love to know about it (and you're more than welcome to add it to the On the Windy Side Flickr group).

Follow on Bloglovin

Wednesday, 16 July 2014

WIP Wednesday

Well, technically, my part of this quilt is finished, so it's really someone else's WIP, but that still counts, right?

Cool stars

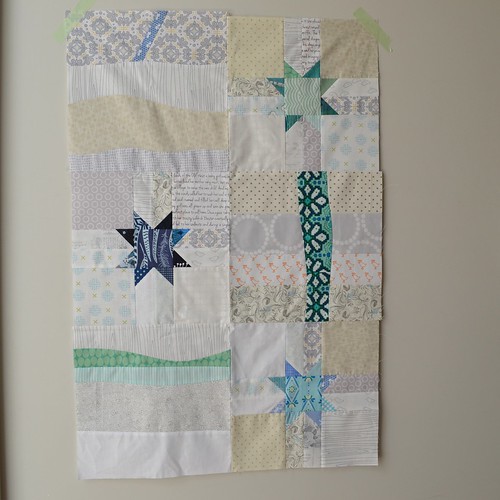
This is a quilt "chunk" that I made for my friend Jess from The Elven Garden. We are both part of a little bee called the Pinprov bee - there are just six of us and we are making blocks for each other based on images we've pinned on pinterest. Jess asked for pops of cool colour on a low volume background.

Cool stars

The first thing that popped into my head were these fun wee star blocks. I made three in different colours, using this Scrappy Star tutorial by Clover and Violet.

Cool stars

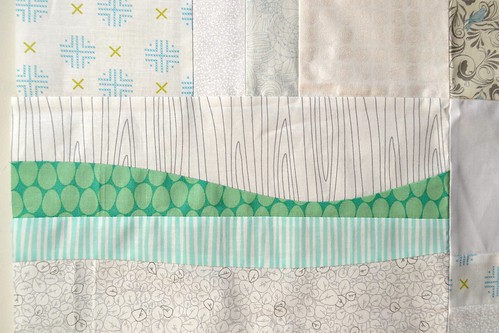
Then I needed to fill in the space around the star blocks. Some of the quilts Jess had pinned featured improv curves. I meant to make this year my year of getting comfortable with curved piecing, but it really hasn't been happening so far. Anyway, I decided to take the plunge and pieced some very simple improv curves. I used the method described by Anne from Play Crafts in this tutorial (hosted on Lily's Quilts) and the very similar method described by Rita from Red Pepper Quilts in this tutorial. Really, like they both say, improv curves are not so scary once you give them a try!

I really enjoyed making this chunk and I'm glad it gave me the opportunity and little push I needed to try improv curves. Expect to see more of them from me!

I'm linking up with Lee at Freshly Pieced:

WIP Wednesday at Freshly Pieced

Follow on Bloglovin

Wednesday, 21 May 2014

Acacia Stars Quilt

This quilt is actually my first quilt finish of the year, but I've been waiting to post about it until now.

I am on the exhibition committee of the local guild I belong to, Capital Quilters, and as part of the fundraising for our exhibition, we are raffling this quilt off. I made it specifically as a raffle quilt and have attempted to bridge the gap between modern and traditional with this quilt, in keeping with our exhibition theme, which is "Quilting: A Modern Tradition". I especially think that Tula Pink is a fabric designer who appeals to both modern and traditional quilters - her more recent fabrics are a bit brighter but if you look at her early designs like Flutterby the colours are quite on the traditional side and even now she often includes shades which I think of as traditional (like the olive green in the Acacia collection, for example). To make this quilt, I used a bundle from Westwood Acres which included Tula Pink's Acacia collection and co-ordinating solids, and some yardage of the raccoon print for the border.

Acacia Stars Quilt 

So, anyway, star blocks are beloved by modern and traditional quilters alike, and the border is quite traditional apart from the inclusion of raccoons(!). This border was just not going to work unless I matched the raccoons in the print (which I had not done before). I used this excellent tutorial, except that I matched the prints with a straight seam, not angled seam as shown. I'm quite proud of the results and you really can't see the seams in the border unless you look really close!

I made the star blocks slightly at random - aiming mainly to have good contrast between the star and the background fabrics, and not worrying too much about the fabric combinations. This left me with a bit of a challenge when setting the arrangement of the blocks for the quilt top and I spent quite some time moving them around my design wall. Ultimately I arranged them with the backgrounds in a sort of rainbow order.

Acacia Stars Quilt 

Once I'd made the top, I handed it over to Sue Burnett and she did the wonderful quilting, using a quilting pattern that is specifically designed to go in eight pointed stars like these. A border version of the same design has been used in the border for continuity, and the whole quilt was quilted with a light purple thread that blended nicely with most fabrics.

With plenty happening on the front of the quilt, I wanted something simple for the back, and the fact that I didn't have to piece this Robert Kaufman Extra Wide fabric was a happy bonus. I knew from before I even starting sewing the top together that I wanted to use that dotty strip for the binding and it worked out really nicely. I even hand stitched the binding down - all 328" of it!

Acacia Stars Quilt

We have started selling raffle tickets for this quilt and so far I think they're selling well. I'm excited for the person who wins this quilt and making it was a nice experience (if slightly nerve-wracking - I wanted this quilt to be just right!). If any of my New Zealand readers would like to buy a raffle ticket, please let me know - they are $2 each or a book of 5 for $10. As much as I would love to sell tickets to my overseas readers, I'm a bit wary about complying with foreign gambling laws (it sounds funny, but in New Zealand raffles are covered by gambling legislation and we have made sure we are complying with local law) so I'm going to restrict sales to New Zealanders - sorry about that.

If anyone would like to come to our exhibition, here are all the details:


This will be my first time exhibiting and I'm quite excited. I'm also strangely nervous - I've gotten comfortable blogging about my quilts and showing them online but having them in a show is something quite different. Have you exhibited a quilt and how did you feel about it?

Quilt Stats
Finished Size: approx 76" by 88"
Fabric: Tula Pink's Acacia collection and co-ordinating solids
Backing: Robert Kaufman 108" wide Spot On fabric in Steel
Binding: Pixel Dot in Teal from Tula Pink's Acacia collection
Pieced by: me
Quilted by: Sue Burnett

I'll be linking up with finish it up friday at crazy mom quilts.

Follow on Bloglovin

Wednesday, 13 November 2013

WIP Wednesday

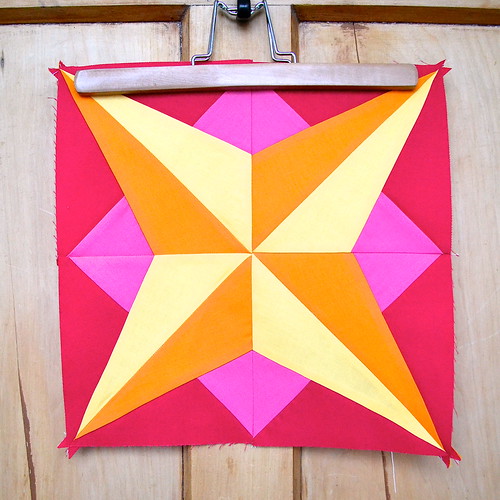
A quick WIP Wednesday today, because although I have lots of WIPs on the go, they mostly aren't at interesting stages.  First up is this block I made a couple of weeks ago for Tracey in the Simply Solids bee.  It's made using the Star pattern from Faith at Fresh Lemon Quilts' Summer Sampler Series.

Star Block for Simply Solids bee 

I'm particularly pleased with the hot colours in this block - they really make it for me.

The next block is part of my newest WIP, one that I am very excited about.  My local guild, Capital Quilters, is holding an exhibition of members' quilts next year.  Each time there is an exhibition, a raffle is held, with a quilt as the main prize.  I am on the exhibition committee and am making the raffle quilt (although it will get sent out for long arm quilting - phew!).

Acacia Stars - block 1

This is block number one of thirty for the raffle quilt.  I am using a bundle of Tula Pink's Acacia collection with co-ordinating solids from Westwood Acres (you can also find Acacia at Stitchbird and Fat Quarter Shop).

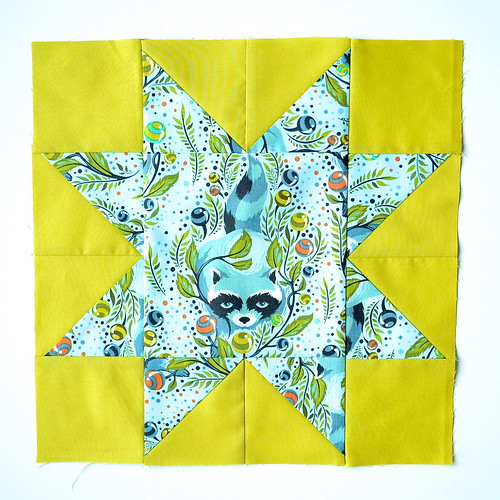
The pattern is super simple and based on a Kaffe Fasset design - just eight pointed stars like this with a border.  I won't be fussy cutting for every block, but I just could not resist featuring the raccoon in this way - isn't he soooo cute?!  I am rather concerned that I won't be able to let this quilt go when it's done...  Also, between this quilt and a couple of others, I have a lot of HSTs to trim, so I bought a couple of Bloc Loc rulers to help.  I haven't done much trimming with them yet, and will do more of a review when I have, but so far I like.

Have you found any new gadgets lately?  I'm not hugely into gadgets, but I'm definitely willing to invest in things that will make the quilting experience better.  A good example is the little wee rotary cutter with a 28mm blade that I bought recently.  I never thought I would need more than one size of rotary cutter, but it is great for all that HST trimming - I feel like the smaller blade gives me much more control.  I'd love to know what makes your quilting experience better.

Linking up with Lee at Freshly Pieced:

WIP Wednesday at Freshly Pieced

Follow on Bloglovin