Friday 31 October 2014

How to pop your seams - a video tutorial

When I first learned to quilt, I made a nine patch quilt.  My mum taught me how to nest the seams in my nine patches, so the points of the squares met nicely, and the block could be pressed really flat.  


I don't have a black and white view on seam pressing - I think pressing seams to the side and pressing seams open are both totally legitimate techniques, and there are times where one is preferable over the other.

This is obviously not a technique I invented, but it's something I find really useful, and I wanted to share the method with you.  I also wanted to suggest that people use it in my patterns, but it's quite hard to explain in writing.  So, I made a video!


As usual, all the filming and editing for this video was done by my sister.  Thanks Jenny!

Anyway, I hope you enjoy the video!  I'd love to know whether this is a technique you were already familiar with, or whether it's new to you.

Follow on Bloglovin

Wednesday 29 October 2014

Introducing Southern Fabric (and a giveaway!)

THANK YOU SO MUCH TO EVERYONE WHO ENTERED! THIS GIVEAWAY IS NOW CLOSED.

Today I'm introducing my newest sponsor, Southern Fabric!


Southern Fabric is an online shop based in Georgia, USA.  They stock a great range of fabrics, mainly with a modern twist, but also some more traditional stuff.


I'm really crushing on this bundle of Utopia by Frances Newcombe at the moment.

Southern Fabric cut their own charm packs and layer cakes, which means you can get your hands on a charm pack or a layer cake of fabrics even where the manufacturer doesn't usually produce charm packs and layer cakes.


This Arizona layer cake caught my eye - what a great way to get a taste of all the fabrics in a line, without breaking the bank!

Southern Fabric is kindly allowing me to give away a $40 gift voucher today.  To enter, simply pop over to their website and follow them on one of their social media channels - then leave a comment here letting me know which one you've chosen.  If you follow my blog, leave a second comment for another entry.

This giveaway is open to everyone (including international participants), but if I can't contact you, you can't win. If you are a no-reply blogger, please leave your email address in the comment. The giveaway will stay open until around 7pm on Sunday 2 November 2014 (New Zealand Time), and I will use the random number generator at random.org to pick a winner then. Good luck everyone!

THANK YOU SO MUCH TO EVERYONE WHO ENTERED! THIS GIVEAWAY IS NOW CLOSED.

Follow on Bloglovin

Tuesday 28 October 2014

Bloggers Quilt Festival - High Tea Quilt

Today I want to share a few more details of my High Tea Quilt.  If you're new to my blog, this is a new pattern that I've just released.  Make sure you pop over to my pattern release post to check out all the different versions made by my wonderful pattern testers.

High Tea Quilt 

My version is made with charm squares from a number of Bonnie and Camille's collections, gathered from the charm swap run by Ms Midge.  I really like the soft colours of Bonnie and Camille's fabric ranges, and I wanted to let the prints shine without too much distraction.  I chose white (Moda Bella White) to add brightness and freshness, and light grey (oops, I hadn't labelled this solid!) to add softness and contrast (but not too much contrast).

High Tea Quilt 

I came up with this design when I was thinking about a modified disappearing nine patch block.  I quickly realised that it would be much more efficient to strip piece the quilt, and came up with the design on that basis.

High Tea Quilt

I couldn't resist taking a photo with these gorgeous copper tea things.  They belonged to my grandparents but live at Mum and Dad's house now.  I have many fond memories of seeing them in my grandparents house when I was little, and playing with a miniature version of them.

This quilt was quilted by Sue Burnett - I'm really grateful to her for turning it around for me in a ridiculously short time frame.  With a fairly traditional layout, and very square piecing, I felt like baptist fans were the perfect way to add some curves to this quilt.

High Tea Quilt

This quilt has passed the most important test - it's Ralph (and Ivy) approved!  I can't wait to wash this quilt and see it crinkle up - I think it will make it even better.

It's that time of the year, when Amy from Amy's Creative Side hosts the Blogger's Quilt Festival.

AmysCreativeSide.com

It's definitely worth clicking through to check out all the other quilts that have been linked up - there's always a wealth of inspiration!

Quilt Stats 
Pattern: High Tea Quilt Pattern designed by me (find it in my Etsy shop and on Craftsy - on sale for only US$4 for another day)
Finished Size: 56" by 69"  
Fabric: Bonnie and Camille charm squares, Moda Bella in White, unknown grey solid
Backing: white on white unknown floral print
Binding: Orange Paisley from Bonnie and Camille's Scrumptious collection
Pieced by: me
Quilted by: Sue Burnett

Follow on Bloglovin

Monday 27 October 2014

High Tea Quilt - pattern release!

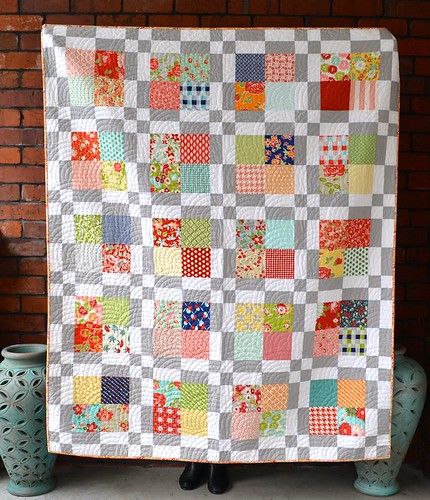
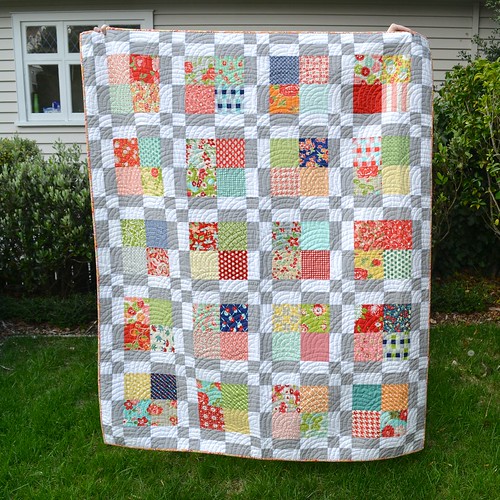
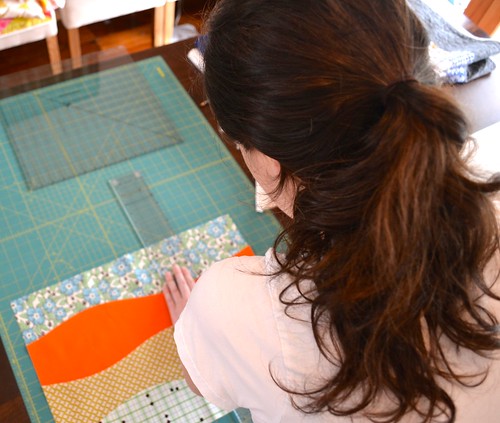
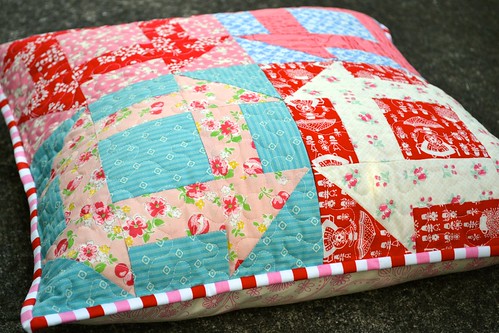
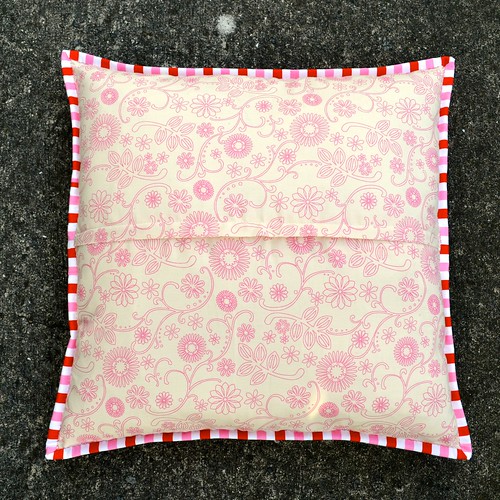
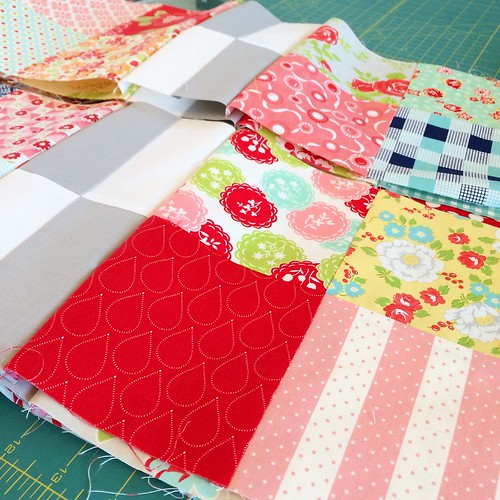
Today, I'm really excited to be releasing my first self-published quilt pattern.  Called High Tea, it's fast to sew up, pre-cut friendly, and in the pattern I've given you all the information you need to make five different size options, from baby to queen size.

High Tea Quilt Pattern

This is my version - my original idea for this quilt came about when I was trying to decide how to use the Bonnie and Camille charms from the charm swap organised by Ms Midge (you should really nip over and check out all the other wonderful quilts made with charms from the swap 
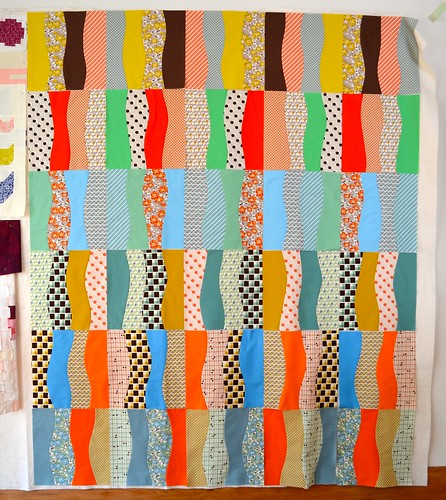
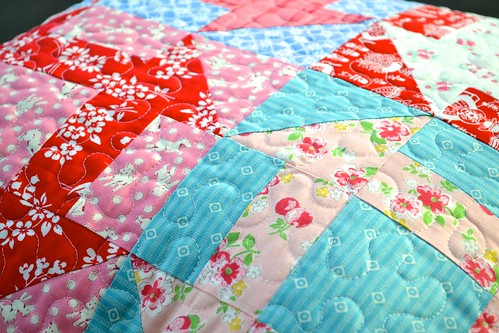
here).  I laid the charms out on my design wall and my sister said they looked like a tea party - and the idea for the High Tea quilt was born!  My version of this quilt was quilted by 
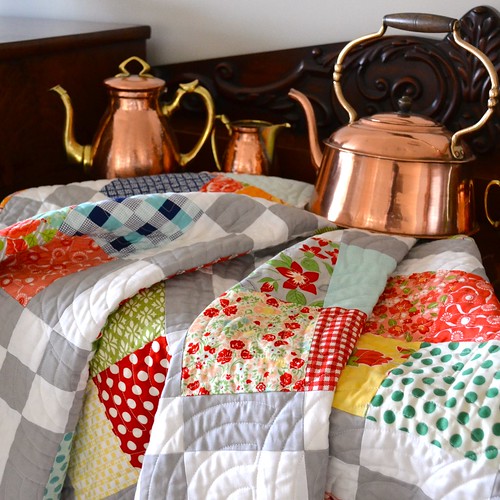
Sue Burnett, and I love how it turned out.  It's both fun and elegant at the same time.  

I'm going to show more pictures of my finished quilt in another post, but right now I just have to show you all the different High Tea Quilts made by my wonderful pattern testers!


First up is this soft and deliciously sweet baby version made by fellow kiwi quilt blogger Rebecca from One Wee Bird (find her on Instagram as @oneweebird).  I love her choice of quilting design as well - it's simple and keeps the quilt looking nice and squishy.  What baby wouldn't want to snuggle with that quilt?!


Next we have this great gender neutral baby version by Jessica.  I really like Jessica made the sashing stand out and the central squares fade into the background a bit more.  You can find Jessica on Instagram as @jmarrizle.


This fun graphic baby version is by Jas (@jasminesews on Instagram).  I think her use of the chevron in the sashing is particularly clever - I never would have thought of it but it works amazingly well.


Speaking of graphic, this knock-out black and white cot version by Amanda (aka @muchoxoxo) is exactly that.  You'll find mucho gorgeousness on Amanda's blog, mucho xoxo.


Shelly (@shellyjennifer) also made the cot version, but went a totally different route!  I think her multi-coloured sashing worked perfectly with those vintage sheets.


The throw size was really popular with my pattern testers! Mary (@maryemmens) created this vision of scrappy rainbow yumminess.  Mary used a couple of different prints for her sashing and it's really changed the look of the quilt in an interesting and delightful way.  Mary sent me lots of lovely photos and you should check them all out on her blog Handmade by Mary Emmens.


Leanne (aka @daisyandjack) made this sweet and pretty version, inspired by the name High Tea and thoughts of scones with cream and jam (I like the way Leanne thinks!).  Find more deliciousness on Leanne's blog, Daisy and Jack.


My long-time bloggy friend Kirsten from Gemini Stitches made this elegant throw size version using What a Gem fabric.  Kirsten (aka @67kirsten) is super speedy and finished the whole quilt - I love being able to show you another option for the quilting design!


Katie (@zipsnipvroom) made this bright and ultra cheerful version.  Katie, did somebody tell you that I love yellow?  Katie has demonstrated the versatility of this pattern by using a mixture of charm squares and layer cake squares to make her quilt top.


You know it's nearly that time of year!  Melissa (@babystepsquilts) does, and she made this very merry Christmas version.


My next pattern tester is Debbie, who blogs at Life in the Doghouse.  Debbie made not one, but two single bed size versions of this quilt, both to donate to children in need.  Awesome work Debbie!  The first one is a really fun and bright boy version, using Zen Chic Barcelona fabric and Moda grunge for the sashing.


This is Debbie's second quilt top, a super pretty girly version, using prints from Jeni Baker's Dreamin Vintage line.  Debbie modified the pattern for this quilt, simplifying the sashing and including a mixture of plain and pieced squares.  The plain squares are for Debbie to show off her long-arm quilting skills, and I cannot wait to see this one finished!


Abby (@colorbarquilts) also made a single bed size version using Moda Grunge for the sashing.  I love that purple and it really sets of the soft colours in the Persimmon layer cake Abby used.  See more of Abby's quilts on her blog, ColorBar Quilts.


Shelley (who blogs at The Carpenter's Daughter Who Quilts) made this really bright and fun batik version.  I'm sure it will provide a nice tropical vibe over the coming winter months in the northern hemisphere.


I have to give a massive shout-out to my pattern testers who took on the largest size option - it is a BIG quilt!  Heather (find her on flickr here) made this very beautiful scrappy rainbow version inspired by her own High Tea experience during Airbourne at Eastbourne last summer.


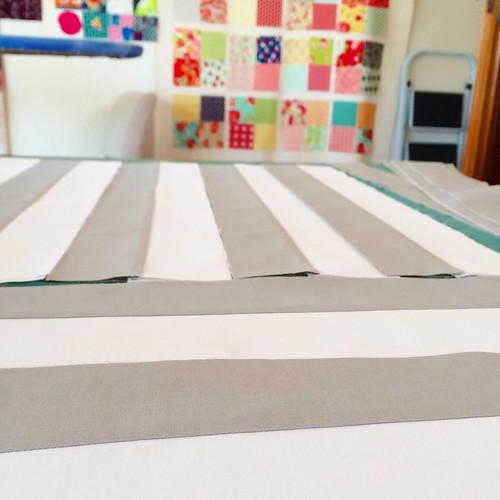
Last but definitely not least, Jeanne from Grey Cat Quilts made this beautiful calm queen sized version using a very restrained colour palette of blue, grey and soft yellow.  Jeanne's quilt is another great example of how this pattern can work for anyone, depending on your fabric choices.

Wow - I hope you've enjoyed seeing all the lovely quilt tops made by my wonderful pattern testers.  I can't thank these ladies enough - I couldn't have done it without them, and I'm really grateful and very moved that they took the time to make these quilt tops and give me lots of great feedback on my pattern.  

I also have to give a big shout-out to Ann Humphrey, who proof-read my pattern for me.  She did a great job and really added value with her suggestions.

You can find the High Tea Quilt pattern on Craftsy and in my Etsy shop.  To celebrate its release, it is on sale for US$4 for the next 48 hours.  After that, it will go back to its normal price of US$8.

If you make your own High Tea Quilt, I'd love to see it!  You can share it in my flickr group or on instagram using the tags #highteaquilt and #onthewindysidequilts.

Follow on Bloglovin

Saturday 25 October 2014

Caturday Wisdom #91

I feel a dark presence... Ralph

These dummies. Adrianne was actually trying to take a photo of Ivy in one of her favourite hiding spots (we had been looking for her again, to make sure we didn't shut her in a room before we went out) but Ralph deemed the shot lacking in Ralphs and made sure he was included. Ivy is like a vampire, it was so hot on the day this photo was taken and she was sitting in the stuffy darkness. Halloween really is Ivy's holiday. 

Friday 24 October 2014

Guest post from my mum: Twenty-three bubbles

Hi everyone - today my mum is guest posting about her latest quilt finish.

Hello I’m Adrianne’s Mum, Lynley. Adrianne asked if I would like to do a guest post about this quilt I recently finished. My response was not hugely enthusiastic, more shrugs and maybes than “of course, I’d love to dear”. I feel like a bit of a fraud writing a post about quilting as I haven’t been doing a lot. but I’ll give it a go.


Most of the fabrics are charm squares from the 2wenty Thre3 range by Eric and Julie Comstock and were bought, on impulse, at the end of an online order.  The impetus to make a quilt was a New Year’s resolution to make use of impulse buys and also to get back into quilting again with some small, simple projects.  The block used is called a Disappearing four-patch.  I probably first saw it on pinterest and then found a video on Missouri Quilts of a quilt being made (this one, I think). The piecing looked fun with enough of a challenge to keep me going.  Once the blocks were made I decided to loosely group the strong yellows and oranges together.


The two borders were added and then, the perennial, vexing question.  How to quilt?  Straight lines and monofilament have been my preferred safe approach, but I was keen to add some curves.  After weeks of sitting folded on the sewing table and periodically spread on the floor and puzzled over, Adrianne suggested quilting concentric circles.  This fitted the bill nicely.

The first circle was marked using an inverted large glass mixing bowl, and then sewn with a walking foot. I continued, in an outwards direction, quilting circles 3/4 inch apart using the walking foot guide. The smallest 3 or 4 circles were marked using a compass and also sewn with the walking foot. The smallest “circle” is rather wonky and is the best I could manage. In the middle is a slightly wonky plus. If I was making this quilt again I would centre the smallest circle around a patterned part of the quilt, not a plain square!


The binding is made from the back of the quilt. To do this, carefully trim the excess batting away and then trim the backing fabric 3/4 inch from the edge of the quilt and fold in half and press. The corners are then folded diagonally and then the rest of the backing, now the binding, is folded over the edge of the quilt. This will create mitred corners and the binding can be hand or machine stitched down (although with either method you will need to stitch up the mitred corners by hand first).


I enjoyed all parts of making this quilt and have a sense of satisfaction with the finished article.

Thanks Mum!  Mum has definitely been overly modest in this post.  She hasn't been quilting a lot lately, but she's really an accomplished quilter and her quilts are always impeccable.  She taught me to sew and all the quilting basics, which I still use today.

Wednesday 22 October 2014

WIP Wednesday

This weekend I started a totally new quilt - I have plenty of other things to be getting on with but couldn't resist.  I've decided to make a series of quilts using improv curves.  I've finished one improv curve quilt so far (I haven't shown it on the blog because it's for an exhibition where the rules require it not to be shown online), so this is the second, and I have ideas for a third quilt and a fourth quilt as well.

Hadley quilt in progress

I bought a bundle of Denyse Schmidt's latest line, Hadley, from Massdrop when they had it on sale.  I've seen quite a few people saying they don't love the inclusion of solids in this collection, but the solids were actually one of the things that sealed the deal for me.

Hadley quilt in progress

This is where my quilt is at so far.  I think I'll rearrange the order of the rows, but I'm liking the kind of crazy vibe.  I have quite a lot of offcuts from these blocks and I'm planning to put them together with some cream yardage to make a double sided quilt.

Have you ever made a series of quilts as a way of exploring a technique or idea?

I'm linking up with Lee at Freshly Pieced:

WIP Wednesday at Freshly Pieced

Follow on Bloglovin

Saturday 18 October 2014

Caturday Wisdom #90

It's amazing what a difference a small change of perspective makes: I so cute! Look at fluffy tum!
 
I a scary bat! I chase you! Ralph
 
Ralph is getting ready for Halloween. Like many among us, he likes any 'least possible effort' costume so he may spend the day lying upside down looking like a hairy Dracula.
It's coming round to summer, we've had a few tastes in the last couple of weeks, and at this time of year the cats become like puddles on the floor. They expand and become almost impossible to pick up but they also can't be bothered avoiding you so you get all the cuddles!

Friday 17 October 2014

Pink, red and blue cushion

A few weeks ago I shared a quilt I was working on.  The quilt is finished now, but I'm keeping it under wraps until I'm ready to hand it over to the recipient.

Pink, red and blue cushion 

When I was making the quilt, I made four extra blocks.  Making more blocks than is strictly necessary for a quilt is a technique I like to ensure a good balance across the quilt.  It can be easier to make extra blocks up front, rather than feeling like you're finished with the quilt top and then having to make more.

Pink, red and blue cushion 

I may also have had a cushion made from the extra blocks in mind as well!

Pink, red and blue cushion 

I'm pleased with this cushion.  Without the sashing and the border fabric, it's quite different to the quilt, but similar as well.  The quilt is straight line quilted, but I decided to stipple this one.  I like the contrast of the curvy quilting against the angles and straight lines of the churn dash blocks.

Pink, red and blue cushion 

Sometimes I buy fabric and it sits in my stash I start wondering whether it was a good purchase.  The binding is one of those fabrics - I bought it with binding in mind (hello, stripes) and then it sat in my stash for quite a while.  When I pulled the fabrics for this quilt, I realised it was the perfect binding for this quilt, and this cushion.  I'm going to have more faith in my fabric buying abilities from now on.

I used my covered zip cushion back tutorial for the back.  It's been a while so I had to refer back to my tutorial for a couple of the steps.

Pink, red and blue cushion

I'm tempted to keep this cushion to add to the growing pile on my couch, but I think it probably belongs with the pink, red and blue quilt that spawned it.

Anyone else like to make extra blocks for their quilts, with or without cushions in mind?

I'll be linking this finish up with crazy mom quilts.

Follow on Bloglovin

Wednesday 15 October 2014

WIP Wednesday

I feel like I haven't been writing many work in progress posts lately.  I like writing about the process behind my quilts, and I feel like doing so avoids the impression that my quilts somehow just materialise out of thin air (believe me, it's not the case!).

High Tea Quilt in progress 

After my call for pattern testers last week, I thought I'd better get on with making my own version of the quilt (which I'm calling the High Tea Quilt) during the weekend.  In the end I managed to whip up the throw size by sewing rather maniacally over the course of Sunday.

High Tea Quilt in progress

I dropped the quilt top off at Sue Burnett's just before closing time on Sunday, and I ordered fabric for binding on Monday which should arrive today.  I'm really excited to have a finished quilt to show you by the time I release the pattern in a couple of weeks.  I'm also very excited about the amazing versions that are coming through from my pattern testers already.

I'm linking up with Lee at Freshly Pieced:

WIP Wednesday at Freshly Pieced

Follow on Bloglovin