Showing posts with label free motion quilting. Show all posts

Monday, 9 May 2016

Garden for Birds - Rainbow version

Hello!  After a bit of a hiatus, I'm back!  I'm hoping to start posting with more regularity again, but, we'll see...

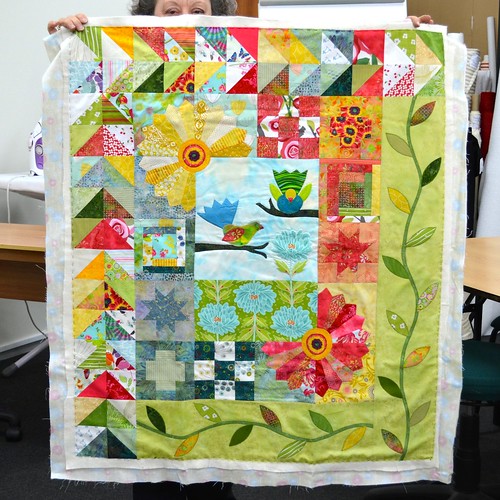
Anyway, this quilt has been finished for a while, but I haven't previously found the motivation to post about it.  It's the third quilt I've made from this pattern (my own).  This is the original Garden for Birds Quilt and this is the Garden for Birds Quilt 2.

I made this one over the course of last year as I taught this quilt pattern for the second time.  It was nice to sew along with my students (although all my stitching was done outside class time, of course).
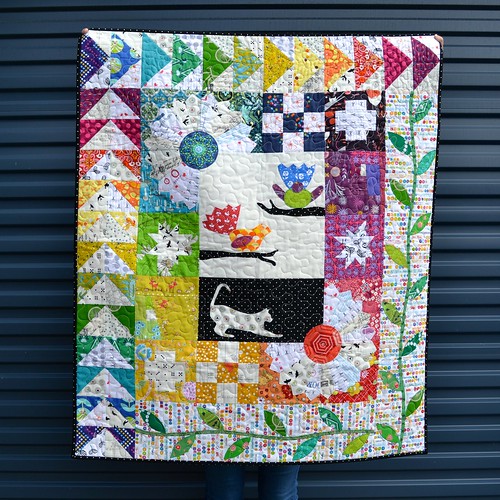
Garden for Birds 3 

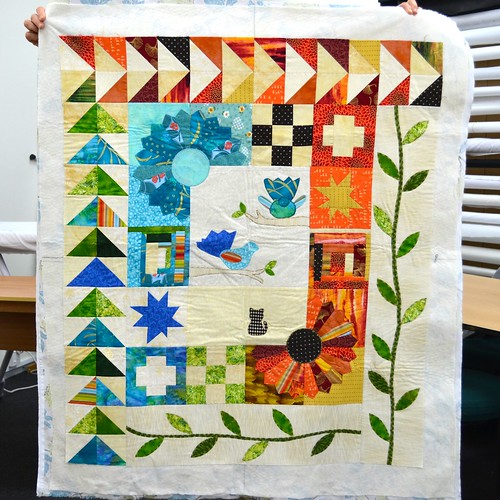
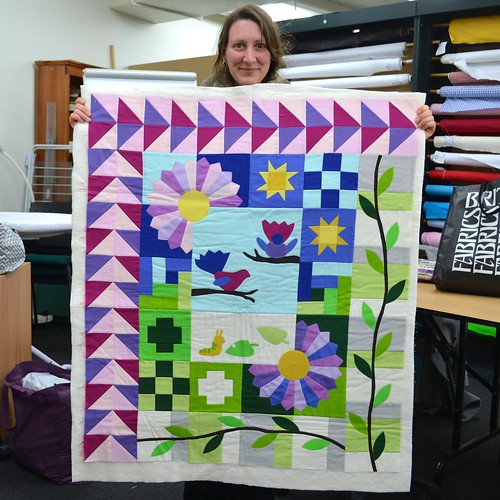
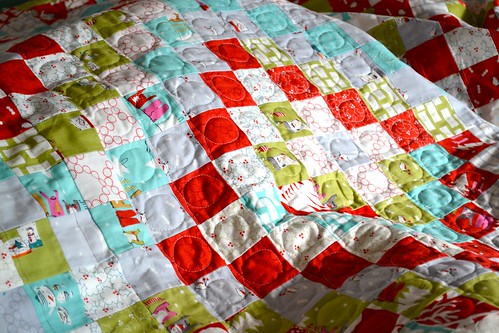
This time I went back to something slightly more along the line of my original quilt, with rainbow colours and a low volume background.  A little black sneaked in as well, since I was going high contrast with this quilt.

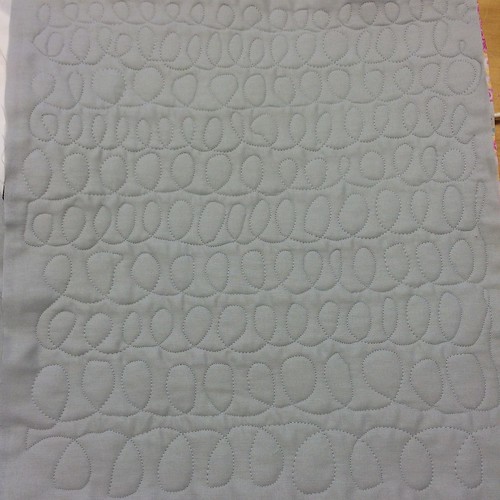
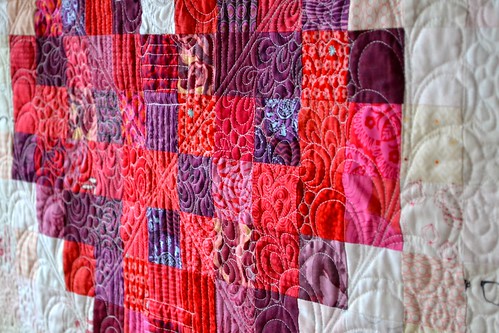
Simple quilting seemed to be the way to go, so I quilted a large scale meander design over the whole quilt, choosing Aurifil in my favourite colour, 2021.  To make the quilting stand out a little more, I went with a 40 weight thread instead of my usual 50 weight thread - its still subtle but just that bit heavier.
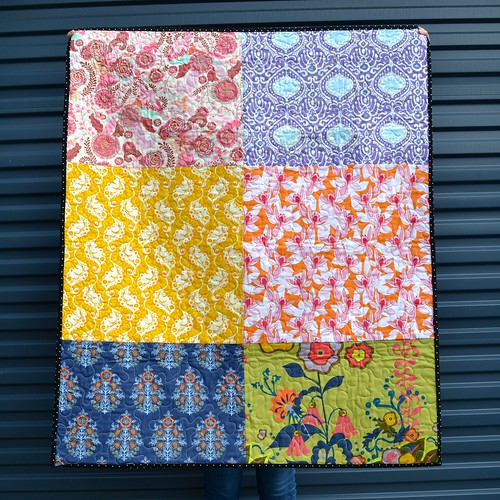
Garden for Birds 3

My stash is pretty out of control, so I have been trying to make quilt backs from fabrics in my stash rather than buying yardage for quilt backs.  Sticking with the rainbow theme, I used a selection of cheerful prints for the back of this quilt, which I rather like.

I'm about to start teaching this class again for the third time.  Every year, my students come up with fabulous and different interpretations of the pattern - I'm excited to see this year's batch of quilts!

Wednesday, 4 November 2015

Adventures in teaching - part two

Ok, on with the rest of the classes I taught this year.

Class photos 2015 

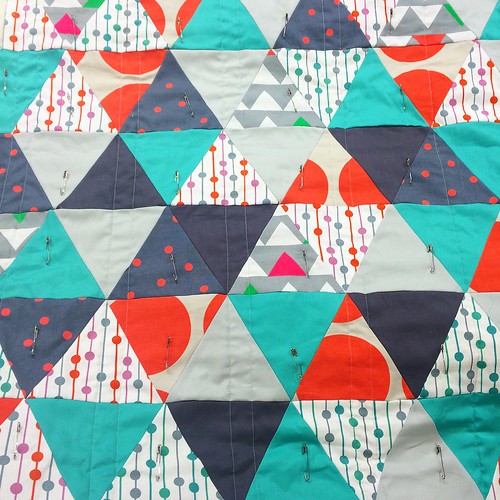
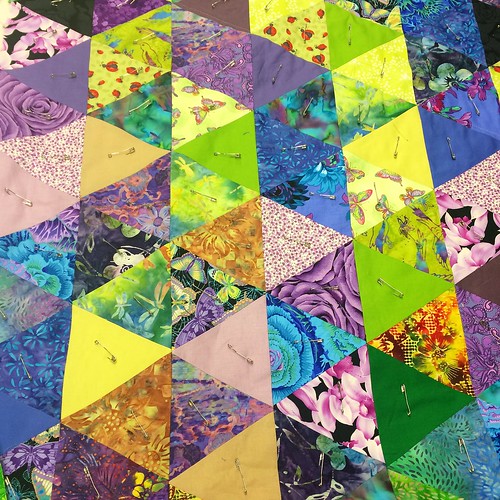
These equilateral triangle quilts are from the equilateral triangle quilt class I taught at Stitchbird.

Class photos 2015 

This is yet another class I taught twice this year, once at Stitchbird and once at Nancy's Stitch Studio.  Unfortunately, I only have photos from the Stitchbird class, but they were both great fun and my students did an amazing job.

Class photos 2015 

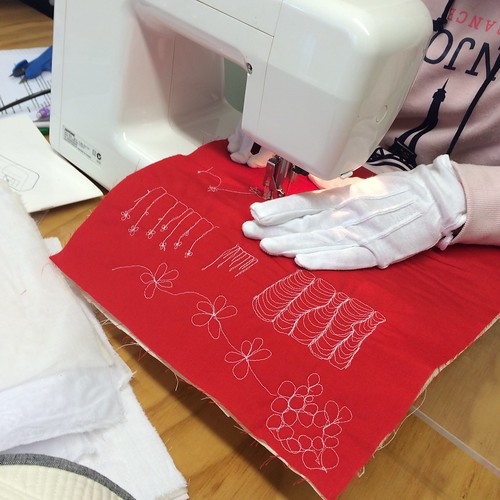
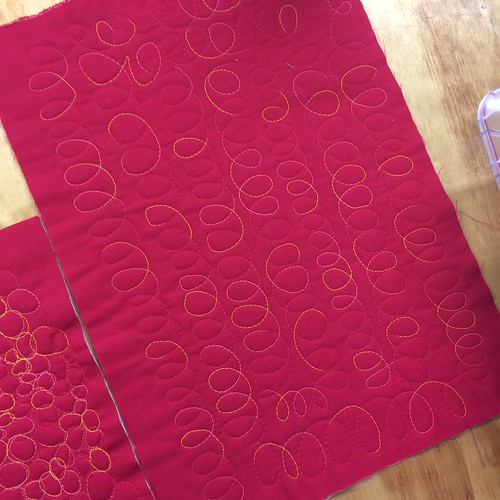
The next few photos are from the free motion quilting class I taught at Stitchbird.  This was a two hour technique class, and so much fun.

Untitled 

I think free motion quilting is one of those things that is really nice to learn in person.  It's truly not that difficult, but having a little bit of encouragement and someone to make suggestions can make all the difference.

Untitled 

My students did amazingly well in this class, busting out a few of my favourite designs and then moving on to coming up with their own.  Awesome!

Untitled 

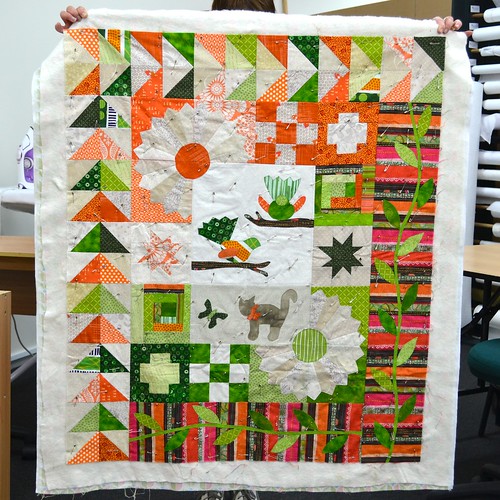
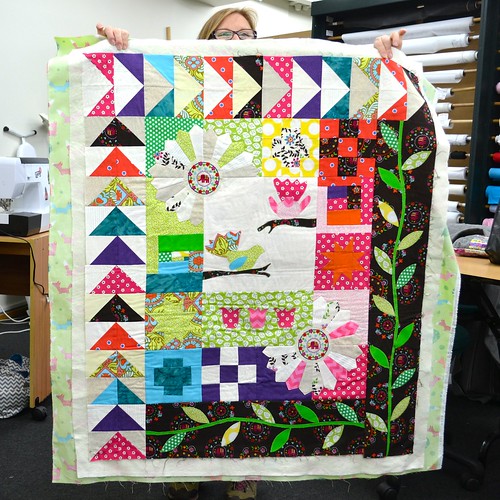
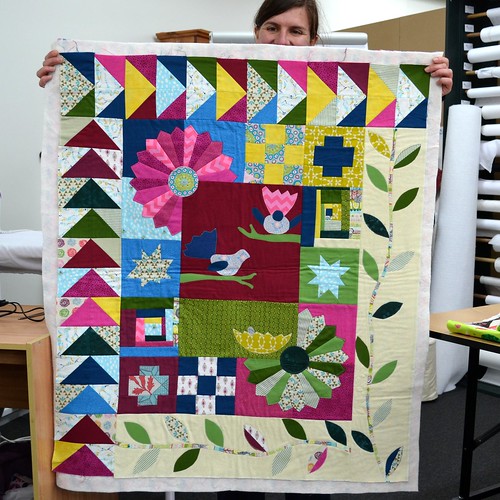
Last, but certainly not least, is my Garden for Birds class.  This one runs over six lessons, and is a form of sampler quilt, with students tackling a variety of blocks, piecing and applique. 

Garden for Birds Class Quilts 

This class is always a blast to teach, because the quilts people produce are always so different from one another.

Garden for Birds Class Quilts 

A few cats crept into these quilts, as well as other more creepy crawly creatures...

Garden for Birds Class Quilts 

I would not have thought of doing an all solids version of this quilt, but I love how graphic and modern it turned out!

Garden for Birds Class Quilts 

Another cat!  And I love this warm autumnal colour scheme!

Garden for Birds Class Quilts 

The quilt above was made for its maker's third baby, who I'm sure will love it!  A couple of people in this class (and in other classes) had only just started sewing.  I love seeing people's confidence grow as they get to grips with sewing, and I'm always delighted when I get to the end of a class and know that people are converts to quilting!  

Garden for Birds Class Quilts

In this class, everyone started quilting their quilt by the last class, which I really strive for.  I always think it's nice, especially with a first quilt, to at least start the quilting in class.

So, that was my year of teaching.  It was pretty busy (not least because I was flat out at work at the same time), but so enjoyable.  Do you have any questions about teaching patchwork and quilting?

Follow

Friday, 27 March 2015

Atria (a finished quilt)

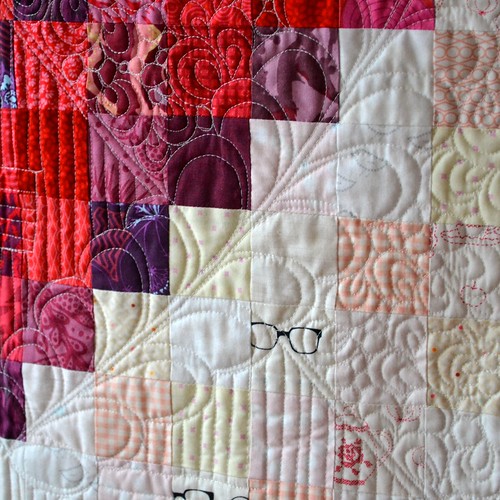
This weekend I finished up this pixelated heart quilt which I started rather a long time ago.  The quilt top was made using Jolene's pixelated heart quilt tutorial, using 2.5" squares.  I've been waiting to quilt it for a long time.  I wanted to quilt feathers on this quilt, but I hadn't really quilted feathers before and I was nervous.

Atria

Even though it wasn't really meant to be included in Krista Withers' compositional quilting class, Krista taught us how to quilt feathers.  Feathers are notoriously tricky but Krista shared a technique for making them easier.

Atria

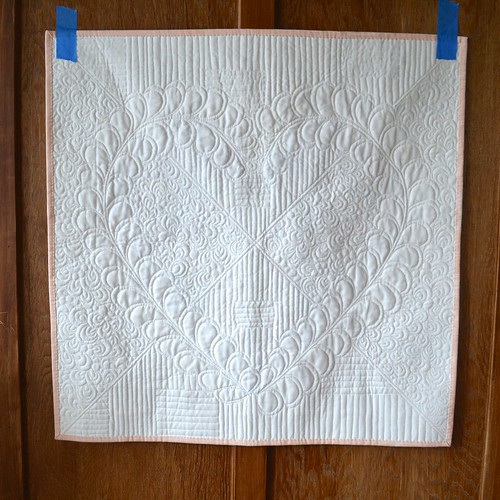
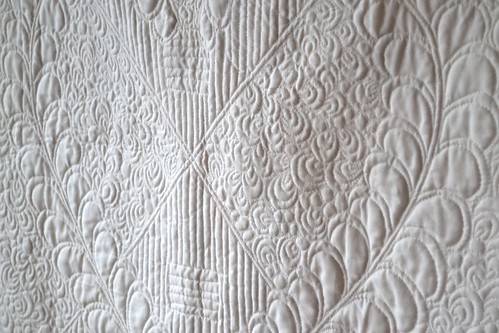
Anyway, I did this quilting on my Juki, mostly free motion, but also using my walking foot a little bit (for the stems of the feathers and the straight diagonal lines).  After I quilted the feathers, I added in the straight lines to divide up the space (one of the key concepts from Krista's class was dividing the space into different segments and using different quilting designs to fill them).  I then filled in the unquilted spaces using two different motifs - paisley with bubbles and straight(ish) lines.

Atria 

I really had to throw a solid fabric on the back of this quilt.  Nothing else shows up detailed quilting as well as a solid!

Atria 

I will pop a label on this quilt and then I really want to send it through the washing machine and see how it changes after washing.  At QuiltCon, I got to touch a couple of quilts that Leanne (shecanquilt) had quilted very densely and then washed a couple of times.  They were so much softer than I expected!  The paisley / bubble quilting is pretty dense so I think this quilt could use some softening up.

Atria

I am pretty thrilled with how this quilt came out.  I'm really inspired to keep working on my free motion quilting.  It's all about the practice!

Have you been working on your free motion quilting skills lately?

2015 FAL at On the Windy Side

This quilt was definitely on my Q1 list for the 2015 FAL!  See you very soon for the Q1 finishes linky!

Follow on Bloglovin

Monday, 9 March 2015

Tough Titties (a quilt)

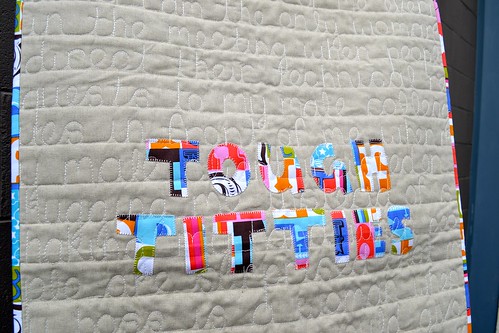
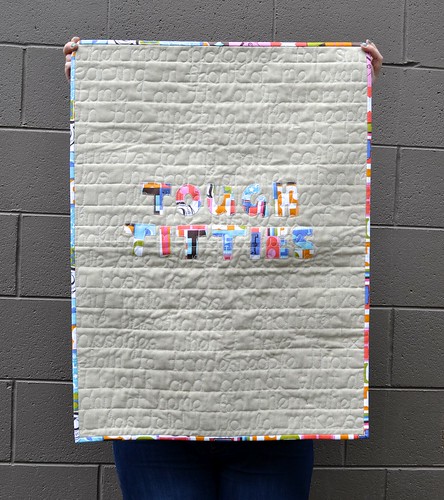
I entered three quilts in QuiltCon, and I was really stoked that one was juried into the QuiltCon exhibition.  I hadn't share the quilt online previously, because I originally made it (together with my sister) for the New Zealand quilting symposium, which required that it not have been published before.  It was one of a very few quilts which were rejected from Symposium, which meant I was a bit surprised when it was accepted into QuiltCon (which was MUCH more selective in terms of quilts entered compared to quilts accepted). 

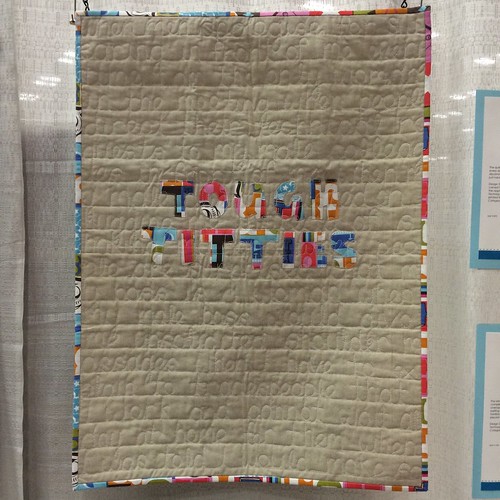
Tough Titties by Adrianne Reid (Wellington, New Zealand)

This is my quilt hanging in the QuiltCon show.  It seems right to be sharing it on what will still be International Women's Day for many people, since it's a quilt with a feminist bent.

Tough Titties

I have to confess that I'm a little bit nervous about sharing this quilt here.  I try to keep the blog a nice happy place for sharing quilts and quilting techniques.  However, quilts are one of the ways I express myself, and this quilt reflects my thoughts from a time when I was thinking a lot about feminism (something I think about more or less depending on what is happening in my life and in the news).

Tough Titties

This is the description I gave for this quilt when I entered it in QuiltCon:

The quilting on this quilt recounts anecdotes of subtle but infuriating instances of every day sexism.  
"Tough Titties" is a reference to the way this kind of discrimination is often dismissed and women are made to feel that they should just harden up and get over it.  Don't miss the hand printed fabric on the back!

This quilt is a collaboration between me and my sister (who is not a quilter, but who is a feminist).  She carved a stamp (out of a potato, no less) and used it to stamp the fabric used for the backing of the quilt.  I did the appliqué and the quilting, and most of the binding (but I did insist that my sister hand-stitch one side of the binding so that she had a hand in the construction of the quilt).  The words on the quilt come from experiences we've had, and a couple of anecdotes contributed by friends.

Tough Titties

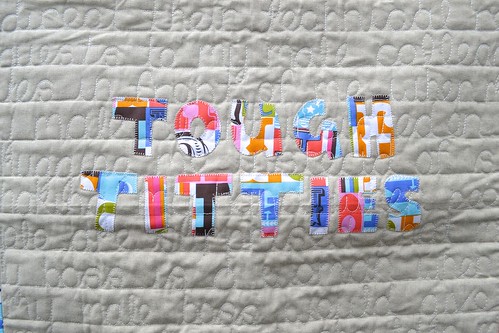
In construction, this quilt is pretty simple.  I appliquéd the words "Tough Titties" to a plain linen background, using the blanket stitch on my sewing machine.  I traced the capitalised letters from my own handwriting, because I felt a bit funny about using someone else's font for this quilt.

The quilting was done free-hand.  I experimented with marking the letters on fabric and then quilting over the marked lines, but found that I was happier with the result when I just stitched freehand.  I did mark some lines using my hera marker so that my writing didn't slope all over the place.  I used a heavier than normal thread, 28 weight Aurifil in my favourite colour 2021, on the front of the quilt, and my usual Aurifil 50 weight 2021 on the back.  I kept the thread colour quite similar to the fabric I was quilting on, so that people would have to get close to the quilt to read the words.

Tough Titties

One of the cool things about showing at QuiltCon is that you get feedback from the judges.  I was really pleased with the feedback on Tough Titties - the judges commented favourably on the craftsmanship of the quilt and suggested that the collaboration could be enhanced by creating a custom fabric for the appliqué as well as for the backing.  I think that's a great idea and I'm going to try it with the next similar quilt I make.  I definitely want to repeat the technique of quilting words on a quilt.  In a happy turn of events, I didn't bring Tough Titties home with me from QuiltCon.  It now lives with Gillian, and she apparently is going to hang it in her office which I think is seriously awesome.

So yeah, that's the quilt I had in the QuiltCon exhibition.  It didn't win any prizes, but it was a thrill just to have a quilt in the show.  It's pretty different from many of my other quilts, and I guess one of the things I've taken away from QuiltCon is that I'm still happy making a variety of quilts in different styles depending on what suits my mood at the time.

Follow on Bloglovin

Wednesday, 3 December 2014

WIP Wednesday

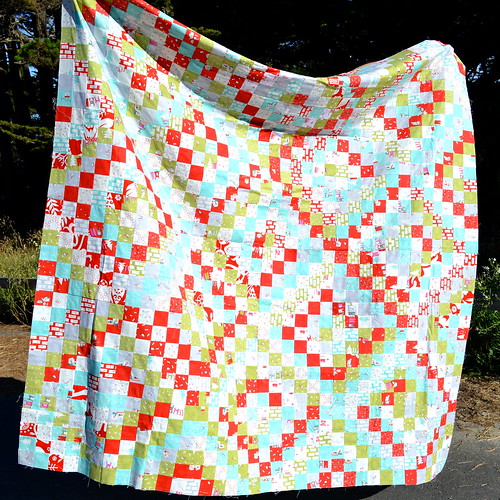
Wayyyy back last year, I started a scrappy trip-along quilt using Aneela Hoey's Christmas collection, Cherry Christmas.

Cherry Christmas Scrappy Tripalong

My plans to have it done for last Christmas didn't come off, but I finished the top early this year.  A couple of months ago, I made the back and then had the quilt thread basted by Sue Burnett - it's so much easier to handle a big quilt like this without the weight of all those pins in it!

Cherry Christmas quilting in progress

After quilting my Christmas Leftovers quilt (made from the leftovers from making this quilt, and, ironically, finished over a year before...), I knew I wanted to free motion loops on this quilt as well.

Cherry Christmas quilting in progress

This weekend I made a start and I love the way the quilting is looking so far.  Hopefully I'll have a finish to share with you soon!

Are you working on any Christmas makes at the moment?

I'm linking up with Lee at Freshly Pieced:

WIP Wednesday at Freshly Pieced

Follow on Bloglovin

Friday, 18 July 2014

I See Fire Quilt

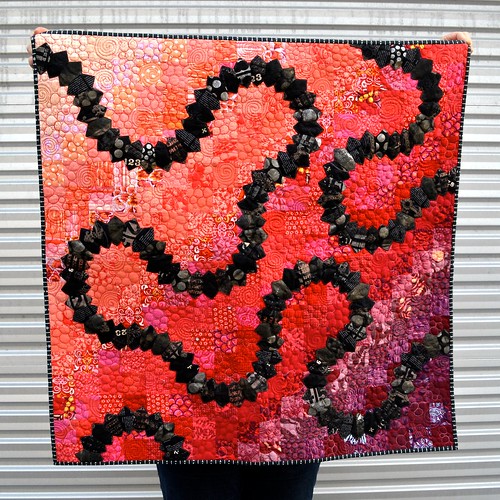
For our local guild exhibition, we set a challenge based around the dresden plate block.  The idea was to make a small (36" square or smaller) quilt using one or more dresden plates, but to put your own twist on the block.

This quilt was my entry.  As you might be able to tell from the name, it was inspired by this Ed Sheeran song.  I wanted to create a fiery lava like background with dark swirling bits.  This quilt was a long time in the making - I started back in April, although I was plotting it for a while before that.

I See Fire Quilt 

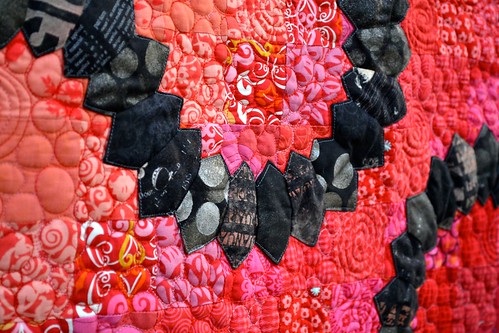
The background is made up of 2" finished squares cut from my stash of peach/red/purple fabrics - a combination I've had pulled for more than 2 years.  The dresden pieces are made from a variety of fabrics, but mostly from a bundle of black based fabrics from Distressed Threads.  The added a heap of interest and variety to these little pieces (and yes, all those dresden blades were a huge pain in the neck to make!).

I See Fire Quilt

 I joined all the dresden blades together in groups of five (quarter circles), and then joined them in a slightly random meandering pattern.  I stitched all the dresden blades in place using a straight stitch.  Once the top was finished, I straight line quilted around all the dresdens, and then quilted swirls and pebbles in the background.  I used two layers of batting to make the quilting really stand out, which worked quite well.

I See Fire Quilt

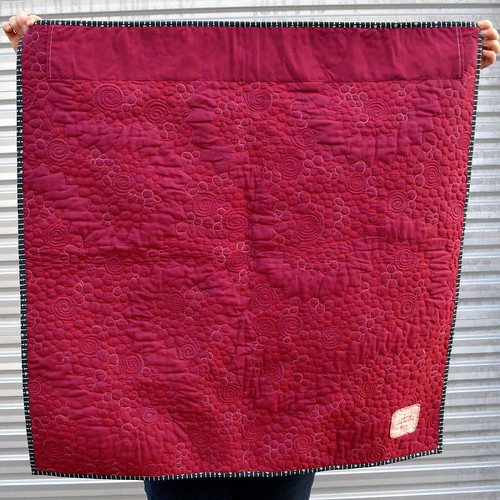
Because the top is quite busy and all that quilting can get a bit lost, I wanted to use something solid on the back.  You definitely get a better look at the quilting, and you can also tell that I used a red and light pink variegated thread.

I was really happy with this finished quilt - it was definitely quite a jump out of my comfort zone and is probably the closest I've come to making an art quilt (although it's definitely still very abstract!).  I'm even more happy now because it won a merit award in its category at the show!  My Garden for Birds 2 quilt won two merit awards as well - one in its category of small bed quilt made by one person, and one as a quilt by a first time entrant.  A pretty good haul of ribbons from my first ever exhibition, I reckon!

Quilt Stats
Pattern: original design
Finished Size: approx 34" square
Fabric: many
Backing: Oakshott shot cotton
Binding: Skull Stripe, from Dem Bones by Sarah Watson for Cloud 9 Fabrics
Pieced and quilted by: me

I'll be linking up with finish it up friday at crazy mom quilts.

Follow on Bloglovin

Monday, 28 April 2014

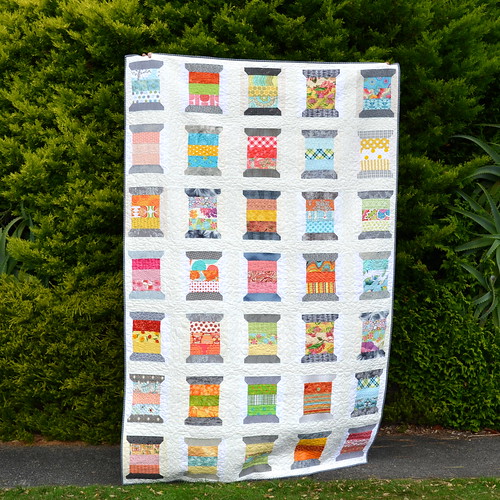
Spools Quilt (quilting on my new Juki and Swiftquilter)

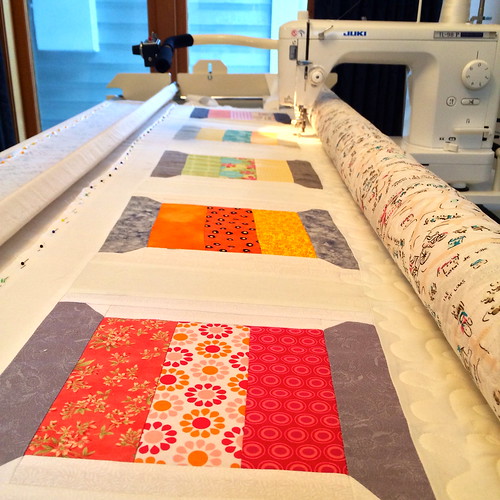
Before Easter I ordered a new Juki TL98-P and Swiftquilter quilting frame from Sew Frisco.  Everything arrived in Wellington safe and sound, and with the help of friends and family, I spent Good Friday rearranging my spare room and setting up the frame and machine.

Juki and Swiftquilter

This is the machine on the frame before a quilt is loaded, and below is when I was nearly finished quilting the spools quilt.

Spools Quilt 

I am planning a proper blog post introducing the Juki and the Swiftquilter, but at the moment I am happy to say that I'm really really loving the whole set-up.  It's even better than I expected it to be, and that doesn't happen often!

Spools Quilt 

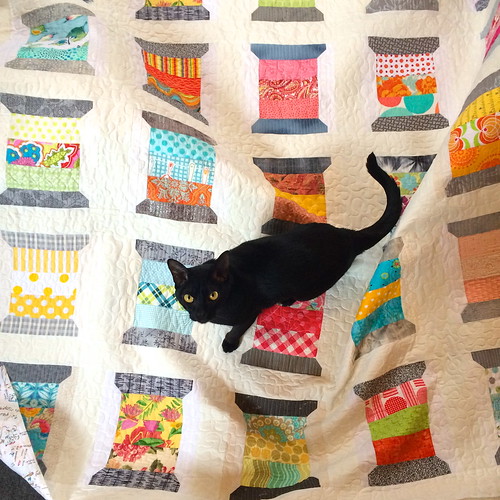
Once I had my set-up sorted, I made a practice quilt sandwich and quilted lots of designs on a plain fabric background.  That was fun, but then I needed something else to quilt.  My friend Anne came to the rescue and gave me a few things to play with, including this spools quilt.  It was a block of the month at our local guild which Anne won and then assembled into a quilt top.  She even had the back all made and ready to go!

Spools Quilt 

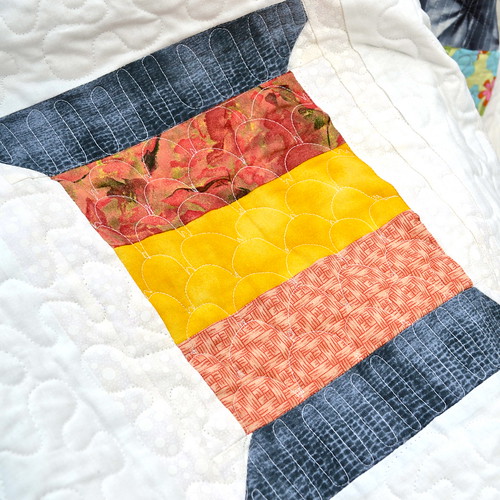
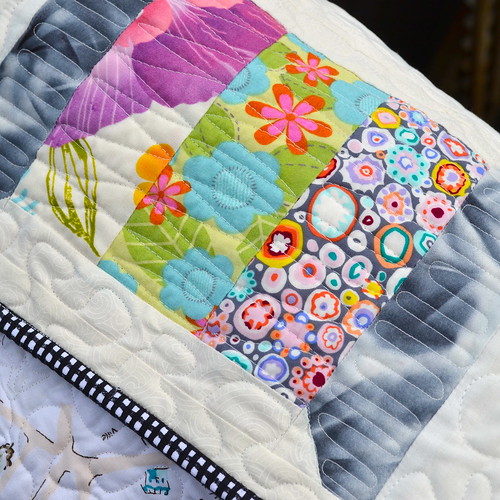
Anne let me have free reign on the quilting, so I decided to take the opportunity to try out lots of different designs - one for each spool, in fact.  I quilted all the spool ends the same, with a back and forth wiggle, and did a fairly large scale meander in the background.

Spools Quilt 

This quilt will be given away to charity eventually - once I get over the attachment I formed while quilting it!  A nice simple black and white check binding ties all the colours of the quilt top together nicely.

Spools Quilt

So while I'm planning my post all about the Juki and the Swiftquilter, I'd love to know what you would like to know.  Fire your questions at me - I can't promise that I'll answer every single one, but I'll try to cover the bulk of them.

Quilt Stats
Finished Size: approx 50" by 80"
Fabric: lots and lots of different fabrics
Backing: Dear Stella Paris Map fabric
Binding: unknown black and white check
Pieced by: Anne aka Elmosmate
Quilted by: me on my Juki/Swiftquilter rig

I'll be linking up with finish it up friday at crazy mom quilts.

Thanks so much to everyone who entered the giveaway from Fabricworm!  I'm delighted to announce that comment number 9 was picked and I'll be in touch with the lucky winner very shortly!


Follow on Bloglovin

Thursday, 19 December 2013

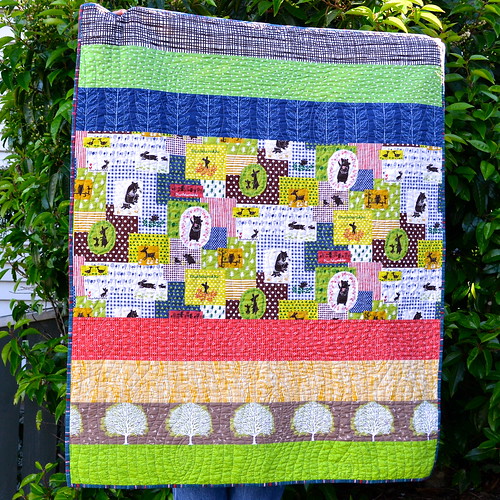
If you go down to the woods today (a baby quilt)

A colleague of mine is expecting his first child soon.  He and his wife haven't found out the baby's gender, so something suitable for a boy or a girl was called for.

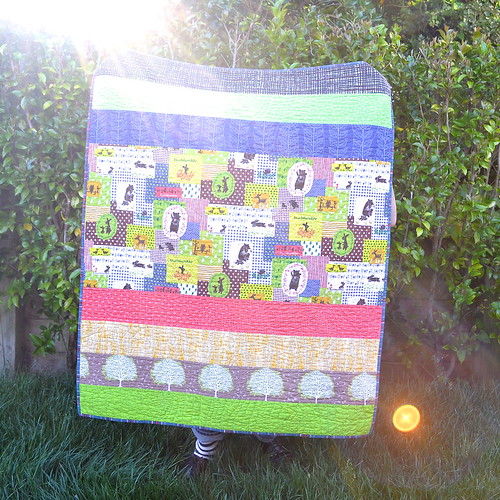
If you go down to the woods today quilt 

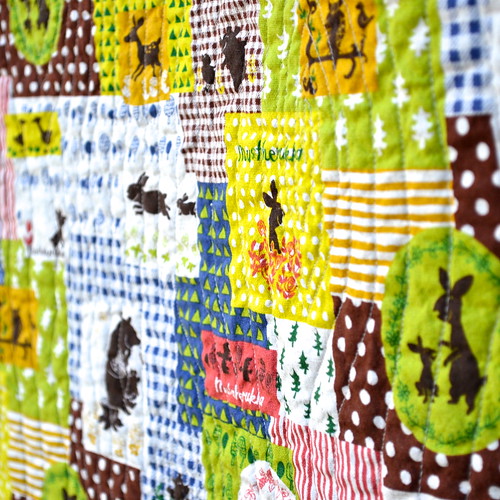
The top of this baby quilt is possibly the quickest quilt top I've ever made (mainly because it is made up of only eight pieces of fabric!).  I really wanted to use the awesome Kokka cheater print featuring bears and bunnies and other woodland creatures - preferably without cutting it up too much.  Apart from just liking it as a big piece, it is also a slightly heavier linen/cotton blend, and I didn't want too many seams which might end up being bulky.  

If you go down to the woods today quilt 

Really, how cute is this fabric?  I haven't seen it around too much, but Stitchbird has it in another colour way.

If you go down to the woods today quilt 

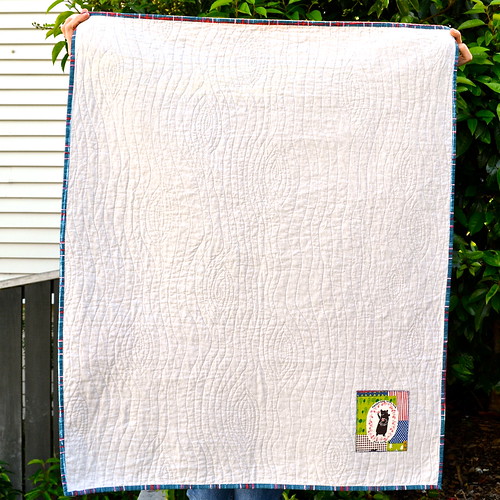
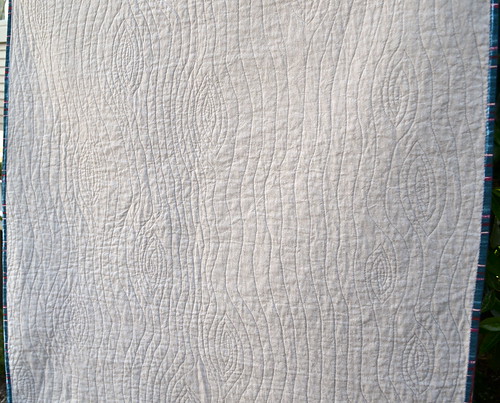
Since the top was so simple, I decided to do something a little bit special for the quilting - woodgrain!  I learned this technique in Angela Walters' Craftsy class, and have been wanting to try it ever since.  It's not the easiest design to do on a domestic machine though, because you need to move the quilt around a lot, rather than working on a small area at a time.

If you go down to the woods today quilt 

That said, I am really pleased with how the woodgrain quilting came out, and it was easier than I thought it would be.

If you go down to the woods today quilt 

I had a little bit of the feature fabric left over, so I used it to make a label.  Sometimes simple is best.

By the way, these photos are taken after the quilt was washed and dried (on the line, not in a dryer).  I didn't pre-wash any of the fabrics (including the linen blends used on both the front and the back) and the quilt crinkled up just the right amount (phew!).  I did give it a light press to get out the crease from hanging, but that didn't take the crinkle out (and nor would I want it to!).

If you go down to the woods today quilt

I took these photos around 6pm - you can see that it is well and truly still light, but the sun was starting to go down, and in trying to get a nice tree-filled background for my shot I ended up capturing the sunlight instead.

I'm thinking this kind quilt might be my new go-to baby gift for when I don't have a lot of time.  You only need a half yard of your feature fabric and then a few co-ordinating fabrics, and it's so speedy to put together.  I did mine all from stash, and even if you don't have an insaneextensive stash like me, I bet you could too!  It's so simple that it almost doesn't need instructions, but would anyone be interested in a tutorial on how I put mine together?
 
Quilt Stats
Finished Size: approx 36" by 45"
Fabric: various
Binding: Skinny Plaid in Blue from Laura Gunn's Cosmos collection
Pieced and quilted by: me

Linking up with finish it up friday at crazy mom quilts and Sew Cute Tuesday at Blossom Heart Quilts.