Saturday 25 July 2015

Caturday Wisdom #130

 Look, don't touch. Ivy
 
 Ivy seems to really enjoy having one arm hang down. She likes to lie above the fireplace in this exact pose. Sometimes I try to hold hands with her but she only lets me when she's reeeeeeallly heat-drunk, otherwise she just shakes me off haughtily.

Monday 20 July 2015

2015 Finish-Along Q2 Winners!

Well done to everyone who entered a finish for Q2 of the 2015 Finish-Along.  My wonderful team of cheerleaders and I have visited all the links and we were so impressed with what everyone accomplished.

Without further ado, here are the winners for Q2:


The winner of the $30 gift voucher from Rachael from imagine gnats is Lucy from Charm About You with this sweet tea cosy.


The winner of 3 patterns of her choice from Sara from Sew Sweetness is Jen with this cute baby quilt.


The winner of 3 patterns of her choice from Sew Bittersweet Designs is Indigo with this fun paper pieced mini.


The winner of a $25 gift voucher from Becca from sew me a song is Mina from Kinda Quilty with this gorgeous mini.


The winner of a $25 gift voucher from Green Fairy Quilts is Carol from Carol Quilts Sometimes with this great baby quilt.


The winner of a $30 gift voucher from Mad About Patchwork is Teresa from Aurea's Kitchen with this adorable giraffe


The winner of 3 patterns of her choice from Juliet from Tartankiwi is Ella from throw a wrench in the works with this scrappy scrap monster quilt.

Scrap monster 2


The winner of a pattern from Alyce from Blossom Heart Quilts is Marie with a beautiful star quilt (privacy settings mean I can't share the image here).


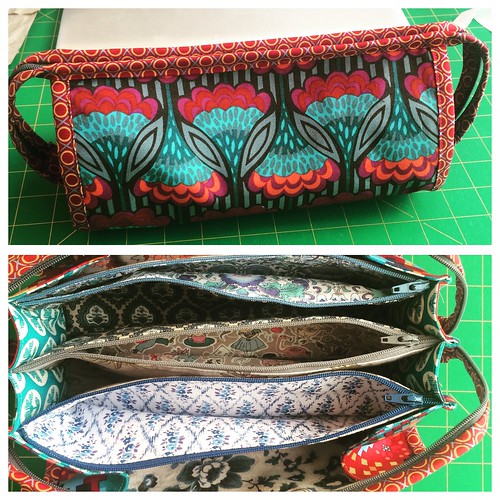
The winners of a copy of the current issue of Make Modern are Anne with this amazing sew together bag

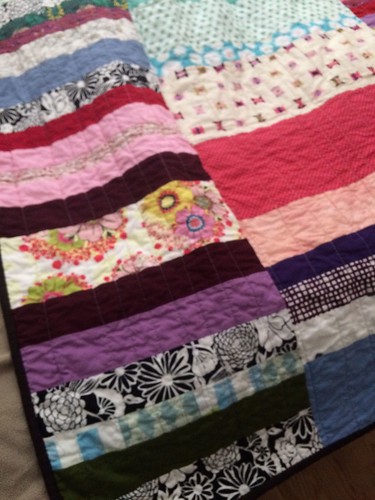
Finish along projects quarter 2

and Iris with this fabulous elephant pillow.


On the Windy Side

And the winner of my high tea pattern is Jennie from Porch Swing Quilts with this  fun zebra pillow.


All the winners were drawn using the random number generate at random.org. Congratulations to all the winners - I'm in the process of sending out emails to hook you up with your prizes so you should be hearing from me very soon!

Saturday 18 July 2015

Caturday Wisdom #129

Eat all your dinner and eventually you'll be big enough to eat anyone who does this to you. Mojo

I got to visit the famous Mojo a couple of weeks ago and got a picture with him, even though he was reluctant to show his lovely face. He is a gentle giant, although not if you're a local bird but I will follow up on that in a few weeks...
Happy weekend!

Saturday 11 July 2015

Caturday Wisdom #128

  
 There's no such thing as normal. Ivy
 
These cats have such funny little personalities.
Ralph is a ridiculous but affectionate sook who is happiest getting belly rubs or sleeping on your lap/chest/head. He's always begging (pitifully) for food or to be let into the 'forbidden room' (my bedroom, off limits except on special occasions) but he will happily tell Ivy where to go if he wants her spot. If you ignore him for too long when you get home he will literally jump into your arms, even if you're not looking.
His top three favourite things are tuna, sunshine and pats.
 
They are both small cats but Ivy is the smaller.  She doesn't usually like being held but is happy curled up on your lap as long as you don't move a muscle. She loves a chin scratch and does very loud grunty purrs when she gets them. She's a special kind of nuts, she regularly does what I would describe as very loud crowing when you're not looking. However, if you stick your head around the corner and see her she will go back to normal meowing like it wasn't even her. She is the braver one and has chased TWO cats (both bigger than her) off the property when she's been let outside on a sunny day, even though they're indoor cats.
Her top three favourite things are being up high, investigating things and eating plants.
 
Even though Ivy always sniffs Ralph's butt and he doesn't like it, they're still best little buds.

Friday 10 July 2015

Registrations for Lizzy House's Meadow class in Wellington, New Zealand, now open!

THE CLASS IS NOW FULL BUT I WILL STILL TAKE NAMES FOR THE WAIT LIST.

I am super excited to announce that Lizzy House is coming to New Zealand (as part of a larger trip that takes place in Australia as well).  If you're not already familiar with Lizzy House, she is a fabric designer, print maker, pattern writer and creative soul.  You can check out some of her fabric collections for Andover here.


Bec (who blogs at Skyberries Handmade) and  I have been working with Lizzy to plan her trip to Australia and New Zealand in September and October 2015.


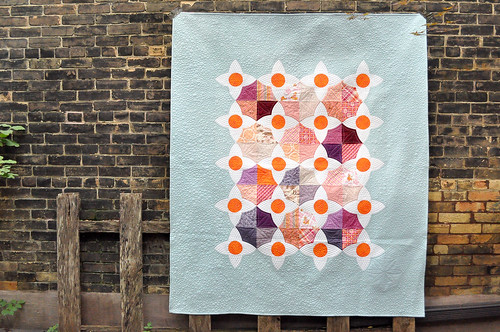
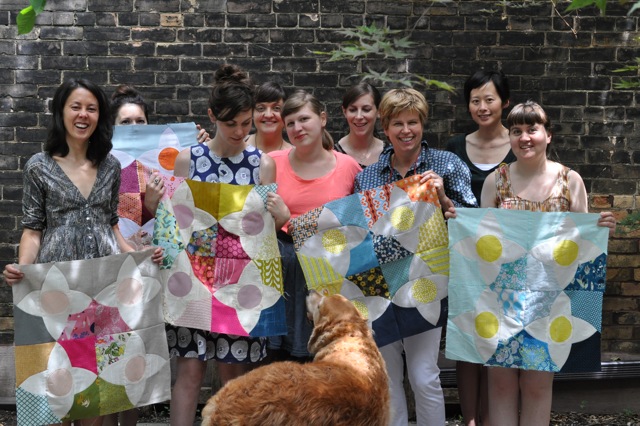
Lizzy and I have planned a two-day workshop where she will teach her beautiful Meadow quilt in Wellington on Thursday the 15th and Friday the 16th of October 2015 (yes, two whole days of hanging out with Lizzy House and stitching your little heart out).  Lizzy has said she will never release a pattern for the Meadow quilt, so this is a rare opportunity to learn how to make one for yourself.

Debi's Meadow Quilt

If you're keen to come along or even if you're just keen to share the news that Lizzy House is coming down under, feel free to share our blog button!

Lizzy House Meadow Down Under Tour

Spaces in the class are limited so I will be taking bookings for the Wellington class on a first come first served basis.

To reserve a space in the Brisbane, Sydney, Perth or Melbourne class, visit Bec at Skyberries Handmade.

To reserve your space in the class, you need to:

(1) email me at adriannereid @ gmail dot com with the subject line "Lizzy House class" confirming that you would like to attend the class.  I will then send you my bank account details so that you can...

(2) pay a non-refundable deposit of $70.

There are only 18 spaces in the class, so I'm sure it will fill up fast!  Once the class spaces have filled up I will create a wait-list.  People on the wait-list don't need to make any payment and I will contact them if anyone on the first list backs out.

You can email me now!  I'll update this post once the first list fills up, but you can still register for the wait-list after that.

Questions you might have:

Why do I need to pay a deposit?

There are three reasons for the deposit.  The first is so that only people who are really committed to coming to the class sign up.  The second is that Bec and I need to collect enough money from attendees to meet Lizzy's costs of travelling to Australia and New Zealand.  And the third is that to book a venue for the class, I will need to pay a deposit - and the deposits I collect from attendees will allow me to do this.

What happens if I have paid a deposit and I can no longer attend the class, or the class is cancelled?

If you cannot attend the class, or the class is cancelled, you will not get your deposit back.

Why isn't this class being organised through a shop?

I want to keep the class as affordable as possible.  Most shops organising a class would want to make a profit on the class - this totally makes sense since they are businesses.  I am not intending to make any profit on this class but simply cover the costs.

Is this class guaranteed to go ahead?

No.  This class could be cancelled for a variety of reasons (including if there is not enough interest in Australia to make the whole trip feasible).  However, we are pretty confident that there will be enough interest and once we have collected deposits, we will be able to book the essential components of flights and venues, which means that the class will very probably proceed (yay!).

How much will the class cost in total?

The class costs are made up of Lizzy's teaching fee, the venue costs, and Lizzy's travel and accommodation expenses.  My aim is to give attendees a final price as far as possible before the class takes place, but at this stage I'm not sure what the final costs will be.  However, I am hoping to keep the total cost to $350 per person or less but I cannot guarantee this.  The deposit you pay comes off this cost.

Where will the class be?

I have found a lovely venue in Wellington's CBD.  It has natural light, loads of space, and each participant will have their own table with plenty of space for a sewing machine and a cutting mat.  They are also happy for us to leave the space set up overnight so there's no need to pack down between the two days.  At this stage I have a pencil booking but will need to pay a deposit soon to confirm.  I looked at a variety of venues (including venues outside the CBD) and this one ticks all the boxes AND was at the cheaper end of the prices I was given.

Who should come to this class?

The Meadow quilt involves reasonably complex curved piecing.  Participants will have experience piecing quilts, and may have worked with curved piecing before.  You must have an open mind and be excited about learning something new!

You will need to bring your own sewing machine and other quilting equipment (cutting mat, rulers, rotary cutter, etc).

What does the class involve?

This class meets twice, for 6 hours each day (with a lunch break).  In this class you will choose your fabrics, learn about the Meadow and make around 6 to 8 blocks.

What about accommodation?

The cost of the class does not include accommodation.  There are loads of options for accommodation in Wellington.  Closer to the date of the class I will try to provide some more information on accommodation options, but participants will be responsible for arranging their own accommodation.

Can I leave a comment on this post to reserve a spot in the class?

No!  Please send me an email at adriannereid @ gmail dot com with the subject line "Lizzy House class".

Hopefully these cover off all the questions you might have.  If you want to ask anything else, feel free to leave me a comment.  I'm super excited about taking this forward and I can't wait to hear from interested participants!

THE CLASS IS NOW FULL BUT I WILL STILL TAKE NAMES FOR THE WAIT LIST.

Wednesday 8 July 2015

Lizzy House is coming!

So, you might have heard a little rumour that Lizzy House is coming to teach her beautiful Meadow quilt in Australia and New Zealand.


You guys, it's totally true!  Bec (from Skyberries Handmade) is organising the Australian side of Lizzy's antipodean tour, and I am organising the New Zealand side.

This Friday, we are going to be opening registrations for the following classes:

Registrations at Skyberries Handmade
Brisbane - a one day class on Wednesday 23 September 2015
Sydney - a one day class on Saturday 26 September 2015
Melbourne - a one day class on Saturday 10 October 2015

Registrations at On the Windy Side
Wellington - a two day class on Thursday 15 October and Friday 16 October 2015

The blog posts setting out all the details will be up at 6:00 p.m. AEST / 8:00 p.m. NZST on Friday 10 July and you will be able to submit your registrations after then.  Please note though, spaces in the classes are limited and will be given on a first in first served basis, so make sure you get in quick!

If you want to spread the news, feel free to share our blog button:

Lizzy House Meadow Down Under Tour

Eeek - we are so excited about this and really hope you are too!

Tuesday 7 July 2015

2015 Finish-Along - Q3 now open!

You guys are really keeping up the good work this year!!! There were 461 finished projects linked up for Q2, which is amazing!  My totally awesome team of Finish-Along cheerleaders Rhonda, Leanne, Wendy, Kirsten and Helen and I are working through your finishes right now, and I'll pick winners once we're done.

I hope you're ready with your lists for Q3 because the 2015 Finish-Along Q3 link-up is now live and ready for you to link your proposed finishes for the third quarter of 2015 (wait, where is the year going??)!   As a quick reminder, if you are ever looking for it, you can find all the information on the 2015 Finish-Along on the 2015 Finish-Along Page.

The Rules:

- At the start of each quarter there will be a linky party for you to link up your proposed list of finishes. You must link up in order to be able to be eligible for those prizes at the end.  Please only enter ONE blog post or flickr photo or instagram photo at this starting link-up.

- In order for your projects to be eligible, they must at least be a tangible project at the start of the quarter.  That means, at the very least, a pile of fabric pulled along with a pattern, or a quilt top needing to be quilted, or a half knit jumper. I love seeing your bee blocks, but they won't count unless you happen to be turning them all into a fully completed quilt!

- As you complete each of your projects on your list, write a post all about it, or a description of a Flickr pic.

- At the end of the quarter, link up each individual post/Flickr pic (please link back to your original list in some way). For each finish/link you complete, you get an entry into the draw, and therefore it's in your best interest to write up a separate post for each!

- A finish is defined as a completely finished project, eg a quilt, quilted and bound, a bag that's fully lined and functional, or a jumper that one could wear out in public. I'm happy for you if you get a quilt top completed in one quarter, but hold onto it for the next quarter and see if you can get it quilted and bound before entering please.

- You won't be punished if you don't finish your entire list, so feel free to make a big list and roll projects over from one quarter to the next if you need to.

- All qualifying finishes will be put into a prize draw, and the names drawn at random for each of the prizes donated by our sponsors for that quarter.

- The finish link party will be open for a week, and then the next quarter will open on the following day.

- During the week that the finish link party is open, there will be a series of tutorials appearing here on the blog. If you'd like to contribute a tutorial, please drop me an e-mail at adrianneonthewindyside at gmail dot com.

- The FAL is open to anyone, anywhere in the world.

I'd love if you'd spread the word about the FAL by popping my button in your post or on your blog.  You can grab the code for a large button or a small button below:

2015 FAL at On the Windy Side

2015 FAL at On the Windy Side


The awesome prizes for Q3 of the 2015 Finish-Along, provided by our wonderful sponsors:


Rachael from imagine gnats is providing a $30 gift voucher.


Sara from Sew Sweetness is providing 3 patterns of the winner's choice.


Becca from sew me a song is providing a $25 gift voucher.


Green Fairy Quilts is providing a $25 gift voucher.


Mad About Patchwork is providing a $30 gift voucher.


Juliet from Tartankiwi is providing 3 patterns of the winner's choice.


Alyce from Blossom Heart Quilts is providing a copy of one of her gorgeous patterns.


The team at Make Modern are providing a copy of the current issue of their magazine for two winners.


Jennie from Porch Swing Quilts is providing three lucky winners with two patterns of their choice each.


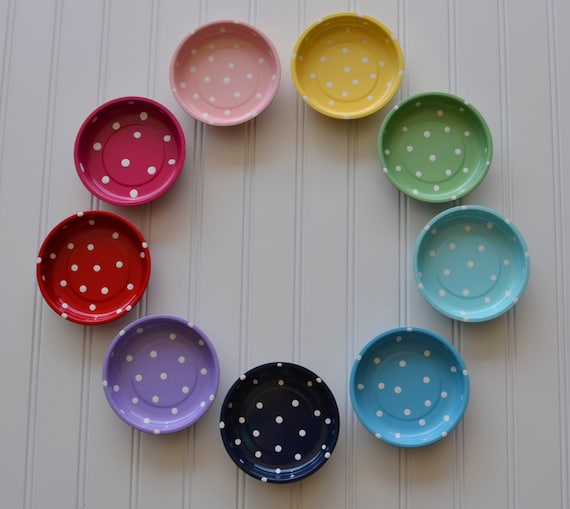
Laurel from Laurel Bee Designs is providing two pin dot magnetic pin bowl in the winner's choice of colours.

On the Windy Side

And finally, I will be providing a copy of each of my self-published patterns to a winner (full disclosure - at the moment there is only the one!).

Before you link up:

If you haven't used a link-up tool before, Katy from The Littlest Thistle did a post which explains how to use it really well - you can find it here.

If you're planning to use instagram to link up, Katy from The Littlest Thistle has done another tutorial on how to link from instagram using your computer (here).  If you are working on your phone or your tablet, Rhonda's tutorial on how to link from instagram (here) is for you.

I am super excited to see your lists of proposed finishes for Q3.  I bet you have a heap of amazing things on the go and I really hope the Finish-Along helps you find the motivation to finish them (because there's something just so satisfying about a finish - for me, the prizes are just gravy).

However, I am asking you to please only enter ONE blog post or flickr photo or instagram photo at this starting link-up.  If you enter multiple links, it creates a heap more work for me at the end of the quarter when I have to go through and try and match the actual finishes with the list of proposed finishes.  If you are linking from flickr or instagram, I'm happy for you to write the list (on your computer or on a piece of paper) and post a photo of the list.  Alternatively, you can take a photo of all your WIPs and write the list in the comment on the flickr photo or instagram photo.

Finally, this link-up theoretically runs from 7 July 2015 to 14 July 2015. Because I am in New Zealand, and time zones mean that our 14 July 2015 will end before most other people's, I have decided to leave the link-up open until 11:00 p.m. 14 July 2015 PST.  The link-up tool below should tell you how much time the link-up has to run BUT if you need to know the closing time in your country, I find World Time Buddy a really excellent visual way to see different time zones.

Phew - that's enough from me I think.  Have fun making your lists and linking up, and let me know if you have any questions!

Sunday 5 July 2015

2015 Finish Along - Q2 Tutorial - How to create a pattern from a block you've seen by Rhonda from Rhonda's Quilt Ramblings

Hi everyone - I'm delighted to share the second tutorial for Q2 of the 2015 Finish Along with you today.  Rhonda is the original instigator of the Finish Along and blogs at Rhonda's Ramblings.  Today she is sharing how she worked out how to make a block she saw in an antique quilt - how fun!

Hey, y’all … Rhonda [the Rambler] here! I am ever so excited to be here today. I blog over at Rhonda’s [Quilt] Ramblings, well, theoretically I do.

As of late, there's been little to no Ramblings. Twice a year my job drains every ounce of energy I have – Christmas and end of June. This is good and bad. It is at this same time (the crazy busy time) we get a week (occasionally two) off. I am certainly looking forward to vacation this year for a couple reasons – I can get back to blogging (which means life is getting back to normal) and I get out of the office for an entire week!!

 BUT…y’all are not here to listen to me Ramble! You’re here for a tutorial…which is just what I have for you! First, a question…have you ever seen an antique quilt and thought you’d like to make it but didn’t know what the block was called and/or couldn’t find a pattern for it? If you answered yes, then I have just the tutorial for you! As a result, I also have a bonus block pattern from a quilt I saw in an antique shop….this quilt:

  starting quilt RQR 

DISCLAIMER: I am sure there are several ways to go about creating a pattern for a block – this is what works for me, and hopefully you can glean some direction from my Ramblings. Two major steps need to take place before you get into the drawing of the block.

1. The first thing I do is to isolate the block in the quilt

isolated block

2. Then you must establish a grid in the block. This allows you to see what “parts” (referred to throughout) the block is made of. As you can see below this block is made of HSTs and squares.

parts found
I did a screenshot on my iPad and then uploaded the pic into TouchDraw and drew lines with the app.

Now that you know the parts of the block, you can start drawing it.

I am a bit old fashioned and do this with graph paper and pencil. I will give you an alternative a little later. So, step one…obtain graph paper & pencil. Free printable paper here.

Copy each part onto the graph paper ensuring the HSTs are slanted in the right direction. I start in the center and work my way out. The letters you see in the pic are the colors in the quilt, this helped me keep track of where I was in the block as I worked my way out.

The center and unfortunately the only pic I took of the line drawing...oops!

NOTE: Pick out the fabrics you plan on using – take it from me, you want to do it at this point – not later (more on this later).

Color the pencil drawing (if you know the colors of your fabrics, coordinate them). This step is important as it makes the block come alive. Pay close attention to this step and ensure the colored block looks like the picture of the finished block. After I colored the block, I went in with a dark color and marked the parts outlines. This allowed me count the parts and create a color key more easily.

See how the dark lines make the "parts" easier to see?

At this point, your pattern is finished. From here, you can start making your project – floor pillow in my case.

Here are the steps to complete this block: NOTE: If you are more tech savy than I, and want a way to draw your blocks on your iPad – then I have just the app for you and know just where to send you to learn how to use it. The app is called TouchDraw and I found you a great tutorial for drawing blocks with HSTs here.

key1
I used the color key for counts of the different HSTs and square - next to them I wrote the fabric color names (not pictured).
NOTE: If you didn’t pick your fabrics earlier, do so now and you created a color key. It may get confusing with the different but if you follow the key and stay focused you can do it. 

FIRST: Determine the size you want your finished block to be and do some math. I wanted a large floor pillow and knew I wanted to use Thangles to make my HSTs. After digging through my Thangle stash, I discovered some 3.5” size. Since the block is an 8x8 layout, my finished block will be 28x28 (3.5*8). If I add borders (or not) this seems like a decent sized floor pillow for Callee (my granddaughter). 

NOTE: There are many ways to make HSTs: HST paper, 8 @ a time, from strips of fabric, more traditional ways 

FYI: If you want this block to be finished at 12” each part must finish at 1.5” (12/8).
  1. Cut your fabrics according to the appropriate technique you chose.
  2. Sew and press your HSTs.
  3. Lay out your parts matching them to your colored drawing.
  4. Sew parts together to make rows and rows to make a block.
Here’s my finished block. 

Lovely Neons
Lovely Neons
As I previously stated I intend to make this block into a floor pillow; but, if you make several of these blocks they make a very nice secondary pattern - I remind you of the inspiration quilt....

starting quilt RQR
I love secondary pattern created.

I hope this gives you some help. If I can answer any questions, don't hesitate to send me an email

Sure hope to see you over at Rhonda's [Quilt]Ramblings - where the Ramblings will get back to normal soon!!

  blog signature