Showing posts with label tutorial. Show all posts

Wednesday, 25 November 2015

How to make a Non-Slip Sewing Machine Mat

I just realised that I wrote this tutorial for Leanne from shecanquilt but never shared it here.  So, here you go!

I came up with this idea after I got annoyed with my sewing machine sliding around on the table, especially when I was sewing quickly or free-motion quilting.  It makes such a difference to have a sewing machine that stays where you want it to!  It also adds a lovely personalised touch to your sewing space.
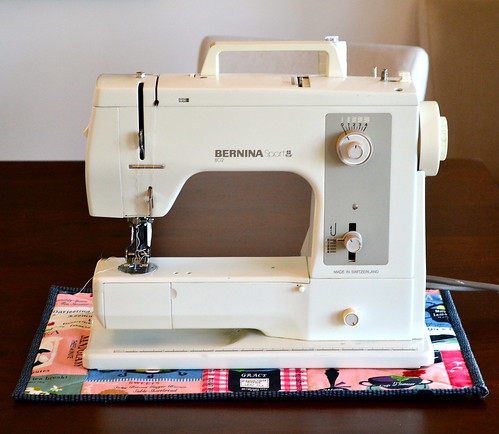
Non-Slip Sewing Machine Mat Tutorial

What you will need:

- feature fabric
- low loft cotton batting
- backing fabric
- non-slip matting
- fabric for binding
- basting pins (curved safety pins)
- sewing machine with walking foot

- usual notions like thread, rotary cutter and ruler, scissors, etc.

Tips before you start:

It's a good idea to read the full tutorial all the way through before you start.

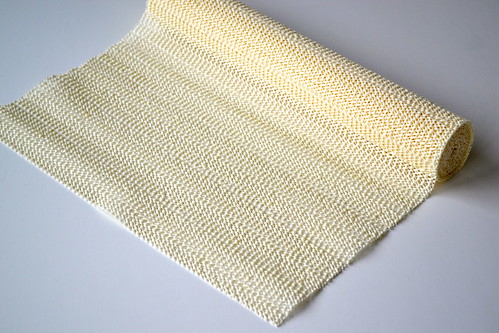
The thing that makes this mat non-slip is this non-slip matting.  It's the type of thing you might put in a cupboard or drawer to stop things sliding around.  These pictures are intended to give you a good idea of what it's like.
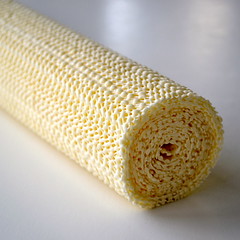
Non-Slip Sewing Machine Mat Tutorial Non-Slip Sewing Machine Mat Tutorial 


I bought mine at Spotlight (essentially the equivalent to Joann's), but you can also find it at hardware stores and big box homeware stores.  You can find the exact brand I bought here, and this is a version which looks pretty much the same which I found on amazon.  The colour doesn't really matter, because you won't see it once your mat is finished.

Step 1 - Create the top of your mat

First, measure your sewing machine to work out how big your mat should be.  I would recommend measuring the base of your sewing machine and then adding at least 2" on each side.  I have a fairly small sewing machine and I made mine 12" by 18".

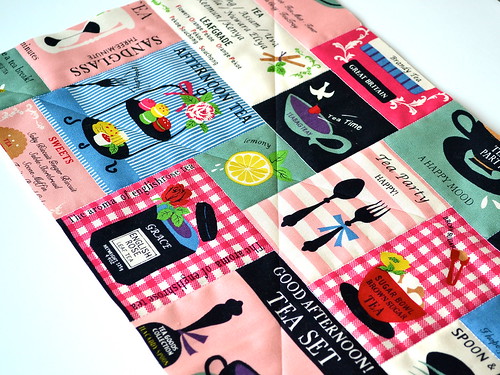
Choose the fabric you will use for the top of your sewing mat.  I used a single cheater print fabric, but you could definitely piece something if you prefer.  Make a quilt sandwich with your feature fabric, the low loft cotton batting, and your backing fabric, using your preferred method.  Quilt as desired.  I simply followed the lines of my cheater print fabric.
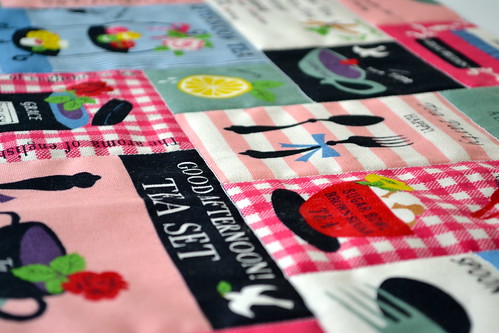
Non-Slip Sewing Machine Mat Tutorial

Step 2 - Mark your quilting lines

You are going to baste the non-slip matting to your quilt top, and stitch through all the layers to securely  attach it.  You don't need to quilt it densely, just enough to make sure it doesn't bubble or move around too much.  Once you have decided on your quilting lines, use your favourite method to mark them on the quilt top.

Non-Slip Sewing Machine Mat

You can see that I used a hera marker - it's absolutely my favourite way to mark quilting lines.  This is the one I have and I love it.

Step 3 - Baste on the non-slip matting

Use the curved safety pins to base the non-slip matting to your quilt top.  Place them not more than 4" apart, and if possible, avoid placing them on your quilting lines.
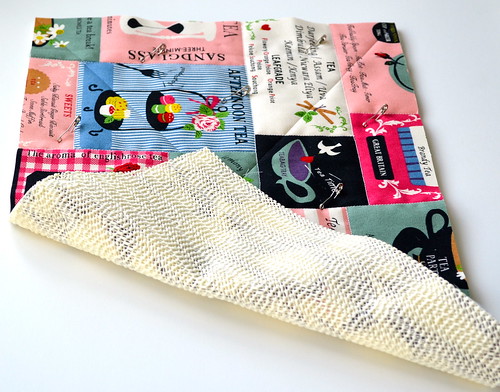
Non-Slip Sewing Machine Mat Tutorial

Step 4 - Quilting

This part is a little tricky, and you will really need a walking foot, because the non-slip matting is going to want to stick to your sewing machine.  Get your quilt set up and ready to go, and drop the needle down.  You may need to lengthen the stitch length beyond what you would normally use for straight-line quilting - I set mine at about 3.75 (the maximum stitch length on my machine is 4).
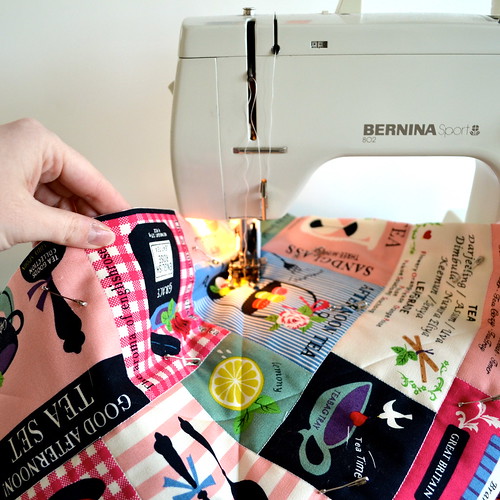

Non-Slip Sewing Machine Mat Tutorial

I would normally use a flat hand to gently guide the fabric through the machine.  This will not work, because putting any pressure on the quilt will cause it to stick to the sewing machine.  What you need to do is lift the quilt up around the presser foot, and let the feed dogs and your walking foot do their job.  It will feel really strange, but if you go slowly and carefully, it will work.

Step 5 - Binding

This project is a great candidate for machine stitching the binding.  I learned from Rita at Red Pepper Quilts, and I still think her tutorial is the best.  If you do decide to hand stitch the binding, I would recommend attaching it to the back first and hand stitching it to the front.
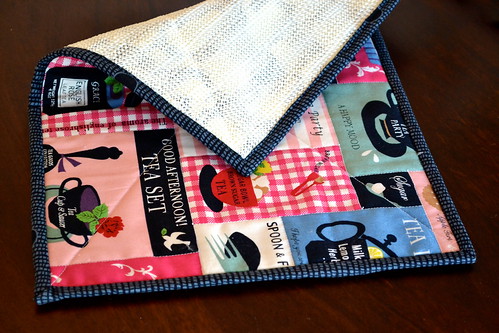
Non-Slip Sewing Machine Mat Tutorial

Ta da - you're finished!  Now you just need to test drive your new sewing machine mat - a perfect excuse to sew something new!
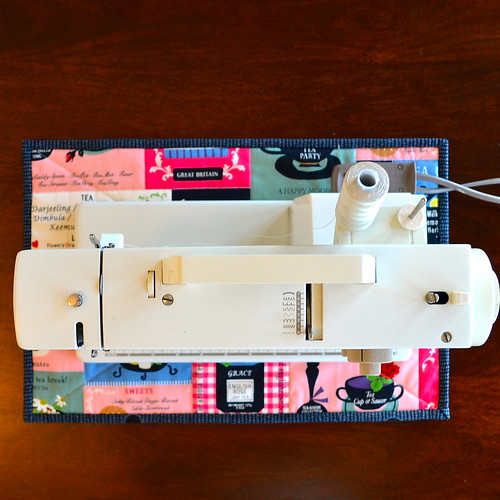
Non-Slip Sewing Machine Mat Tutorial

P.S. You will have a fair bit of the non-slip matting left over - try putting a piece under your sewing machine pedal.  It will stop creeping away from you as you sew!

Follow

Sunday, 5 July 2015

2015 Finish Along - Q2 Tutorial - How to create a pattern from a block you've seen by Rhonda from Rhonda's Quilt Ramblings

Hi everyone - I'm delighted to share the second tutorial for Q2 of the 2015 Finish Along with you today.  Rhonda is the original instigator of the Finish Along and blogs at Rhonda's Ramblings.  Today she is sharing how she worked out how to make a block she saw in an antique quilt - how fun!

Hey, y’all … Rhonda [the Rambler] here! I am ever so excited to be here today. I blog over at Rhonda’s [Quilt] Ramblings, well, theoretically I do.

As of late, there's been little to no Ramblings. Twice a year my job drains every ounce of energy I have – Christmas and end of June. This is good and bad. It is at this same time (the crazy busy time) we get a week (occasionally two) off. I am certainly looking forward to vacation this year for a couple reasons – I can get back to blogging (which means life is getting back to normal) and I get out of the office for an entire week!!

 BUT…y’all are not here to listen to me Ramble! You’re here for a tutorial…which is just what I have for you! First, a question…have you ever seen an antique quilt and thought you’d like to make it but didn’t know what the block was called and/or couldn’t find a pattern for it? If you answered yes, then I have just the tutorial for you! As a result, I also have a bonus block pattern from a quilt I saw in an antique shop….this quilt:

  starting quilt RQR 

DISCLAIMER: I am sure there are several ways to go about creating a pattern for a block – this is what works for me, and hopefully you can glean some direction from my Ramblings. Two major steps need to take place before you get into the drawing of the block.

1. The first thing I do is to isolate the block in the quilt

isolated block

2. Then you must establish a grid in the block. This allows you to see what “parts” (referred to throughout) the block is made of. As you can see below this block is made of HSTs and squares.

parts found
I did a screenshot on my iPad and then uploaded the pic into TouchDraw and drew lines with the app.

Now that you know the parts of the block, you can start drawing it.

I am a bit old fashioned and do this with graph paper and pencil. I will give you an alternative a little later. So, step one…obtain graph paper & pencil. Free printable paper here.

Copy each part onto the graph paper ensuring the HSTs are slanted in the right direction. I start in the center and work my way out. The letters you see in the pic are the colors in the quilt, this helped me keep track of where I was in the block as I worked my way out.

The center and unfortunately the only pic I took of the line drawing...oops!

NOTE: Pick out the fabrics you plan on using – take it from me, you want to do it at this point – not later (more on this later).

Color the pencil drawing (if you know the colors of your fabrics, coordinate them). This step is important as it makes the block come alive. Pay close attention to this step and ensure the colored block looks like the picture of the finished block. After I colored the block, I went in with a dark color and marked the parts outlines. This allowed me count the parts and create a color key more easily.

See how the dark lines make the "parts" easier to see?

At this point, your pattern is finished. From here, you can start making your project – floor pillow in my case.

Here are the steps to complete this block: NOTE: If you are more tech savy than I, and want a way to draw your blocks on your iPad – then I have just the app for you and know just where to send you to learn how to use it. The app is called TouchDraw and I found you a great tutorial for drawing blocks with HSTs here.

key1
I used the color key for counts of the different HSTs and square - next to them I wrote the fabric color names (not pictured).
NOTE: If you didn’t pick your fabrics earlier, do so now and you created a color key. It may get confusing with the different but if you follow the key and stay focused you can do it. 

FIRST: Determine the size you want your finished block to be and do some math. I wanted a large floor pillow and knew I wanted to use Thangles to make my HSTs. After digging through my Thangle stash, I discovered some 3.5” size. Since the block is an 8x8 layout, my finished block will be 28x28 (3.5*8). If I add borders (or not) this seems like a decent sized floor pillow for Callee (my granddaughter). 

NOTE: There are many ways to make HSTs: HST paper, 8 @ a time, from strips of fabric, more traditional ways 

FYI: If you want this block to be finished at 12” each part must finish at 1.5” (12/8).
  1. Cut your fabrics according to the appropriate technique you chose.
  2. Sew and press your HSTs.
  3. Lay out your parts matching them to your colored drawing.
  4. Sew parts together to make rows and rows to make a block.
Here’s my finished block. 

Lovely Neons
Lovely Neons
As I previously stated I intend to make this block into a floor pillow; but, if you make several of these blocks they make a very nice secondary pattern - I remind you of the inspiration quilt....

starting quilt RQR
I love secondary pattern created.

I hope this gives you some help. If I can answer any questions, don't hesitate to send me an email

Sure hope to see you over at Rhonda's [Quilt]Ramblings - where the Ramblings will get back to normal soon!!

  blog signature  

Wednesday, 1 July 2015

2015 Finish Along - Q2 Tutorial - Building Momentum by Mary Huey

Hi everyone - I'm delighted to share the first 2015 Finish Along Q2 tutorial with you today.  Mary Huey blogs at Quilting through Rose-colored Trifocals and today she is sharing her thoughts on a topic dear to my heart - how to tackle your UFOs and make it through projects.  As part of my year 30 quilt project, I've been stitching every single day and it's amazing how taking 10 or 15 minutes at the end of each day to do a little something keeps me going.  Without further ado, here is Mary.  

My name is Mary Huey.  I’ve quilted for over 40 years during which time I've taught for 35 years and owned a quilt shop for 26 years.  In other words, I’m an expert UFO enabler!!  For years, I’ve been helping quilters start projects but since I closed my shop in 2005, I’ve been trying to help quilters finish projects.

I love the “cartoon” that circulates around Facebook every so often with two women chatting and one says to the other, “I hear it takes a long time to finish a quilt you’re not working on . . . . “  It’s funny, but it’s sad at the same time.  We love to start, but many of us forget that we also need to love to finish! 

Over the years, I’ve observed that an overload of UFO’s will kill creative energy faster than a cranky husband – the guilt that travels with UFO’s extinguishes enthusiasm relentlessly!

So how do you deal with UFO’s?  Certainly participating in the 2015 Finish-a-long is a good step in the right direction.  That end of the quarter deadline that is fast approaching can stimulate lots of positive activity!   I have always been a deadline finisher myself!

Several years ago I created a course for quilters to use to tackle their UFO’s more successfully and one of the topics I cover is "building momentum".  At the end of each lesson, I assigned participants several tasks.  The most important task and the one that was at the end of every lesson was “to work at your craft/art every day!”

I'm lucky to be able to commandere the couch every evening so I just leave my current projects out and ready!
It’s one of the most effective strategies I use personally to get UFO’s finished.  Sometimes it’s only 20 minutes, but it’s easier for me to find 20 minutes every day than it is to find big blocks of stitching time.  And if that’s all I can get during a busy week, those 20 minutes daily sessions equals over 2 hours a week?! 

I’m going to make a big assumption here – you quilt because you enjoy it?  So keeping at it on a daily basis is good for you.  Seriously, science has shown that it relieves stress and calms us down.  Using our hands bolsters self-esteem and confidence in all areas of our life.  So why aren’t you stitching every day.  You can’t wait until you have the time and the energy.  You have to figure out how to make it a regular part of your day.

I started an accountability journal almost 10 years ago to document my daily progress.  When I first started mine, there were days when I didn’t have anything to “tell” my journal so I would dash back up to the studio and sew madly for 15 minutes so I could make an entry before I went to bed.  Now it’s a routine part of every day.  One of the surprises you may encounter if you’ve never journaled your stitching is how much you really get done.  After 10 years, I still love to write “FINISHED” in that journal and add to my annual tally in the margin of the pages.  I now know that I average 45 finishes a year – feels good.

“Yes, but I work” you are saying.  The most important strategy I use to keep me stitching every day is to leave my work areas set up so I can plop down at the end of the day and just start stitching without thinking about what to do.  I find if I don’t have to think about the “what”, it’s easier to pick up my work and continue.  So I leave the next step set out when I leave my studio at the end of the afternoon.  I hand stitch or knit every evening – so before I head to bed, I thread the needle and organize the next step.  It’s waiting for me to return the next evening when I’m too tired to think.  It isn’t that we are too tired to stitch, we are too tired to think – our decision maker is just closed for the day!!

Ready and waiting for me to return -- no thinking required, just plop down and turn on the machine!!
I’ve also observed that stitching every day leads to increased skill without much effort – practicing every day really does work!  Your piecing will get better, your cutting will become more consistent, the more you do, the better you get!!  I’ve also noticed the creative solutions to challenges and problems has become almost effortless.  I think it’s because our subconscious keeps working on a project when we keep coming back to it each day rather than waiting until we have a couple free hours to stitch.  It watches quietly for ideas and searches that memory bank of experience we own without being asked.  Next thing I know, there is an "idea"!  Where did that come from?
 
My current travel stitching being restocked for the next outing -- the tools never leave the pouch!!

Quick personal story – my mother unfortunately suffered a horrible descent into dementia during the last year of her life.  I live the closest and tried to be with her every day.  Her anger and frustration was heaped on me and as time went on, it became harder and harder to endure.  Because I was already in the habit of stitching EVERY DAY, it became my respite.  It was an escape from my reality and soothed me every day to sit down and stitch.  Interestingly, although it was the most difficult experience of my life it was an incredibly creative and productive year for me as a quilt maker.   Had I not already figured out the importance of daily stitching to me as a creative person, I don’t believe I would  have sought that avenue to manage the stress.  I would have been too tired.  Everything in my life came down around my head, but my stitching soared and kept me afloat. 

If you don't stitch everyday, I encourage you to start today.  The benefits are astonishing and you won't be sorry.  You'll finish more, you'll be calmer, you'll be more creative and all that leads to more happiness!!

Mary Huey

Friday, 31 October 2014

How to pop your seams - a video tutorial

When I first learned to quilt, I made a nine patch quilt.  My mum taught me how to nest the seams in my nine patches, so the points of the squares met nicely, and the block could be pressed really flat.  


I don't have a black and white view on seam pressing - I think pressing seams to the side and pressing seams open are both totally legitimate techniques, and there are times where one is preferable over the other.

This is obviously not a technique I invented, but it's something I find really useful, and I wanted to share the method with you.  I also wanted to suggest that people use it in my patterns, but it's quite hard to explain in writing.  So, I made a video!


As usual, all the filming and editing for this video was done by my sister.  Thanks Jenny!

Anyway, I hope you enjoy the video!  I'd love to know whether this is a technique you were already familiar with, or whether it's new to you.

Follow on Bloglovin

Monday, 29 September 2014

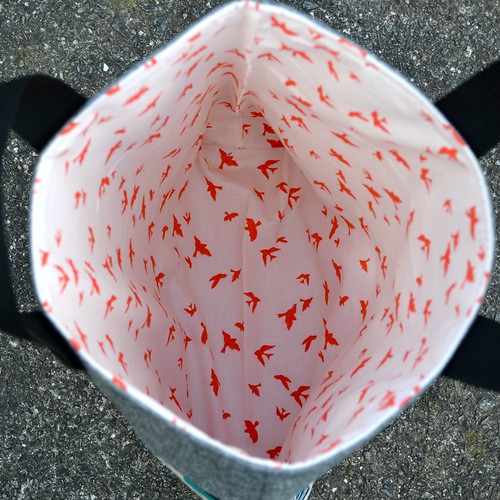
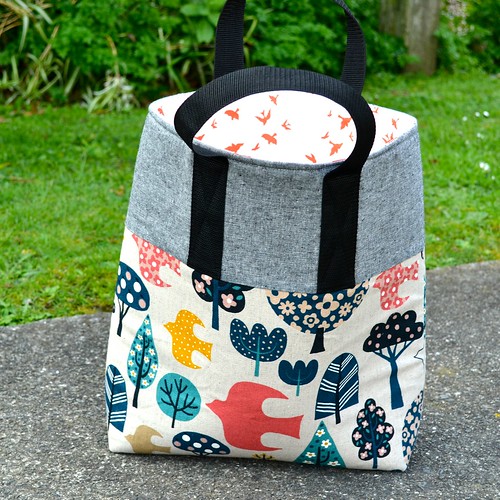
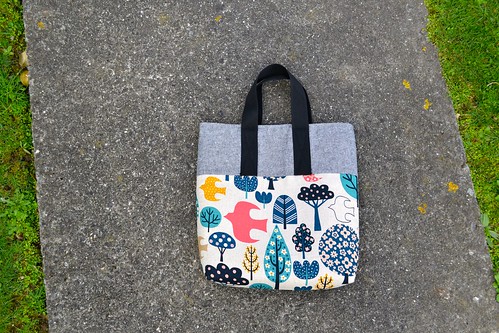
Tote bag tutorial

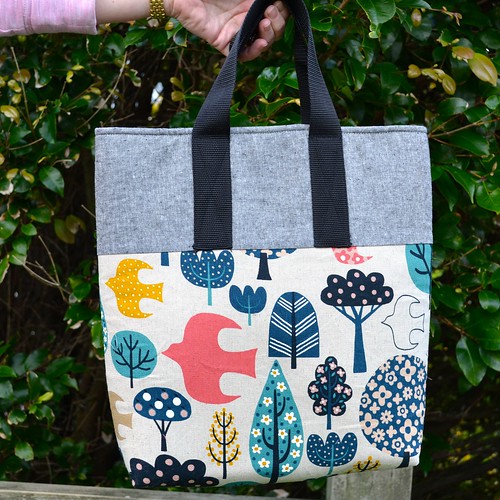
So last weekend I made yet another tote bag - what can I say?  I'm obsessed!

Tote bag tutorial

While I was making it I took some photos so I could write up a tutorial - here it is.  Warning - may spark obsession with tote bags!

You will need:

- half yard main exterior fabric
- fat quarter contrast exterior fabric
- half yard lining fabric
- half yard Soft and Stable (you can find it at By Annie's website, and for kiwis, Stitchbird now has it in stock)
- 2 yards webbing strap (I used 1.5" wide webbing)
- pins
- large quilting ruler
- scissors
- thread
- rotary cutter
- cutting mat
- sewing machine (preferably with walking foot)
- Clover wonder clips (optional but very helpful)

All seams are 1/4" unless otherwise specified.

Step 1 - Create the fabric exterior of your bag.

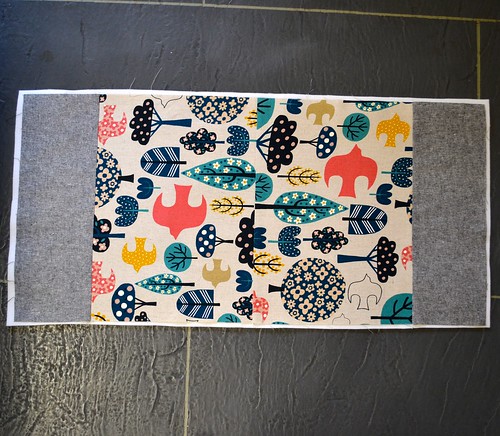
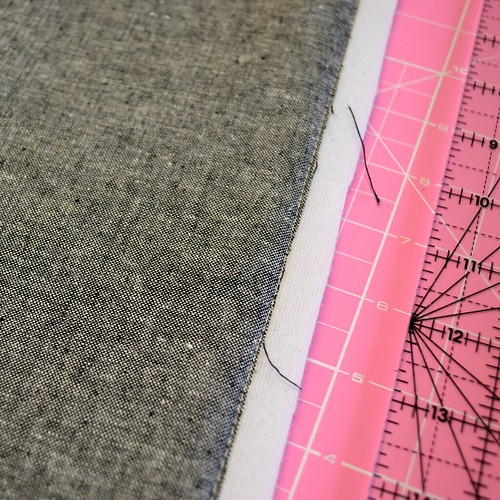
If you are using a non-directional fabric for your main exterior fabric, cut a piece 22" by 16.5".  If you are using a directional fabric for your main exterior fabric, cut two pieces 11.25" by 16.5".  Sew the two pieces together along the long side so that when the seam is at the bottom of the bag, both pieces of fabric will be facing the correct way.  Cut two pieces of your contrast exterior fabric 5.5" by 16.5".  Stitch one piece of your contrast fabric to each end of the long strip of the main exterior fabric.  Press all the seams neatly - on this project I recommend pressing to the side rather than open for extra strength.

Step 2 - Add the Soft and Stable.

Lay your exterior panel out on the Soft and Stable, and trim away any excess so you have a piece of Soft and Stable that is bigger than your exterior panel by approximately 1" all around.  If your Soft and Stable is not very flat after being stored folded, you can iron it flat.  I use the wool setting on my iron, and steam, with good results.  Bear in mind that the Soft and Stable is synthetic material so should not be ironed at full heat - I haven't tried it but I expect it would melt.

Smooth your exterior panel flat on the Soft and Stable, and pin in place.  If you are going to quilt the exterior, you will want to use a good number of pins - spaced about every 4", to ensure that the fabric does not shift around too much as you are quilting.  If you are not planning to quilt the Soft and Stable, you can use fewer pins.

Tote bag tutorial

For this sample, I decided not to quilt the exterior of the bag.  Instead, I simply stitched around the very edge of the exterior panel, using a longer than usual stitch length.  The stitching is within 1/8" of the edge of the fabric, so it will not be visible when the bag is finished. Either do this (using your walking foot) or quilt the exterior panel to the Soft and Stable using your preferred design (also using your walking foot).

Tote bag tutorial

Using your rotary cutter and ruler, trim away any excess Soft and Stable.

Step 3 - Add the straps.

Cut the webbing into two pieces, each approximately 1 yard long.  This length should give you a bag that you can carry over your shoulder or in your hand.  That said, the best strap length for you will depend on your own height, so you may wish to experiment with the strap length by pinning the strap onto the bag in approximately the right position and seeing how it feels.

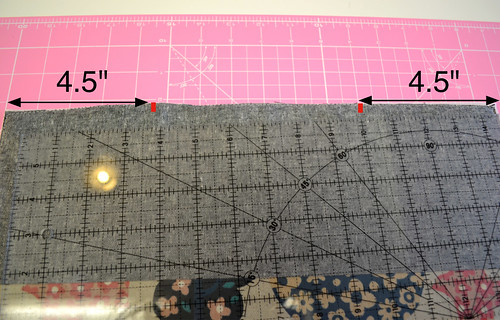
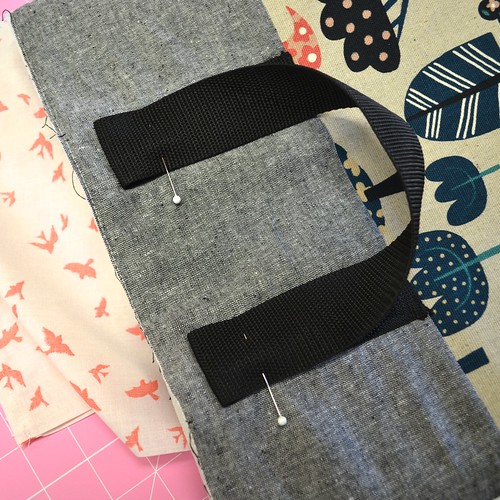
At each end of your bag, measure 4.5" from each side of the bag, and make a small mark.

Tote bag tutorial

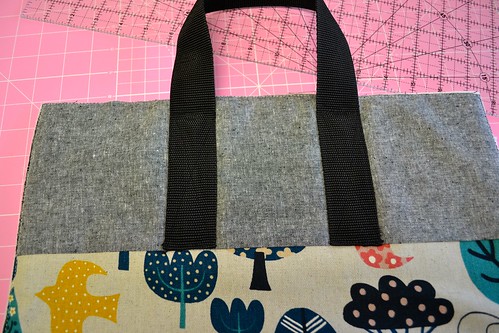
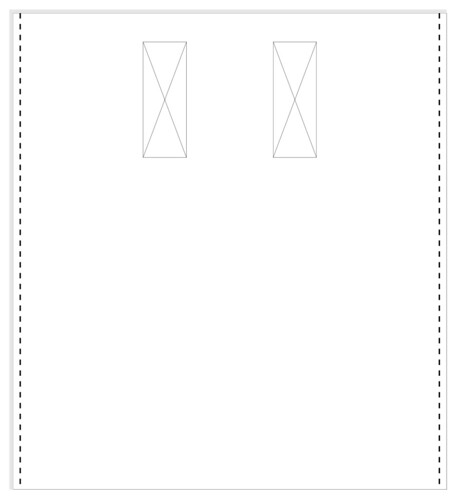
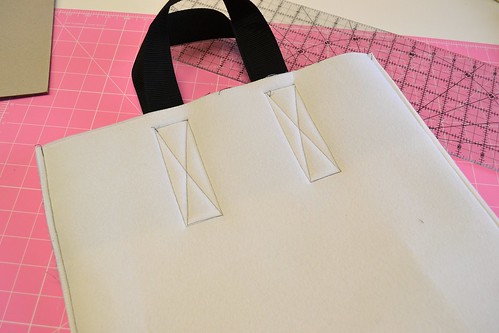
To prevent fraying, tuck each end of the straps underneath by about 1/4" to 1/2". Pin one strap to each side of the bag, aligning the outer edge of the strap with the mark you made, and aligning the bottom of the strap with the seam between your contrast and main fabrics.  Stitch each strap in place, making sure you leave at least 3/4" at the top of the bag where the strap is not stitched downI like to stitch a rectangle with an X in the middle.  I also usually change my thread colour so it matches the strap so that the stitching is almost invisible.

Tote bag tutorial

Step 4 - Complete the exterior.

Fold the exterior panel in half, right side in.  Pin or clip along the sides, making sure that the seams are aligned.  Stitch along the sides using your walking foot, backstitching at the start and end of each seam.

Tote bag tutorial

I generally prefer to stitch from the fold to the top of the bag - this way there is less chance of having a pucker at the fold. I also usually stitch along these seams twice, for additional reinforcement (alternatively you could stitch a straight seam and then a zig-zag seam right at the edge for reinforcement - I didn't do this because I was working on my Juki which is straight stitch only).  Remove pins or clips from bag.

Tote bag tutorial

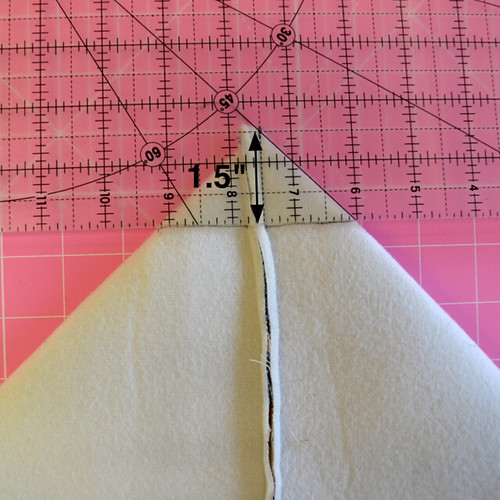
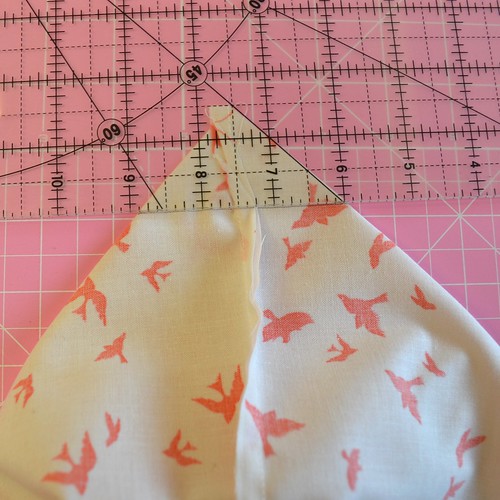
Box the corners of the bag by pushing the corners out and aligning the side and bottom seams.  Using your ruler, draw a line perpendicular to the side seam, 1.5" away from the point of the corner.  Most quilting rulers have a 45 degree line on them which should help with this step.

Tote bag tutorial

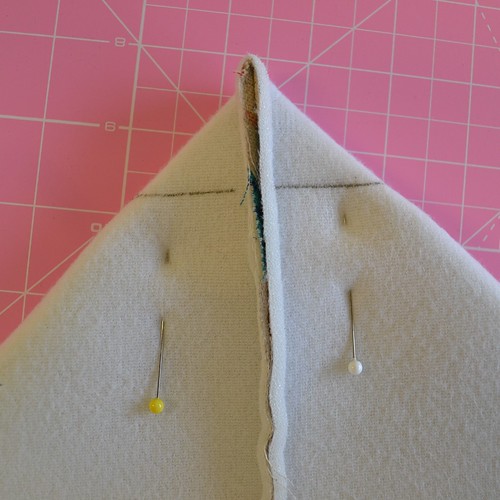
Pin so that the corner of the bag is sticking out and you can stitch along this seam.  Repeat for the other corner of the bag.

Tote bag tutorial

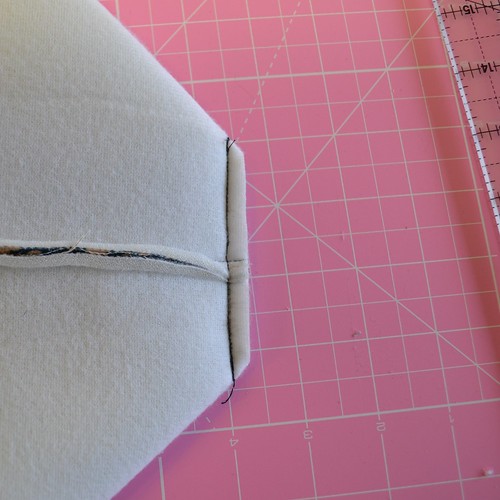
Stitch along each line, using your walking foot, and backstitch at the start and end of each seam.  Again, I like to stitch these seams twice for extra reinforcement.  Trim away the excess by cutting 1/4" from each drawn and stitched line.

Tote bag tutorial

Turn your exterior right sides out.

Step 5 - Create the lining.

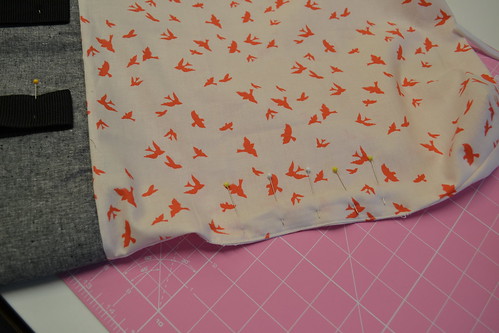
Cut a piece 31.5" by 16" for the lining (yes, this is slightly smaller than the fabric you cut for the exterior).  Fold in half, right sides together.  Pin or clip along the sides. Stitch along one side, backstitching at the start and end of each seam.    For the other side, stitch the first 5" or so as normal, then backstitch a couple of stitches.  Increase your stitch length to almost the maximum, and then stitch another 5" with the longer stitch length.  Return your stitch length to normal and backstitch a couple of stitches again, and finish the seam with a normal stitch length.  The part with the long stitches will be unpicked at a later stage for use as a turning gap - I simply find this easier than leaving an actual gap. As with the exterior, I generally prefer to stitch from the fold to the top of the bag.  Box the corners of the lining in the same way as you did for the bag.  Leave the lining with the right side facing in.

Tote bag tutorial

Step 6 - Add the lining to the bag.

Pin the loose part of the strap to the exterior of the so it does not get in the way at this stage.

Tote bag tutorial

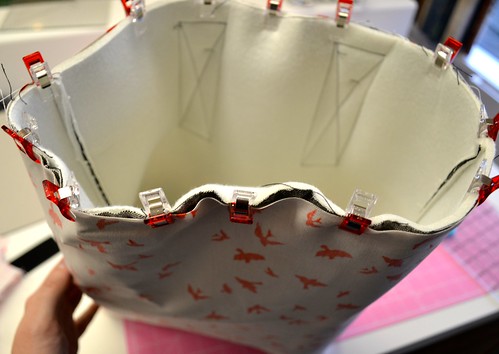
Put the exterior part of the bag inside the lining, so the right sides of both are touching.  Align the side seams of the lining and the exterior.  Pin or clip along the raw edge to hold the two in place.

Tote bag tutorial

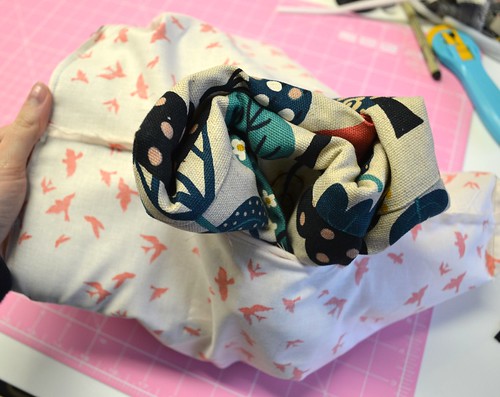
Stitch the exterior and the lining together at the top of the bag using your walking foot, and going slow and carefully because of the bulk in certain places.  Unpick the long stitches on one side of the lining, and turn the bag out through the gap.  Push the exterior and the lining out.

Tote bag tutorial

Close the turning gap by tucking the raw edges inside and stitching close to the edge.

Tote bag tutorial

Push the lining inside the exterior of the bag.

Tote bag tutorial

I often find it's useful to press along the top of the bag at this stage to get a neat seam, but be careful of touching the straps with your iron.  Clip or pin along the edge, and then top stitch using your walking foot and a slightly longer than usual stitch length to create a neat finished edge at the top of the bag.  Stop and start your top stitching so it is under a strap for maximum neatness.

Tote bag tutorial

Voila - you have a nice structured but light tote bag ready for use.

Tote bag tutorial

I hope you've enjoyed this tutorial - let me know if you have any questions.  If you make a bag using this tutorial, I'd love to see it - you can add it to my flickr group or flick me an email directly.

Follow on Bloglovin

Monday, 15 September 2014

Other people's scaled star blocks (and an update to the tutorial)

It's been super exciting to see a few people using my Scaled Stars tutorial to make blocks.


Megan from Jaffa Quilts made these gorgeous 12" blocks using low volume backgrounds and super saturated fabrics for the stars.  She's used a lot of Anna Maria Horner fabrics, which of course, I love.   I'd find it hard to explain why, but these colours remind me of sour lollies - yum!

6" Scrappy Scaled Star

The lovely Julie from JulieLou made this 6" version, which is fussy cutting perfection.  I love how she kept the block really monochromatic as well.


Deb from Works in Progress shared some 6" blocks she'd made on instagram just this weekend - I love how she switched things up and used a solid for just the star points.  The scrummy Cotton and Steel fabrics she used don't hurt either.

To make life a bit easier for anyone using this tutorial, I decided to write up my own directions, with diagrams, and pop it all into a pdf version of the tutorial.  Click on the link to download it - it's still free, and I've added some extra block sizes (15" and 18" as well).

Hopefully next week I'll have some more scaled star blocks of my own to show you!

Follow on Bloglovin

Monday, 18 August 2014

Scaled stars (a quilt block tutorial)

 A few weeks ago, I enjoyed making some Scrappy Star blocks using Clover and Violet's awesome tutorial.  I used them in this quilt chunk which now lives with Jess from The Elven Garden.


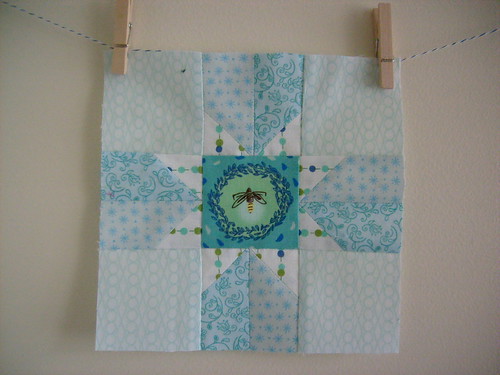
Anyway, at the time I was doing my block a day July challenge, and I decided to scale down this star block to 6 1/2" so I could use it in my quilt.


This is my 6 1/2" version, liberty on a low volume background.  It's actually a slight variation on Jennie's original block, because it was easier for me to figure out that way.  As a result, my 12" version of this block is slightly different to Jennie's.  (If you're curious, my block is a true nine patch, with all nine patches being squares of the same size.  Jennie's is a variation on a nine patch - there are nine patches which come together to form the block, but they are not all the same size).

Anyway, a couple of people have asked me for my method for making this block and Jennie from Clover and Violet has very kindly agreed to let me link back to her original tutorial, so here are the measurements for a variety of different scaled star block sizes.


12" finished block - cut:

4 - 4 1/2" background fabric squares
1 - 4 1/2" star fabric square
8 - 2 1/2" by 4 1/2" background fabric rectangles
8 - 2 1/2" star fabric squares

9" finished block - cut:

4 - 3 1/2" background fabric squares
1 - 3 1/2" star fabric square
8 - 2" by 3 1/2" background fabric rectangles
8 - 2" star fabric squares

6" finished block - cut:

4 - 2 1/2" background fabric squares
1 - 2 1/2" star fabric square
8 - 1 1/2" by 2 1/2" background fabric rectangles
8 - 1 1/2 star fabric squares

3" finished block (for the truly insane) - cut:

4 - 1 1/2" background fabric squares
1 - 1 1/2" star fabric square
8 - 1" by 1 1/2" background fabric rectangles
8 - 1" star fabric squares

The method for constructing the block is exactly the same as that set out in the original Clover and Violet scrappy stars tutorial.  Once you have made the block it will measure 12 1/2", 9 1/2", 6 1/2" or 3 1/2" as applicable - the finished size above is once the block is stitched into a quilt.

Please let me know if you make a scaled star block using my measurements and Jennie's tutorial - I'd love to know about it (and you're more than welcome to add it to the On the Windy Side Flickr group).

Follow on Bloglovin