Showing posts with label foundation piecing. Show all posts

Monday, 2 November 2015

Adventures in teaching - part one

I've done quite a lot of teaching this year, and I thought it might be nice to share some of my students' work here.

Class photos 2015

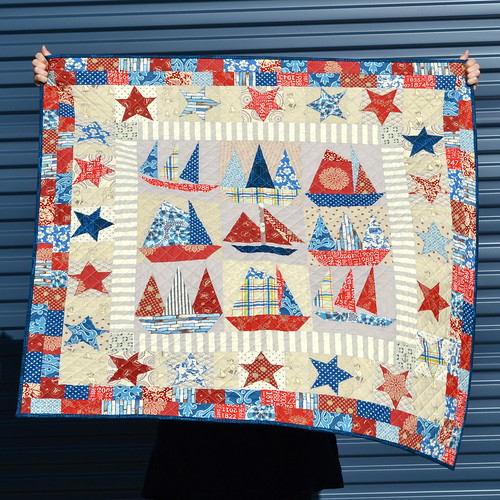
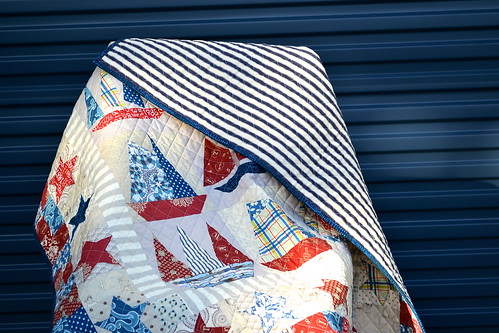
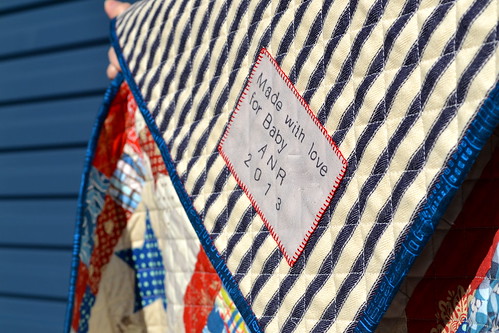
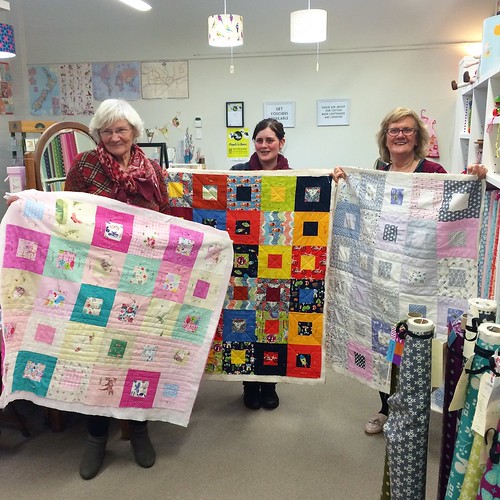
First up are the ladies who took my Modern Baby Quilt class at Stitchbird.  Over the course of four sessions we covered cutting, piecing, assembling the quilt top, basting, quilting and binding.  Everyone did amazingly well, and got to the point of starting the quilting on their quilt in the last class. 

Class photos 2015

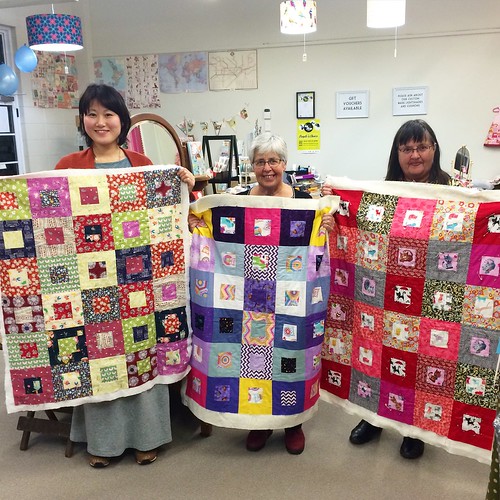
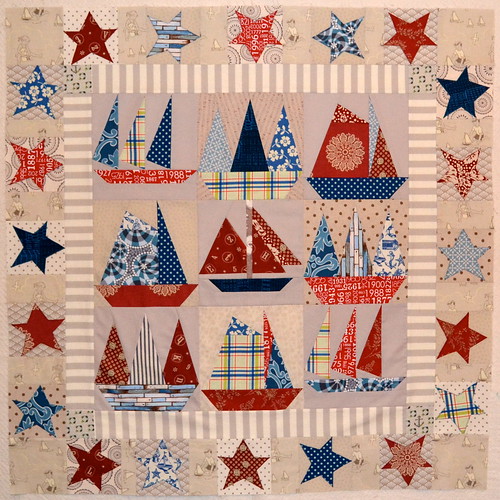
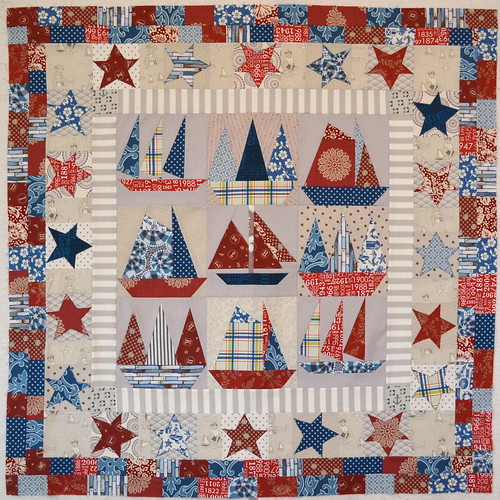
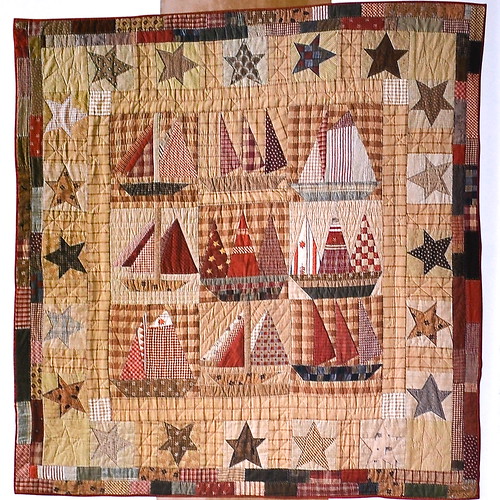
This quilt is super simple, which is perfect for beginners, but has enough happening that class participants can really put their own spin on it with fabric choices and quilting designs.  Seeing the different choices people make is one of my favourite parts of teaching.  While my students were working on this quilt, I made my own version (outside class time, of course).  You can check it out here, together with other previous versions here and here.

Class photos 2015

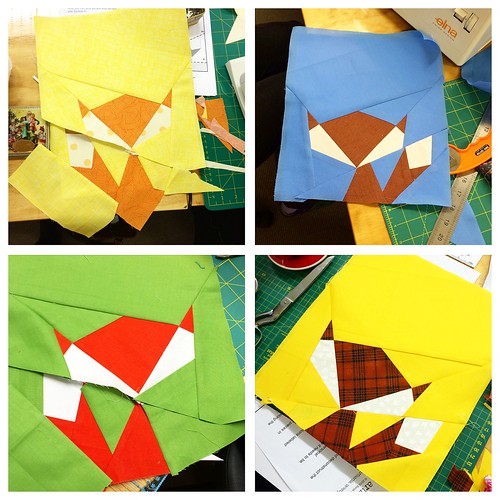
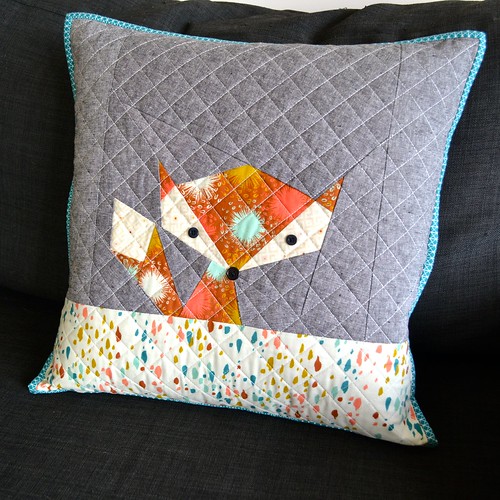
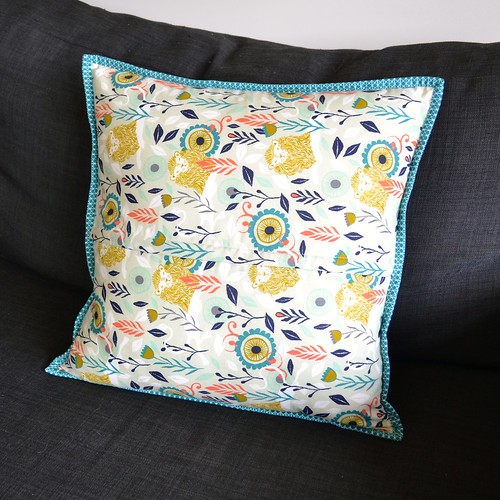
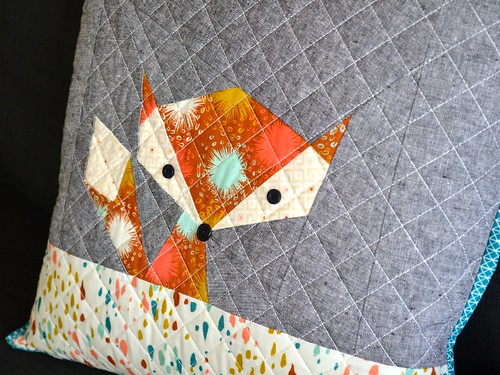
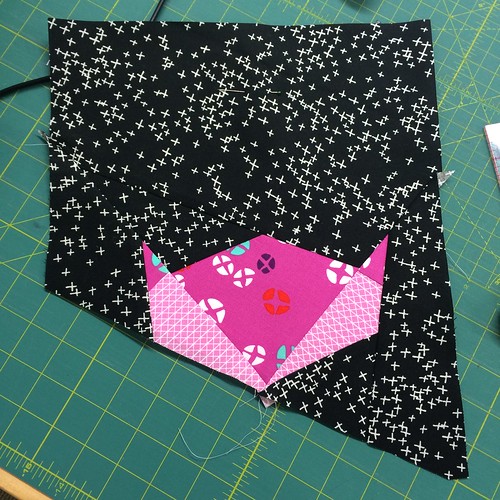
Next up is some of the work that came out of my foundation paper piecing class, also at Stitchbird. The pattern I've used here is, of course, Artisania's Lil' Fox pattern, and you can see my class sample cushion here.

Untitled 

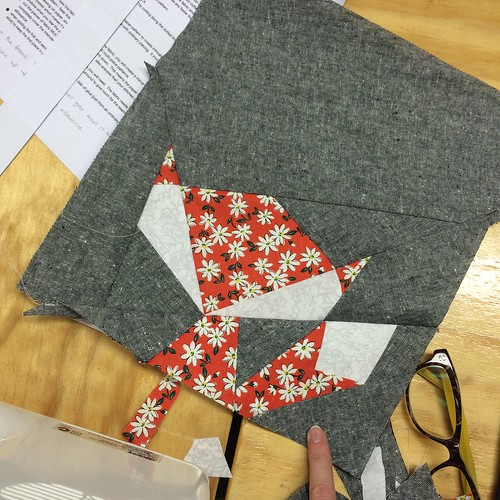
 I actually ran this class twice last year, because there was so much interest after the first class, and it was a lot of fun.  It is a technique class, so only takes two hours, and participants leave with a partially completed fox block and the skills to finish it at home and tackle other foundation paper piecing projects on their own.

Untitled 

I know that a few of these foxes have made their way into finished projects - like these cushions made by Kerry and Bridget.

Class photos 2015

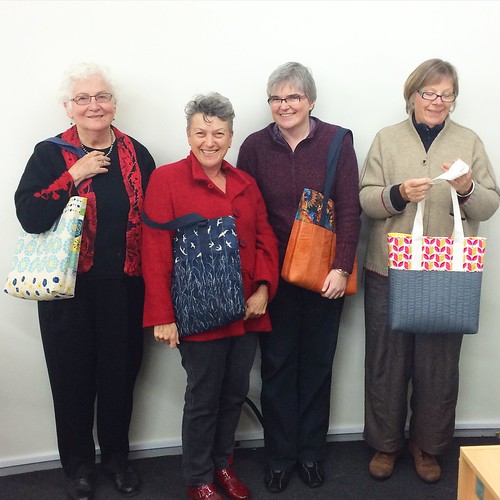
Another class I taught twice this year was a class based on my Soft and Stable Tote Bag tutorial.

Class photos 2015

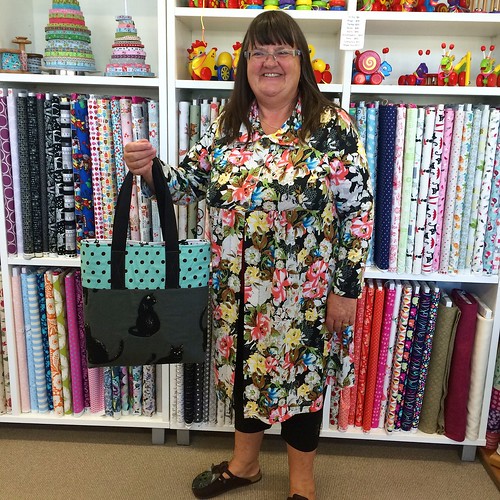
I taught this one at both Stitchbird and Nancy's Stitch Studio, and had a blast each time.

Class photos 2015

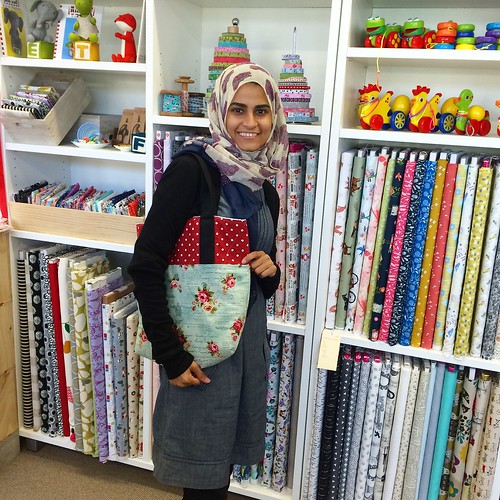
I know, as a student, that it's so satisfying to come out of a class with a finished project, and my participants left each class with a fully completed tote bag each, which was awesome!

I was going to share all of my class photos for the year in a single post, but writing it up, there are a lot, so I think I will spread them over a couple of posts.  Come back later in the week for part two...

Follow

Monday, 16 March 2015

Lil' Fox Cushion

One of the classes I'm teaching this year at Stitchbird is on foundation paper piecing.  We will be using Artisania's Lil' Fox pattern and students can turn their paper pieced fox into whatever they like. All the class details are here.

Lil Fox Cushion

Of course, I had to make a class sample (as well as some step-outs to show in class).  I decided to use a few Cotton & Steel fabrics together with my old favourite, yarn dyed Essex Linen in Black (available here), for the sample.

Lil Fox Cushion

I also used Cotton & Steel for the back of the cushion, and using my covered zipper tutorial to finish.

Lil Fox Cushion

I thought simple would be better for the quilting, and went for a cross-hatch using a heavier weight thread again - I love the way the heavier thread stands out against the linen.  This one is Aurifil 2021 in 28 weight.

Lil Fox Cushion

I'm not much good at embroidery so I stitched on some buttons for this the eyes and nose.  I think they give this guy some extra personality.

If you'd like to learn foundation paper piecing (and it is one of those things that is quite nice to learn from someone else), I hope you'll join me at Stitchbird.  Again, you can find all the class details here.

Follow on Bloglovin

Monday, 8 July 2013

Old New Sailboats Quilt

My sailboats quilt is finished and has been delivered to the mother-to-be.  I am very very pleased with how it came out, and it was well received, which is always nice!

Old New Sailboats Quilt 

You can see that I kept the quilting very simple with my favourite diagonal cross-hatch.  The lines are 1" apart.  The first time I quilted a cross-hatch I tried using the guide bar that comes with my walking foot.  The theory is all good, but in practice, it doesn't work well for me.  The other end of the guide bar gets in the way of my right hand, it gets bumped out of place too easily, and I still find it difficult to get neat straight lines.  Since then, I've been converted to marking all my quilting lines, and even though it's time consuming, I find the result is a lot better.


I use a hera marker for marking quilting lines - partly because there is no risk of making a mark that will not come out of the fabric, but mostly because it is the most cost effective way of marking.  Once you've bought a hera marker (which, by the way, costs about the same as a single marking pen), you should be able to keep using it for many many years.  This is the one I have, and I would highly recommend it.

Old New Sailboats Quilt 

If you're interested in how I made the quilt top, I shared some of the details here.  It involved a variety of techniques, including foundation paper piecing, machine appliqué and regular piecing.  Since there was quite a bit happening on the front of this quilt, I decided to go very simple for the back. This navy and cream ticking stripe fabric fits nicely with the nautical theme.  It also happened to be 54" wide, meaning I didn't have to piece the back (hooray!).

Old New Sailboats Quilt 

Even though I'm happy to pass this quilt on to it's intended home, I'm also a little sorry to say goodbye to it.  I enjoyed making it a lot more than I thought I would.  The colour scheme is out of my usual comfort zone, but I had a lot of fun picking fabrics (and more of them come from my stash than you might expect!).

Old New Sailboats Quilt 

Back when this quilt was still a WIP, I asked for some advice on labelling.  I received lots of great ideas, including the suggestion to add the label later after the baby is born.  In the end, I decided that if I didn't label the quilt now, it would never get done.  You can see the label I went with below - the couple's last name is actually on the label, but I have edited it out for their privacy.  After writing the label with a fabric marker, I used fusible webbing to attach it to the back of the quilt, and then blanket stitched around the edge with two strands of embroidery thread.

Old New Sailboats Quilt

I would really like to make another version of this quilt in a colour palette that's more my speed.  Sadly the book the pattern is from (Le Petit Monde de Jacqueline Morel) seems to be out of print and a bit hard to find, otherwise I would definitely be adding it to my collection.  I guess I'll have to wait until I can get it out of the guild library again!

Quilt Stats
Pattern: Old Sailboats Quilt from Le Petit Monde de Jacqueline Morel
Finished Size: Approximately 42" square.
Fabric: assorted designer quilting fabrics including Moda, Anna Maria Horner, Riley Blake and Tula Pink
Backing: Navy and Cream Ticking Stripe
Binding: Tonal High Rise in Dark Blue from Velocity by Jessica Hogarth for P&B Textiles
Pieced and quilted by: me, on my domestic sewing machine.

Linking up with:


and with Finish it up Friday at crazy mom quilts.

Wednesday, 19 June 2013

WIP Wednesday

I've been working away on my Sailboats quilt.  A couple of weeks ago my friend Helen (yes, the one with that cushion) gave me some pointers on machine appliqué and let me use her (rather lovely) Janome Horizon to appliqué the stars onto their background squares.

This was a deviation from the pattern - it instructed reverse needle turn appliqué, where you needle turn appliqué the lighter background pieces to the star fabric.  That method would make sense if, for example, the stars were light and the background was dark, but for this pattern it seemed like an unnecessarily large amount of work, so I went with machine appliqué instead.

Sailboats quilt in progress 

I then stitched the star borders together and added them to the central panel and the first border.  After that I created the third and fourth borders using lots of little pieces of the blue and red fabrics I used for the boats and the stars.

Sailboats quilt top finished 

Above is my finished quilt top, and below is the quilt top from the book (Le Petit Monde de Jacqueline Morel).  

You can see that I changed the colour scheme up a bit - I think mine is a bit crisper and more modern, while the original has a softer, vintage feel to it.  I also changed the placement of the boats, mainly because I liked the look of some more than others (and to be honest, I thought the little one in the centre of my quilt would be the most difficult to make and therefore I only wanted to make it once!).

Old Sailboats Quilt from Le Petit Monde de Jacqueline Morel

You might also have noticed that my boats are reversed from the ones in the original quilt.  This is because the pattern instructs you to use templates to make the boat blocks.  I'm sorry, but no way was I going to do that - it would have been a disaster for me.  Instead, I copied the boat blocks from the book, and used the copies as foundation papers to make the boat blocks.  This was far more accurate (and therefore satisfying) for me.

I now have the quilt top basted and am planning to quilt it this week or this weekend.  I have a question for my readers though - something which has been bothering me for a while.  I will be giving this quilt at a baby shower, and I would really like to put a label on it, but I don't know what to say.  My friend is having a baby boy, but he doesn't have a name yet (as far as I know - and it's not really the done thing here to name your baby before birth).  I'm sure this is something many of you have encountered before, so I would love to know - what do you do in this situation?

Linking up with Lee at Freshly Pieced, and Kirsty at Quiet Play:

WIP Wednesday at Freshly Pieced Paper Piecing Party


P.S. You might want to check back tomorrow for a giveaway I have planned.  Only if you like fabric though! Updated - giveaway here.

Saturday, 12 January 2013

How far will you go? Not very!

Last year, Jess at The Elven Garden put together a great Quilt Along, the How Far Will You Go? Quilt Along.  I didn't exactly follow along, but I was very inspired by the Tippecanoe block, and particularly Jess' use of it to make this cushion.

I used elements of the tippecanoe block in the Dat Star block I designed, which I quilted lightly and turned into a cushion for my brother.


The Linky Party for finished quilts and quilted items is now open, and with Jess' encouragement am entering my cushion in the small quilted items category.  Head over and check out the lovely things people have made!

Wednesday, 28 November 2012

WIP Wednesday

Since I enjoyed making my first zippy pouch over the weekend using the open wide pouch tutorial from noodlehead,  I thought I would make some more.  Last night, I decided to cut the fabric for two new pouches using the leftovers from my first pouch.  My leftover fabric was a bit small, so I decided to add a contrast bottom.

So, I cut all the exterior, lining and interfacing pieces for both pouches, and pieced the exterior pieces for both.  I interfaced the exteriors for both pouches, and found that the size of my interfacing was slightly off, but nothing terrible.

Then, I went to interface the lining of the first pouch.  Ummm, my two pieces of lining were different sizes.  Doh!  I decided to set that pouch aside for the night and work on my second one.  This one wasn't quite smooth sailing, but seemed to being going ok.

Ummm, do you notice something wrong with this picture?!

#sewingfail

Yeah, I left the wrong end of the zip sticking out of the pouch.  It's still functional, but it looks really weird, and I don't think I can fix it by adding a zipper tab (someone correct me if I am wrong, but I am worried about getting the zipper teeth all out of alignment if I cut the open end).  Sigh.  Nevermind, I am not exactly in love with the fabric combo in this pouch anyway. 

Ralph is not impressed with my efforts
 Will be taking a bit more care with the next one!

In other WIP news, I have been doing a bit of foundation piecing.  This is a quarter of the Which Way North block from the Compass Collection.  I am going to make several of the Compass Collection in a selection of low volume aqua, grey and yellow fabrics.  It may end up as a baby quilt, or a mini, or something else entirely.  I am just having fun playing with fabric.


Regular readers may be wondering what has happened to my Oakshott quilt.  It is finished!  But I am currently camera-less (apart from the camera on my phone, which I used to take the pictures above), so I haven't been able to take photos of the finished product yet.  Soon, soon, I hope.

Have you had any sewing fails lately?  Or maybe you have been indulging in some just because, no real plan, fabric play?
Linking up with Lee over at Freshly Pieced:


P.S. My Rocky Road bundle made the final 10 in Sew Lux Fabrics Guest Curator Contest!  The list of the final 10 is here, and voting is now open, so head over and vote for your favourite (the voting poll is in the top left of the screen).  I would be over the moon to win this bundle, so if you feel like voting for me, please do!

P.P.S.  I have a couple of giveaways coming up in the next fortnight or so, so you might want to hang around for a bit.  The first one will be on 3 December as part of the Sew, Mama, Sew! giveaway day.