Showing posts with label zipper. Show all posts

Tuesday, 14 January 2014

A couple of zip pouches

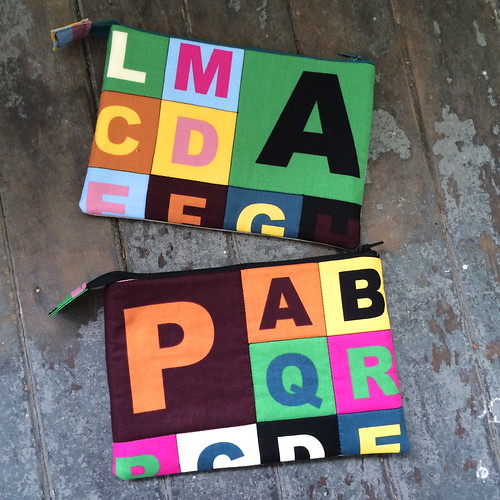
This weekend, at my brother's request, I made him a pencil case.  I used some amazing colourful First of Infinity fabric to piece a rude word for the front, and a bigger piece for the back.  I used Noodlehead's open wide pouch tutorial to make these, except I quilted the exterior and didn't box the corners.

Funny pouches 

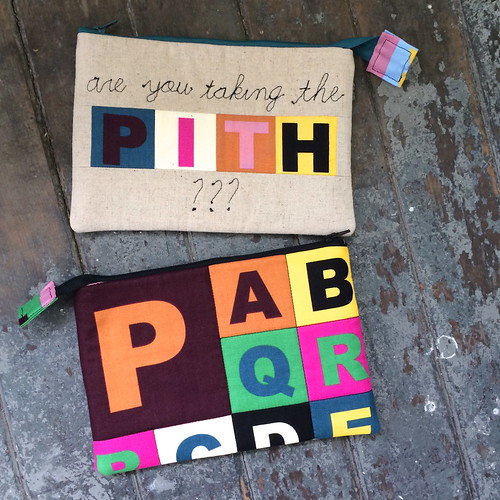
I had so much fun making a pouch for my brother that I decided to make one for my mum.  She wouldn't appreciate a sweary pouch, but she can't resist the word pith.  It makes her laugh every time.  So I made her a nearly-but-not-quite sweary pouch.

Funny pouches

The cursive letters were done by tracing the writing with a water soluble pen and then free motion quilting over the lettering.  My quilting is not perfect but I still love the effect.

Have you every gotten carried away making something and ended up making multiples?

By the way, if you're thinking about participating in the 2014 Pantone Quilt Challenge (or frankly, even if you're not), you should head on over to Play Crafts and check out Anne's For the Love of Colour post on Radiant Orchid.  I'm learning so much from these posts and this is a particularly good one!

Monday, 16 December 2013

Skills Swap - what I sent

Several months ago I said I would be interested in a skills swap.  I was keen for a pair of hand knitted socks, but lacking the skills to actually knit them myself, I offered up a quilted item made by me in exchange for the socks.  The lovely Kelsey of Everyday Fray put her hand up and so we have swapped!  Now that my items have arrived with Kelsey, I'm very excited to share them with you.

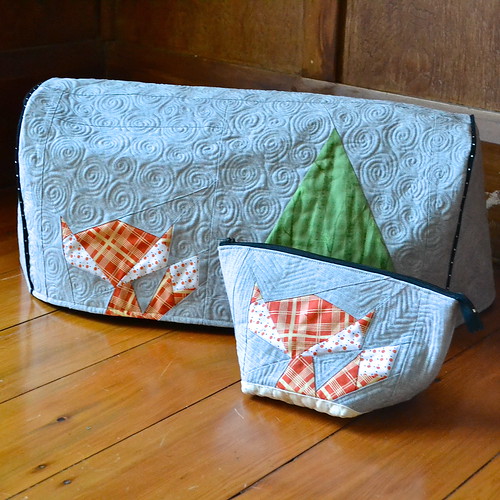
Lil Fox sewing machine cover and pouch

The thing that Kelsey actually asked for was a sewing machine cover.  She left it to me to choose the design, but we did discuss cute animals, including foxes.  I'll share more details of these items in a later post, but the sewing machine cover is a modified version of this pattern, and the little fox is made using this pattern.  I also made Kelsey a matching pouch using my favourite open wide zipper pouch tutorial from noodlehead.

Kelsey's stocking

Since it's so close to Christmas, I thought it might be fun to include something Christmassy as well.  I made this stocking, and a matching one for Kelsey's husband, using my own pattern.  It was really fun and I think I will have to do a whole set for my family one of these days.

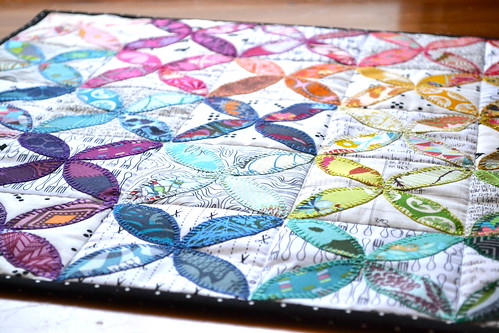
AMH All Day mini quilt

The final handmade item that I included is this mini quilt.  All the coloured petals are Anna Maria Horner fabrics - 100 different ones in total.  Yes, I had all of these (and more) in my stash already.  I went for a kind of rainbow effect on a crisp white low volume background.  I'm very happy with how this mini turned out, and I think I will have to make another one for myself.  Good thing I love that hand done blanket stitch appliqué so much!

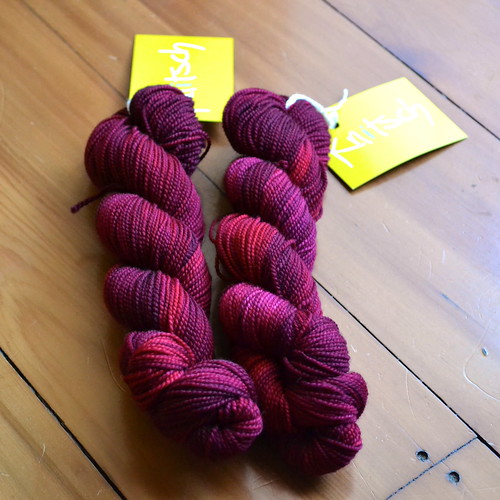
Knitsch yarn

Kelsey and I also agreed to include some swag in our parcels.  This locally produced knitsch sock yarn is particularly lovely (it's actually what my mum is using to knit me another pair of socks) and with a name like "Mad Blood Stirreth", how could anyone resist?

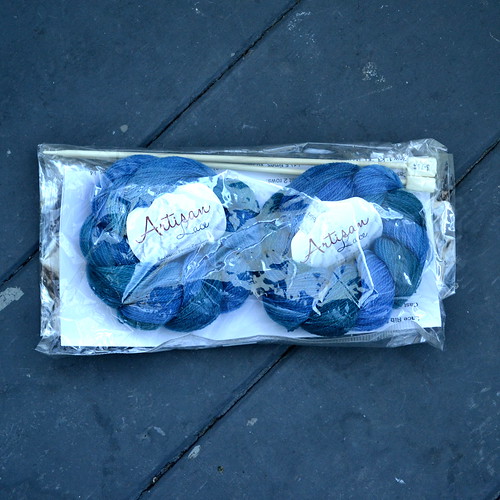
Lace yarn

At the same time I was buying the sock yarn, this Artisan Lace yarn kit caught my eye.  It has two skeins of yarn, three different lace scarf patterns and the right size knitting needles as well.  I have no idea if Kelsey likes knitting lace, but the scarves looked so pretty knitted up in the shop.

There are more photos and details to come on my handmade items, but I have to say that doing a direct swap like this was a lot of fun.  I found it more satisfying than making something for a relatively anonymous partner and I would definitely do something like this again.  Although Kelsey and I sent our parcels on the same day, NZ Post seems to be taking its own sweet time with delivering Kelsey's parcel to me, but I am very excited to receive it and hope to share the contents with you shortly!

Linking up with:

Fresh Poppy Design  Sew Cute Tuesday  My Quilt Infatuation

and with Finish it up Friday at crazy mom quilts.

Follow on Bloglovin

Tuesday, 26 November 2013

How to make a cushion back with a covered zipper

As promised last week, here is a tutorial for my new favourite method of making cushion backs, which involves a covered zipper.  Here it is in action on the back of my Falling Softly cushion.  By the way, I am going to use the term cushion in this tutorial, but for my US readers, I mean pillow.  It's the thing you have on your couch, not the thing you sleep on.
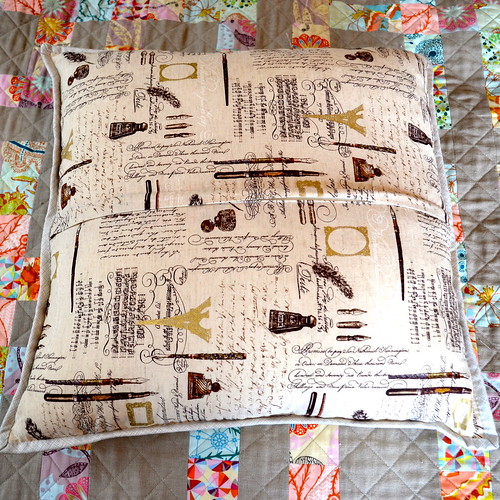
covered zipper cushion back

I really like this method because it is quick, it is neat, and it is quite economical with fabric.  I promise it is not difficult if you work through it step by step, but it's also one of those things that's not completely obvious at first.  Give it a try anyway - I think you'll like it!

Materials:

covered zipper pillow back 

  • A piece of fabric at least 4" taller than your cushion front and at least 2" wider than your cushion front
  • A zipper at least 2" wider than your cushion front
  • Zipper foot
  • Edgestitch foot (if you have one)
  • Sewing machine and the usual tools like scissors, thread, needles, seam ripper, etc.
For this tutorial I have used a linen cotton blend fabric, which is slightly heavier than quilting cotton.  This technique will work equally well with anything from quilting cotton to upholstery weight fabrics (although if you get into really thick fabrics it will get a bit trickier).

Step 1:
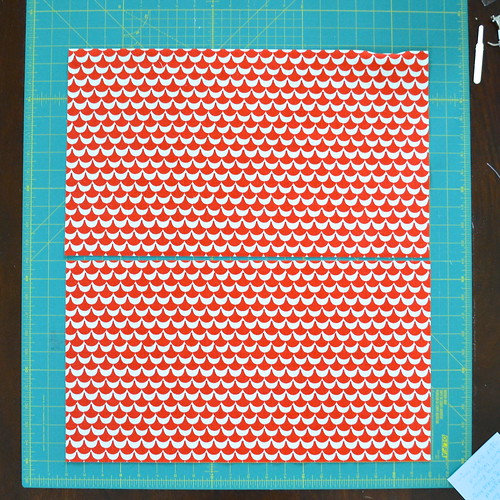
Cut the fabric approximately in half along the width of the fabric.

covered zipper pillow back 

Step 2:
Sew the two pieces together using a 1" seam allowance.  You are going to unpick this seam later, so it's best to use a basting stitch to make that easier.  I just use the longest stitch length on my machine, but if you have something more modern, you might not need to go that extreme.

covered zipper pillow back 

Confession time - I can't sew a straight line unless it's marked or I'm using my quarter inch foot with a guide.  I marked the 1" seam allowance (the light blue line in the picture above) - feel free to do the same!  Also, if you are using a directional fabric (like me), be aware of how the print will run when the two pieces are stitched together.  In the photo above you can see that I'm checking to make sure the print will run the same way on each piece.

covered zipper pillow back 

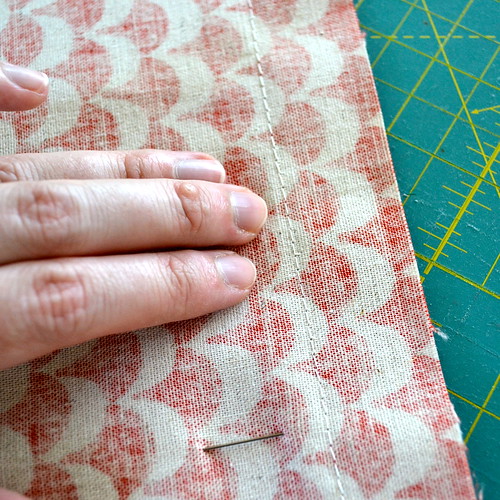
This is the seam after it is sewn - you can see that the stitches are longer than normal.

Step 3:
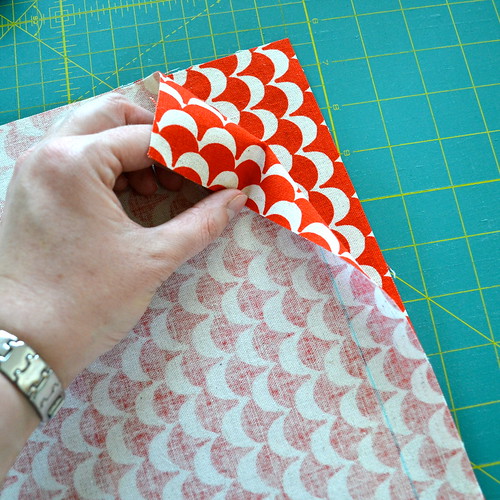
Press all the layers of the fabric except the right hand seam allowance to the left.

covered zipper pillow back 

Step 4:
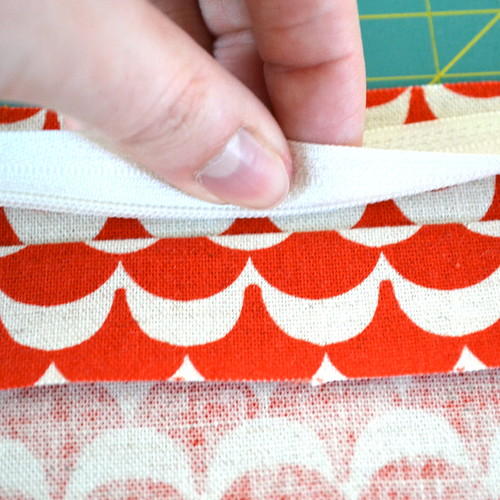
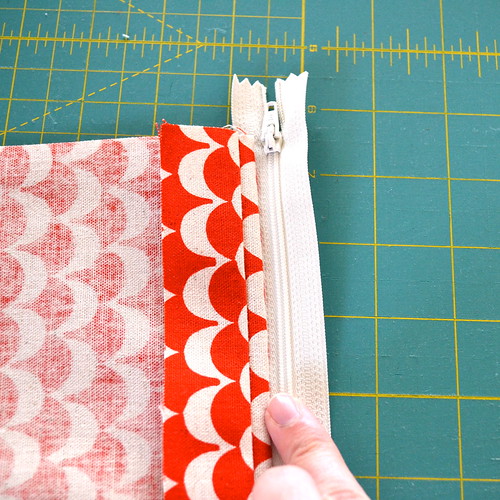
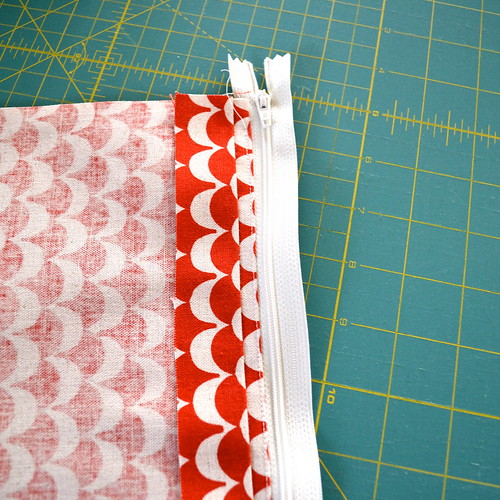
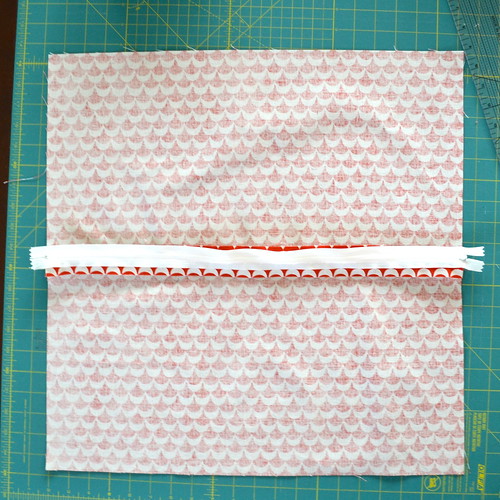
Lie the zipper, teeth down, along the seam allowance.  Make sure the teeth line up right along the seam.

covered zipper pillow back 

Pin in place.  We are going to stitch down the zipper tape on the right side of the zipper teeth, so if you pin the left side of the zipper tape you will be able to leave the pins in place as you sew.

covered zipper pillow back 

Step 5:
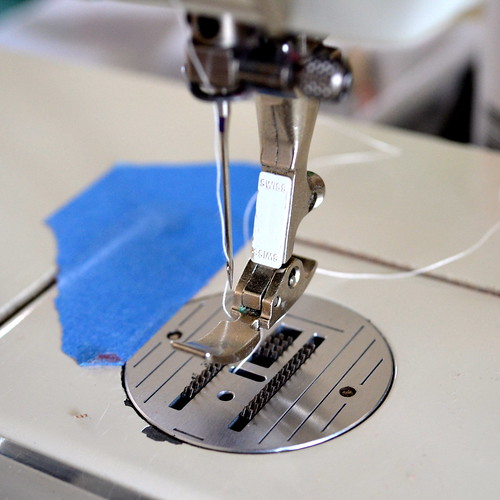
Put your zipper foot on your machine and move the needle all the way over to the left.

covered zipper pillow back 

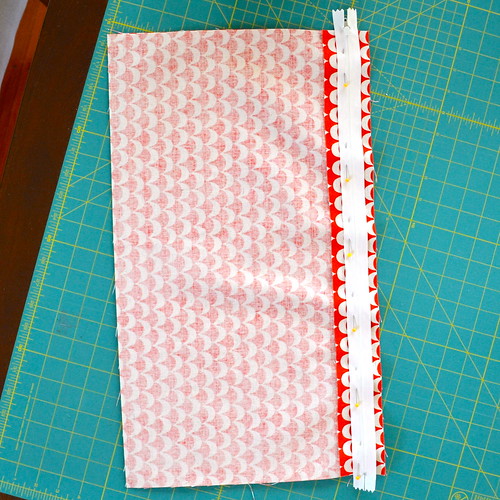
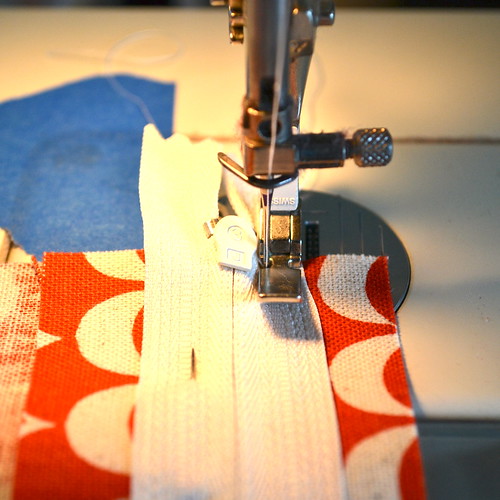
Stitch down the zipper tape to the right of the zipper teeth, keeping your needle nice and close to the teeth and using a normal stitch length.  I find using the woven lines in the zipper tape quite useful for keeping my stitching straight.

covered zipper pillow back 

Step 6:
Turn the zipper face up and move all of the fabric over to the left.  

covered zipper pillow back 

Top stitch along the fold to create a neat edge.  If you have an edgestitch foot, this is the time to use it.  Otherwise, just use a normal foot and go slowly and carefully - actually you could probably use your zipper foot for this step too.

covered zipper pillow back 

Step 7:
Open out the cushion back so that the zipper is again lying along the central seam face down.  Stitch down the zipper tape that hasn't already been stitched in place, using your zipper foot and the same technique as before. You will be sewing through the zipper tape, the seam allowance and the right side of the fabric, and this seam will be visible on your finished cushion, so use a matching thread and try to keep things nice and straight.

covered zipper pillow back 

Step 8:
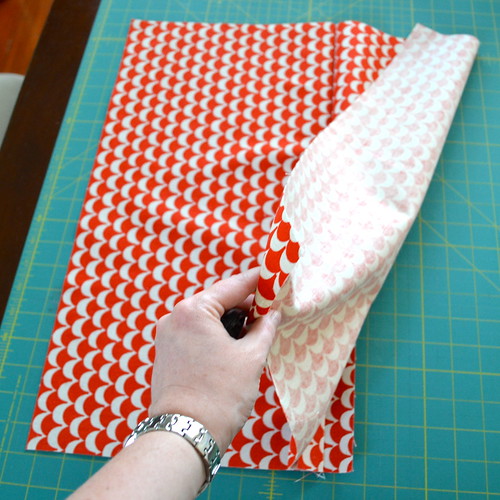
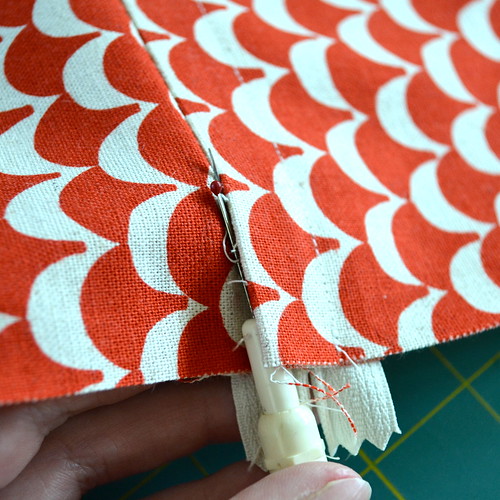
You should now have a zipper that is stitch in place, but trapped under a flap of fabric.  Use your seam ripper to carefully unpick the first seam you sewed.

covered zipper pillow back 

Step 9:
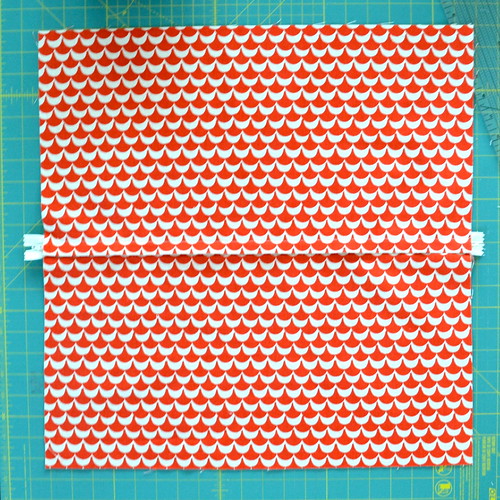
Admire your cushion back!

covered zipper pillow back 

It is now ready to attach to your cushion front in whichever way you prefer.  For my Falling Softly pillow I stitched the front and the back wrong sides together and then finished the edges with a binding like a quilt.  This cushion back will be stitched right sides together with the front and then turned out (if you are going to do it this way, make sure you open the zipper before you stitch around the edges!).

covered zipper pillow back

I hope you've enjoyed this tutorial!  Let me know if you have any questions and I will do my best to answer them.

Strictly speaking, this cushion back is now a WIP (I haven't yet made the cushion front for it..), so I'm linking up with Lee at Freshly Pieced, and Alyce at Blossom Heart Quilts:

WIP Wednesday at Freshly Pieced
 
Follow on Bloglovin