
I wrote this tutorial last year for Leanne at she can quilt as part of the 2013 Finish Along. I've been meaning to re-post it here but came up with the idea of a version with patchwork pockets and felt like I really needed to try it out first! So, here is the original tutorial, with some additional instructions in case you feel like making a version with patchwork pockets. Also, I posted about making afghans, a very New Zealand biscuit*, on instagram lately, and someone asked if I'd post the recipe, so I thought I'd include it here.

This oven mitt is a pretty quick project, which I think is perfect for gifts - what could be better than an oven mitt customised to the recipient's kitchen? It is also a solution to that gifts-for-guys dilemma we all face - it's something practical that a man who likes cooking will actually use (I made one for my Dad for Christmas 2012 and he's still using it). I personally really like this style of oven mitt because even if you don’t have any hooks in your kitchen, you can easily hang it over the handle of your oven, and it lets you use both hands.
To make this oven mitt, you only need a single fat quarter of your chosen feature fabric, which makes it a perfect project to use up those “just because” fat quarters – you know, the ones you bought just because you love the fabric, not because you had a plan for it at the time!
What you will need

- 1 fat quarter of your feature fabric
- 2 scrap pieces of fabric, 9” by 7”
- 34” by 11” piece of backing fabric
- 30” by 10” piece of low loft cotton batting
- 30” by 10” piece of Insul-Bright (insulated batting)
- At least 70” bias binding (2 1/4" or 2 1/2" wide)
- Freezer paper
- Printed template
Download templates here
Tips before you start
It's a good idea to read the full tutorial all the way through before you start.
When choosing fabrics for this project, bear in mind that they will be touching hot dishes. For this reason, I would recommend that you stick to natural fibres like cotton and/or linen which can stand up to the heat. If you're not sure, think about whether you would iron the fabric hot and with steam. If not, it's probably not suitable.
You need bias binding for this project so that it can go around the curved ends of the oven mitt - straight grain binding will not work. You can use store-bought bias binding or make your own.
If you use store bought bias binding, make sure it is 100% cotton, otherwise you run the risk of it melting on contact with hot dishes (I used poly-cotton binding on the first version of this oven mitt I made, and had to rip it off after I melted it with my iron...).
If you make your own bias binding, cut it the width that you would normally cut binding for a quilt. I like a narrow binding, so I cut mine 2 1/4" wide, but with the extra layer of the Insul-Bright, it was a bit of a squeeze so 2 1/2" wide binding might have been better.
Finally, don't be put off by the inclusion of Insul-Bright in this tutorial. I thought it might be expensive or hard to find here in New Zealand (we don't generally have as large a range of quilting goods available here as in the US, for example), but I found it easily and at several places. I know it is definitely available at Spotlight in New Zealand and Australia, I believe it is available at Joann's in the US, and if necessary you can buy it online quite readily.
Step 1 – Preparing templates
Print the template on A3 paper, making sure that your print settings are “actual size” or "scale 100%" – measure the 1” test square to check. Put a piece of freezer paper over your template, with the shiny side down, and trace around the template. Cut both piece 1 and piece 2 out of the freezer paper so that you have two freezer paper templates.

Step 2 – Preparing fabric
Iron your fat quarter and fold in half, aligning the shortest cut edge with the selvedge. Square up the edges. Cut your fat quarter into two strips approximately 9” by 20”. Trim the selvedge off both pieces. Sew one scrap piece of fabric to each end of one of the fat quarter strips, and press, so that you end up with a strip approximately 9” by 34”. Press the fold line again to keep it crisp.

If you are making the patchwork pocket version, you can use a strip of plain fabric for this step - but the principles are the same.
Step 2A - Preparing the patchwork pockets
You can make whatever patchwork you like for the pockets - you just need to end up with two pieces about 8.5" square. You don't want to leave all the seams of your patchwork exposed though, because your pocket will fall apart after a bit of use.
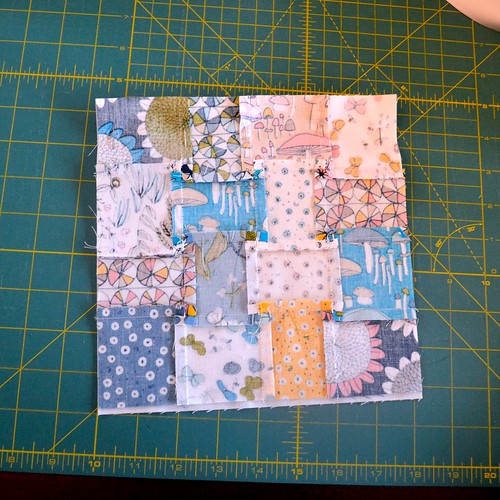
The solution is to line your pockets and it is really simple to do. Take a plain piece of fabric which is the same size as your patchwork piece (I used white fabric to line my pockets because of the white based fabrics I used). Place your patchwork piece and lining fabric right sides together and stitch together along one edge. Fold the pieces so they are wrong sides together and press the seam so it is nice and neat. Topstitch along the seam to create a nice finish.
Put the freezer paper template for piece 1 on the longer strip cut from your fat quarter, aligning the straight edge of the template with the folded edge of the strip. Iron the freezer paper on to your fabric using a dry iron. Cut around the freezer paper template.
Put the freezer paper template for piece 2 on the shorter strip cut from your fat quarter, aligning the straight edge of the template with the cut edge of the strip. Iron the freezer paper on to your fabric using a dry iron.

Cut around the freezer paper templates and remove. You should now have a single version of piece 1, and two versions of piece 2 for the pockets.

For the patchwork pockets version, follow the instructions as above. Since you will have made each pocket separately, you will need to stick the freezer paper onto each patchwork piece and cut twice.
Make a quilt sandwich in the following order, and baste using your preferred method:
• backing fabric – right side down
• Insul-Bright insulated batting
• cotton batting
• piece 1 – right side up

Step 5 – Quilting
Quilt as desired. For durability, I recommend that you quilt the oven mitt quite densely. Personally, I think this project is perfect for trying out a new free-motion quilting design. A small project is easier to manoeuvre and doesn’t take long to quilt even if the design is complicated or dense. That said, I was in the mood for straight lines when I quilted this particular oven mitt, and I think they look good too!
Once the oven mitt is quilted, use the edge of the feature fabric as a guide and trim away the excess batting and backing fabric.
Step 6 – Add the pockets
Take both of the pocket pieces and fold the straight edge over ¼” and press. Fold over another ¼” and press again to create a tidy hem. Top stitch along the edge of the hem on each piece. If you are making the patchwork pockets version, you can skip this step because you have already created a finished seam at the top of your pockets.

Pin each pocket piece onto the quilted body of the oven mitt. Sew around the edge, about 1/8” from the edge. You won’t see these stitches once the oven mitt is bound, so don’t stress too much about making them perfect.

Step 7 – Binding
Pin the bias binding around the edge of the oven mitt, attaching it to the front side (with the pockets and feature fabric). Stitch in place using a quarter inch seam.

Finish the binding using your preferred method - I hand stitched mine down, but you could machine stitch it.

And you're done!
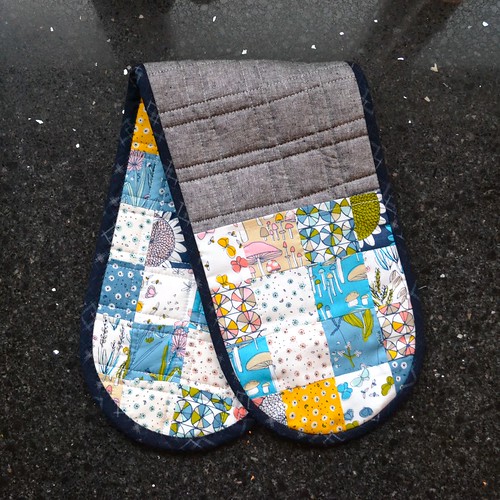
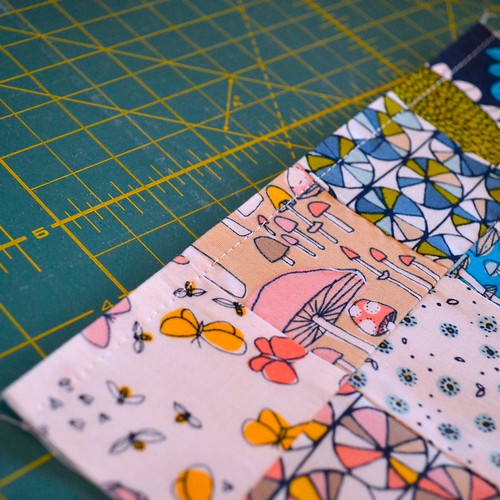
This is my version with the patchwork pockets - you can see that I made a patchwork panel for the other side as well, just for fun. I used the Arcadia collection by Sarah Watson for Cloud 9 Fabrics for the patchwork - it's just so pretty.

Here you can see that my pockets are lined, so there are no exposed seams.
Phew - if you've made it this far through this mammoth blog post, you deserve a snack. Afghan biscuits* are a peculiar New Zealand delicacy, although why this deliciousness hasn't spread further escapes me, because they are really good and really easy to make. Here is the recipe, from my well used copy of the Edmonds Cookbook (another kiwi classic).
Afghans
Afghans
200g (7oz) salted butter (use real butter, it's better)
1/2 cup (110g/3 7/8 oz) white sugar
1/4 cup (20g/3/4oz) cocoa (dutch cocoa is extra yummy)
1 1/4 (160g/5 5/8oz) cups plain flour
2 cups cornflakes (not the sweetened kind)
Chocolate icing*
Knob of butter, melted (again, use the real stuff)
Icing sugar*
1 tablespoon or so of cocoa
Boiling water
Chocolate icing*
Knob of butter, melted (again, use the real stuff)
Icing sugar*
1 tablespoon or so of cocoa
Boiling water
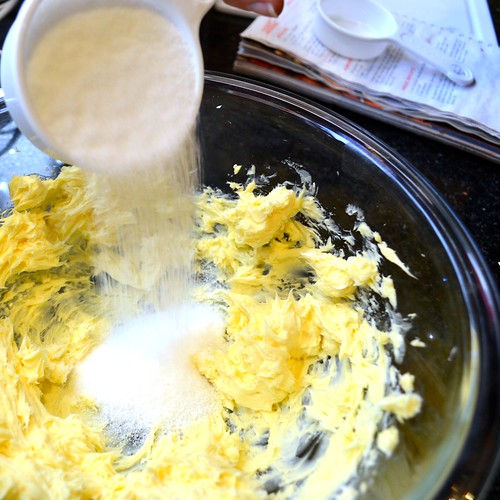
Preheat your oven to 180 degrees celsius (360 degrees fahrenheit). Soften, but do not melt, and then cream butter.
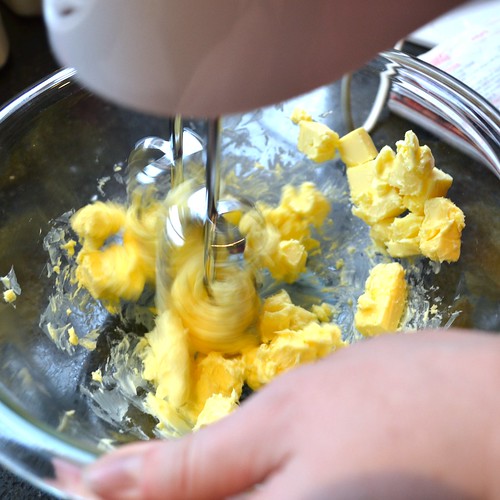
Add sugar, and beat again.
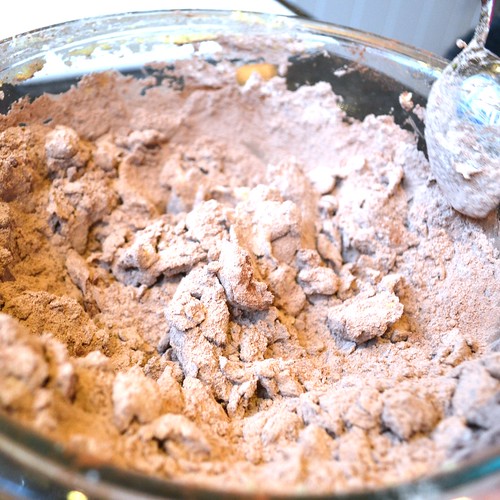
Sift in flour and cocoa.
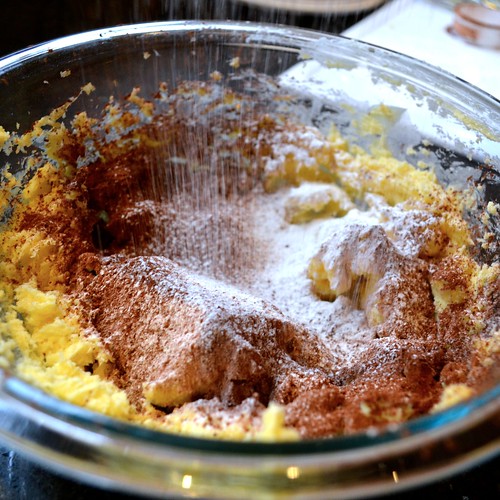
Mix to combine. Don't worry if your mixture seems too dry to start with - keep mixing and it will come together. Use your hands if it's easier.
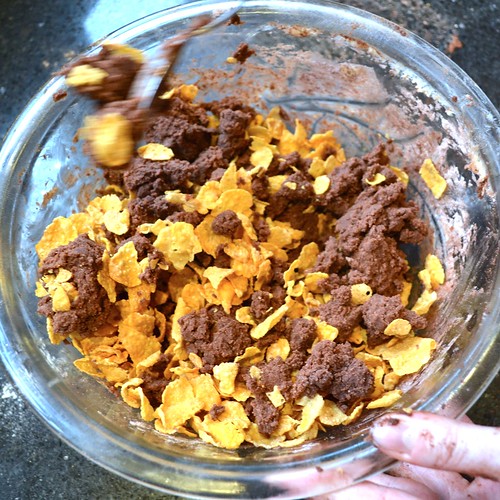
Add cornflakes and mix well to combine.
Form into balls (or thick discs, depending on your preference), and place on a greased or baking paper lined oven tray.
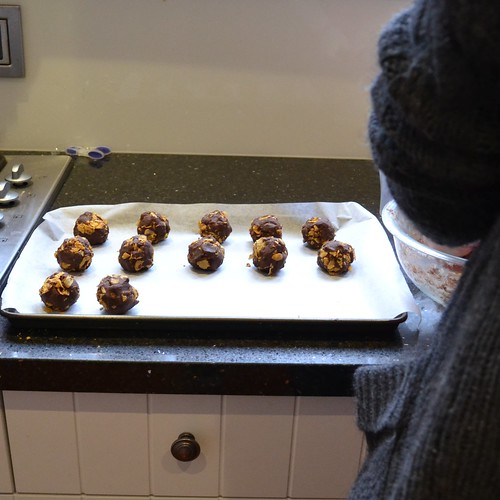
Bake for about 15 minutes. I usually put mine in for 10 minutes and then check how they're doing, and leave them in for another 3 to 5 minutes. You want to err slightly on the side of undercooking, rather than overcooking. Remove from oven using your pretty new oven mitt.
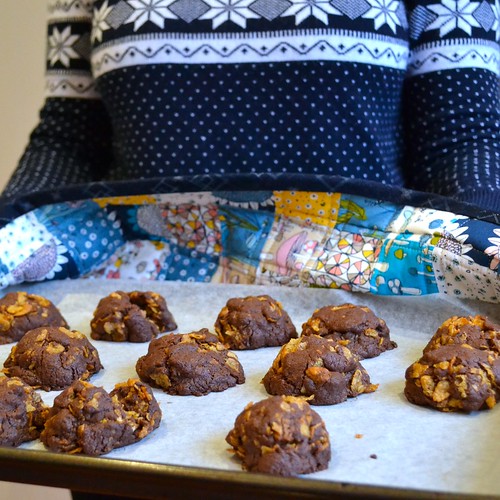
Allow the afghans to cool completely, and then top with chocolate icing (mix all the chocolate icing ingredients from above together until you have a thick but still spreadable icing. It's hard to give quantities but expect to use about 1 cup of icing sugar). If you want, put half a walnut on each biscuit while the icing is still soft.
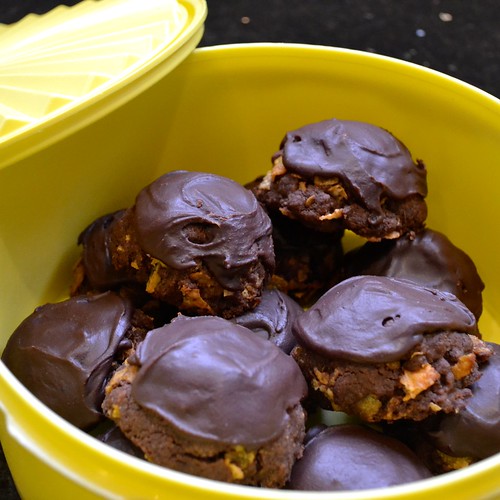
Consume with tea or coffee or just on their own. Store in an air tight container (we are using our delightful heirloom tupperware) until they've all been eaten (I'm sure afghans would go bad at some point but we've never hit it - they don't last more than a few days in my household).
*Translation for my US friends:
Biscuits = cookies
Icing = frosting
Icing sugar = powdered or confectioner's sugar
I hope you enjoy! If you make an oven mitt (or afghans) using my tutorial, let me know!

12 comments:
Ahh, Afghans, yumo! I hope you licked your fingers!
great oven mitt & tutorial.
I never seem to get all my afgans in the oven if the kids realise I'm baking them... I usually only end up baking the one or two I can get out of the remains of the cookie dough after they have been at it.
Your oven mitts are lovely! I would like to make some new ones but need to find some Insul-bright first.
those biscuits look delicious, dammit!!!!!!!
Thanks for recipe and tutorial, going to add both to my make list :-)
I am definitely bookmarking this to refer to in the future. Thank you for both the tutorial and recipe!
I keep seeing these afghans on instagram and they look soooo yummy. I got some cornflakes so I can try them soon! :D
There is a right and wrong side to the insulbrite...one should read the instructions on the wrapping...I made oven mitts and had the batting the wrong way around and the recipient almost burnt her hands ...
Ask and ye shall receive! Thanks so much for the recipe, Adrianne - they looked delicious on IG, and even more delicious here. My kids will love them : )
Mmmmm, afghans, my favourite. I crush my cornflakes when I make afghans, I measure them first them put them in a plastic bag and roll over it with a glass jar or rolling pin. I prefer them like this because otherwise I find the cornflakes go soft.
They look so yummy, the ingredients are very similar to a cornflake slice I make with the same icing so I'll have to try these. Have to make myself a fancy oven mitt first though. Two pins from one post! Thanks so much for sharing (:
Just found this site. Thank you for the oven mitt tutorial. Do you know if Gluten Free flour (like Cup for Cup) would work with this recipe?
Post a Comment