Showing posts with label patchwork. Show all posts

Tuesday, 22 July 2014

Fat Quarter Friendly Oven Mitt Tutorial (with patchwork option and afghan recipe)

I wrote this tutorial last year for Leanne at she can quilt as part of the 2013 Finish Along.  I've been meaning to re-post it here but came up with the idea of a version with patchwork pockets and felt like I really needed to try it out first!  So, here is the original tutorial, with some additional instructions in case you feel like making a version with patchwork pockets.  Also, I posted about making afghans, a very New Zealand biscuit*, on instagram lately, and someone asked if I'd post the recipe, so I thought I'd include it here.


This oven mitt is a pretty quick project, which I think is perfect for gifts - what could be better than an oven mitt customised to the recipient's kitchen?  It is also a solution to that gifts-for-guys dilemma we all face - it's something practical that a man who likes cooking will actually use (I made one for my Dad for Christmas 2012 and he's still using it). I personally really like this style of oven mitt because even if you don’t have any hooks in your kitchen, you can easily hang it over the handle of your oven, and it lets you use both hands.

To make this oven mitt, you only need a single fat quarter of your chosen feature fabric, which makes it a perfect project to use up those “just because” fat quarters – you know, the ones you bought just because you love the fabric, not because you had a plan for it at the time!

What you will need


- 1 fat quarter of your feature fabric
- 2 scrap pieces of fabric, 9” by 7”
- 34” by 11” piece of backing fabric
- 30” by 10” piece of low loft cotton batting
- 30” by 10” piece of Insul-Bright (insulated batting)
- At least 70” bias binding (2 1/4" or 2 1/2" wide)
- Freezer paper
- Printed template

Download templates here

Tips before you start

It's a good idea to read the full tutorial all the way through before you start.

When choosing fabrics for this project, bear in mind that they will be touching hot dishes.  For this reason, I would recommend that you stick to natural fibres like cotton and/or linen which can stand up to the heat. If you're not sure, think about whether you would iron the fabric hot and with steam.  If not, it's probably not suitable.

You need bias binding for this project so that it can go around the curved ends of the oven mitt - straight grain binding will not work. You can use store-bought bias binding or make your own.

If you use store bought bias binding, make sure it is 100% cotton, otherwise you run the risk of it melting on contact with hot dishes (I used poly-cotton binding on the first version of this oven mitt I made, and had to rip it off after I melted it with my iron...).

If you make your own bias binding, cut it the width that you would normally cut binding for a quilt.  I like a narrow binding, so I cut mine 2 1/4" wide, but with the extra layer of the Insul-Bright, it was a bit of a squeeze so 2 1/2" wide binding might have been better.

Finally, don't be put off by the inclusion of Insul-Bright in this tutorial.  I thought it might be expensive or hard to find here in New Zealand (we don't generally have as large a range of quilting goods available here as in the US, for example), but I found it easily and at several places.  I know it is definitely available at Spotlight in New Zealand and Australia, I believe it is available at Joann's in the US, and if necessary you can buy it online quite readily.

Step 1 – Preparing templates 

Print the template on A3 paper, making sure that your print settings are “actual size” or "scale 100%" – measure the 1” test square to check. Put a piece of freezer paper over your template, with the shiny side down, and trace around the template. Cut both piece 1 and piece 2 out of the freezer paper so that you have two freezer paper templates.


Step 2 – Preparing fabric 

Iron your fat quarter and fold in half, aligning the shortest cut edge with the selvedge. Square up the edges. Cut your fat quarter into two strips approximately 9” by 20”. Trim the selvedge off both pieces. Sew one scrap piece of fabric to each end of one of the fat quarter strips, and press, so that you end up with a strip approximately 9” by 34”. Press the fold line again to keep it crisp. 


If you are making the patchwork pocket version, you can use a strip of plain fabric for this step - but the principles are the same.

Step 2A - Preparing the patchwork pockets

You can make whatever patchwork you like for the pockets - you just need to end up with two pieces about 8.5" square.  You don't want to leave all the seams of your patchwork exposed though, because your pocket will fall apart after a bit of use.
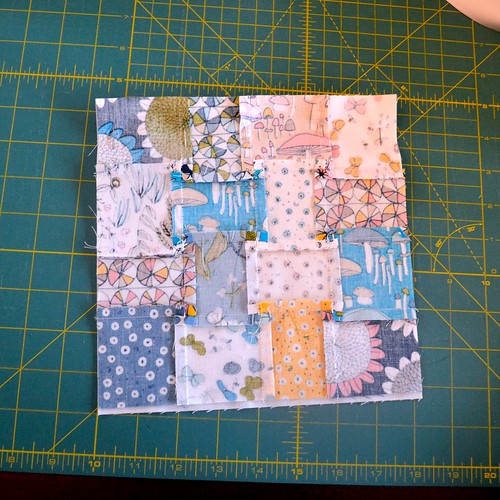
Patchwork oven mitt

The solution is to line your pockets and it is really simple to do.  Take a plain piece of fabric which is the same size as your patchwork piece (I used white fabric to line my pockets because of the white based fabrics I used).  Place your patchwork piece and lining fabric right sides together and stitch together along one edge.  Fold the pieces so they are wrong sides together and press the seam so it is nice and neat.  Topstitch along the seam to create a nice finish. 
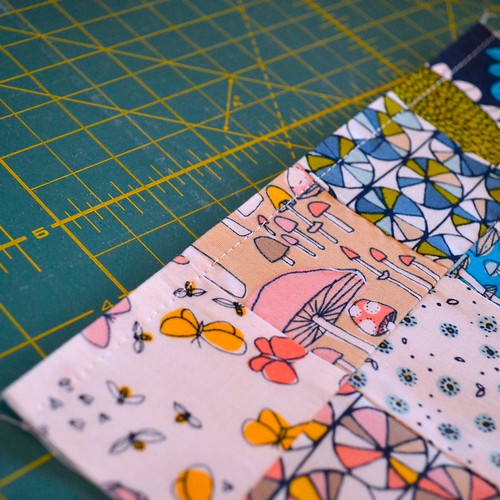
Patchwork oven mitt

Step 3 – Cutting pieces 

Put the freezer paper template for piece 1 on the longer strip cut from your fat quarter, aligning the straight edge of the template with the folded edge of the strip. Iron the freezer paper on to your fabric using a dry iron. Cut around the freezer paper template.

Put the freezer paper template for piece 2 on the shorter strip cut from your fat quarter, aligning the straight edge of the template with the cut edge of the strip. Iron the freezer paper on to your fabric using a dry iron.

Cut around the freezer paper templates and remove.  You should now have a single version of piece 1, and two versions of piece 2 for the pockets.


For the patchwork pockets version, follow the instructions as above.  Since you will have made each pocket separately, you will need to stick the freezer paper onto each patchwork piece and cut twice.

Step 4 – Making your quilt sandwich 

Make a quilt sandwich in the following order, and baste using your preferred method:

 • backing fabric – right side down
 • Insul-Bright insulated batting
 • cotton batting
 • piece 1 – right side up


Step 5 – Quilting

Quilt as desired. For durability, I recommend that you quilt the oven mitt quite densely. Personally, I think this project is perfect for trying out a new free-motion quilting design. A small project is easier to manoeuvre and doesn’t take long to quilt even if the design is complicated or dense.  That said, I was in the mood for straight lines when I quilted this particular oven mitt, and I think they look good too!

Once the oven mitt is quilted, use the edge of the feature fabric as a guide and trim away the excess batting and backing fabric.

Step 6 – Add the pockets 

Take both of the pocket pieces and fold the straight edge over ¼” and press. Fold over another ¼” and press again to create a tidy hem. Top stitch along the edge of the hem on each piece. If you are making the patchwork pockets version, you can skip this step because you have already created a finished seam at the top of your pockets.


Pin each pocket piece onto the quilted body of the oven mitt. Sew around the edge, about 1/8” from the edge. You won’t see these stitches once the oven mitt is bound, so don’t stress too much about making them perfect.


Step 7 – Binding

Pin the bias binding around the edge of the oven mitt, attaching it to the front side (with the pockets and feature fabric). Stitch in place using a quarter inch seam.


Finish the binding using your preferred method - I hand stitched mine down, but you could machine stitch it.


And you're done!
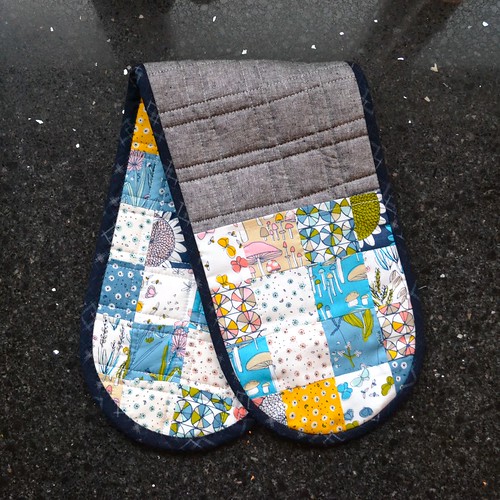
Patchwork oven mitt

This is my version with the patchwork pockets - you can see that I made a patchwork panel for the other side as well, just for fun.  I used the Arcadia collection by Sarah Watson for Cloud 9 Fabrics for the patchwork - it's just so pretty.
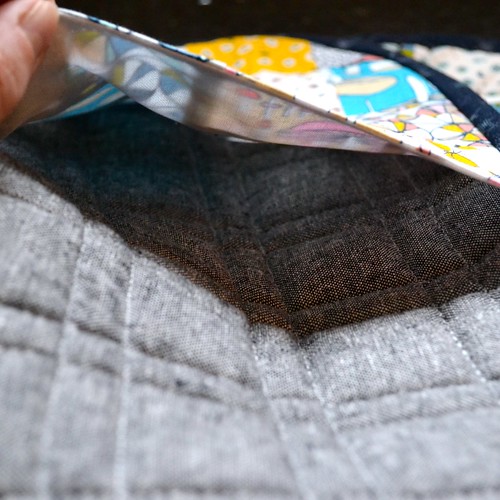
Patchwork oven mitt

Here you can see that my pockets are lined, so there are no exposed seams.

Phew - if you've made it this far through this mammoth blog post, you deserve a snack.  Afghan biscuits* are a peculiar New Zealand delicacy, although why this deliciousness hasn't spread further escapes me, because they are really good and really easy to make.  Here is the recipe, from my well used copy of the Edmonds Cookbook (another kiwi classic).

Afghans

200g (7oz) salted butter (use real butter, it's better)
1/2 cup (110g/3 7/8 oz) white sugar
1/4 cup (20g/3/4oz) cocoa (dutch cocoa is extra yummy)
1 1/4 (160g/5 5/8oz) cups plain flour
2 cups cornflakes (not the sweetened kind)

Chocolate icing*

Knob of butter, melted (again, use the real stuff)
Icing sugar*
1 tablespoon or so of cocoa
Boiling water

Preheat your oven to 180 degrees celsius (360 degrees fahrenheit).  Soften, but do not melt, and then cream butter.
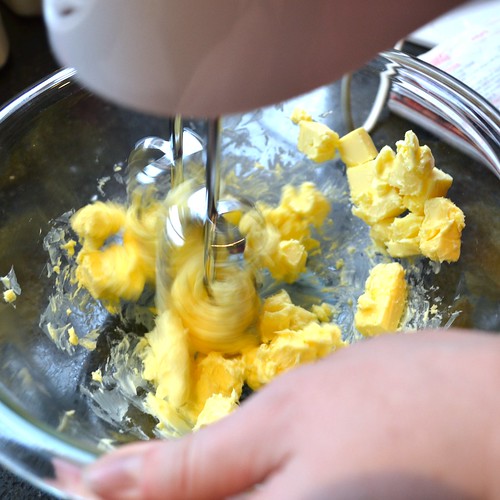
How to make afghans

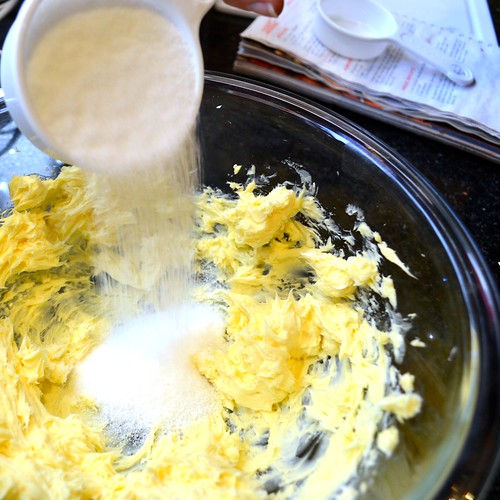
Add sugar, and beat again.

How to make afghans

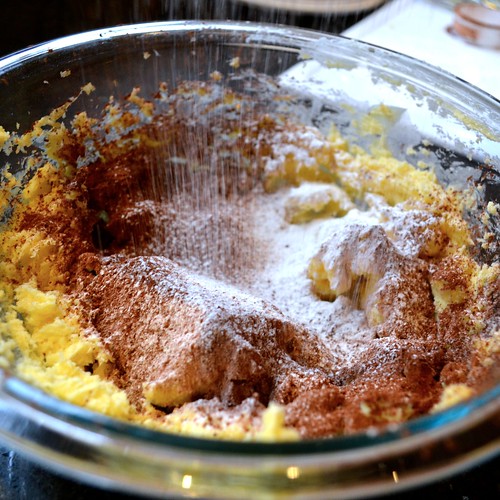
Sift in flour and cocoa.

How to make afghans

Mix to combine.  Don't worry if your mixture seems too dry to start with - keep mixing and it will come together.  Use your hands if it's easier.
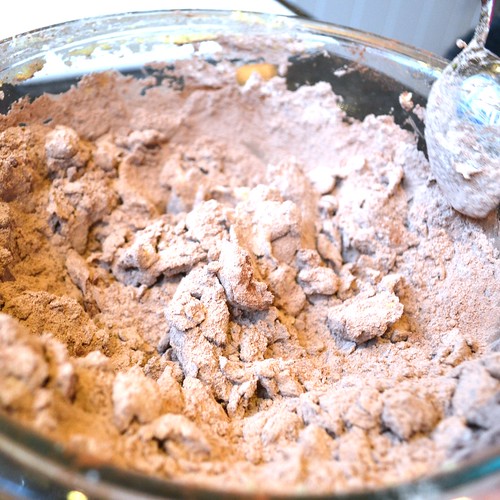
How to make afghans

Add cornflakes and mix well to combine.
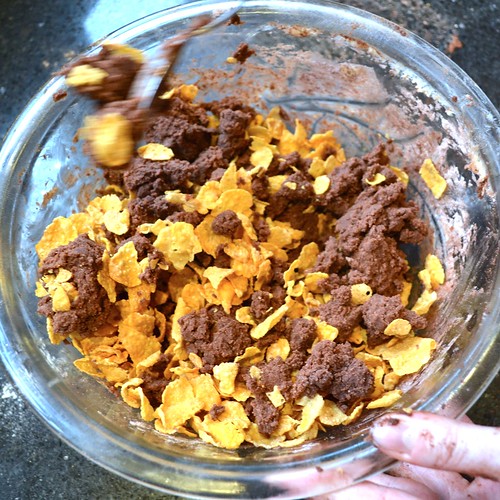
How to make afghans

Form into balls (or thick discs, depending on your preference), and place on a greased or baking paper lined oven tray.
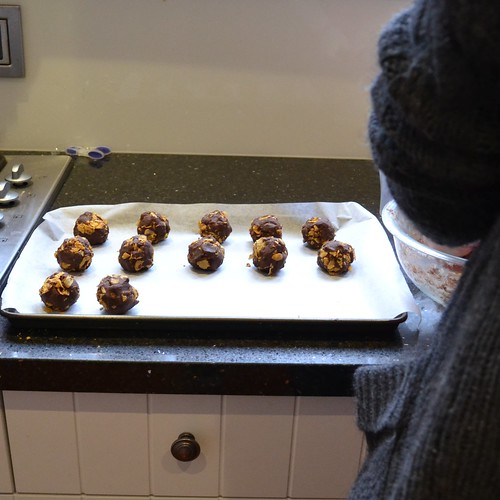
How to make afghans

Bake for about 15 minutes.  I usually put mine in for 10 minutes and then check how they're doing, and leave them in for another 3 to 5 minutes.  You want to err slightly on the side of undercooking, rather than overcooking.  Remove from oven using your pretty new oven mitt.
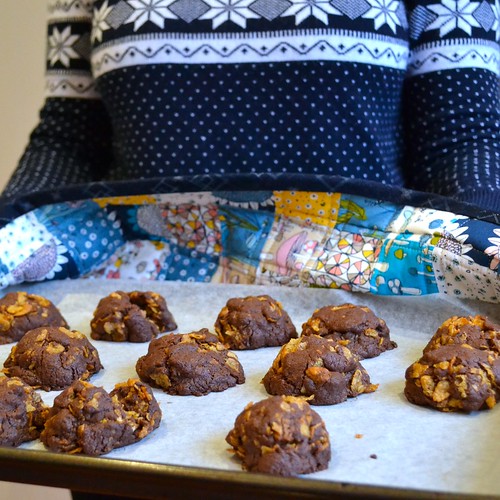
How to make afghans

Allow the afghans to cool completely, and then top with chocolate icing (mix all the chocolate icing ingredients from above together until you have a thick but still spreadable icing.  It's hard to give quantities but expect to use about 1 cup of icing sugar).  If you want, put half a walnut on each biscuit while the icing is still soft.
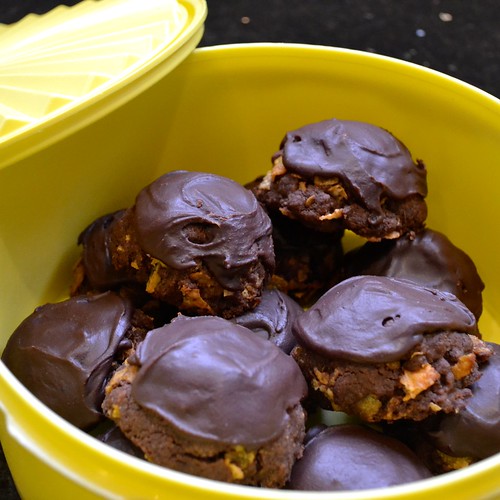
How to make afghans

Consume with tea or coffee or just on their own.  Store in an air tight container (we are using our delightful heirloom tupperware) until they've all been eaten (I'm sure afghans would go bad at some point but we've never hit it - they don't last more than a few days in my household).

*Translation for my US friends:
Biscuits = cookies
Icing = frosting
Icing sugar = powdered or confectioner's sugar

I hope you enjoy!  If you make an oven mitt (or afghans) using my tutorial, let me know!

Follow on Bloglovin

Wednesday, 14 May 2014

WIP Wednesday

What?! I'm posting WIP Wednesday on an actual Wednesday (not a Thursday like the last two times I tried to do WIP Wednesday)?! What is the world coming to??

Actually, the world has been set to right because I am back home after a couple of months working in another city during the week. It really cramped my sewing style, even if I did take my (backup backup) sewing machine up with me after the first few weeks. That's not a typo by the way, I now have three sewing machines. Oops.

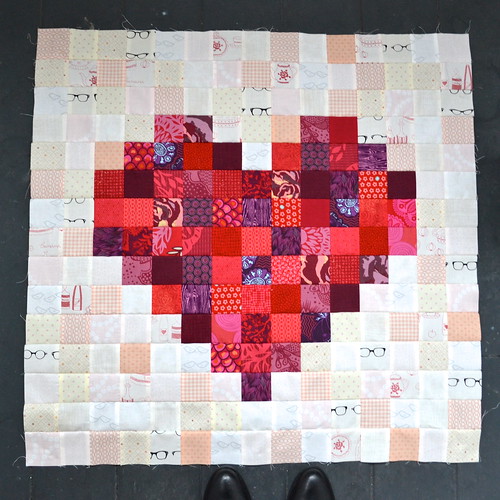
So what did I do to celebrate my return to Wellington? Cut up fabric into little squares and then sewed them back together, obviously. Ever since Jolene of Blue Elephant Stitches posted her Pixelated Heart Quilt, I've wanted to make one myself. But I never really had a reason to make one. But then she made another one, and Amanda at A Crafty Fox made another, even bigger one and then my friend Lara made this one (and started making this one) and then my friend Anne made a heart quilt as well and then I HAD to make one RIGHT NOW.

So I did and this is it.

Pixelated Heart Quilt

Jolene's original pixelated heart quilt is still my favourite iteration of this pattern and I spent a bit of time looking at it to work out why. I think it's that all those ultra saturated Kaffe Fassett fabrics really glow against the very muted creamy peachy background. In more technical terms, there is a high degree of contrast between the heart fabrics and the background fabrics. So, I shamelessly copied Jolene's approach. I took leftover squares from the darkest, most saturated end of the spectrum of fabrics in my I See Fire quilt , and then used the softest, lightest creamy and peachy fabrics in my stash for the background. Seriously, I have a pretty good collection of low volume fabrics and these were whispering compared to most of them.

Pixelated Heart Quilt

And I love it. I'm giving it to the cats, obviously. Now to raid my stash of cat fabric for the backing...

I'm linking up with Lee at Freshly Pieced:

WIP Wednesday at Freshly Pieced


Follow on Bloglovin

P.S. If you're looking for my Sew Mama Sew Giveaway Day giveaway, it's here.

Friday, 17 May 2013

Top of the Lake Quilt

Have you seen Top of the Lake?  It's a TV mini series filmed in New Zealand, written and directed by Jane Campion, and starring Elisabeth Moss (aka Peggy from Mad Men).  The themes are very dark, but the cinematography is beautiful, the scenery is stunning (of course) and it has a very New Zealand vibe (we like our dark and brooding stories here it seems).

Top of the Lake Quilt

It's maybe not the obvious TV show to inspire a quilt, but inspire it did.  I think the mosaic below of images from the show gives a good idea of the kind of colour story running through the series.


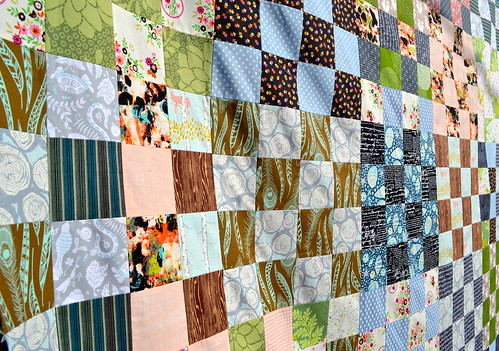
This is what I've tried to capture in my quilt.  Since I was trying to capture a colour story and vibe, I didn't feel like this quilt needed fancy piecing, so I used the St. Louis 16 Patch tutorial that has seen quilts popping up around blogland like mushrooms.

Top of the Lake Quilt

This quilt was super speedy to make - it took me about a day to make a 70" square quilt top.  I'm really happy with how it turned out, although I would describe it as deliberately un-pretty - the colours are a bit off, and it's definitely moodier than the quilts I usually make.


The title sequence, based on a painting by New Zealand artist Seraphine Pick, is amazingly beautiful and incredibly creepy at the same time, and inspired my use of the Tula Pink sea shells fabric (below).

Top of the Lake Quilt

A quick note about how I made my blocks, because it differs slightly from the tutorial I linked to.  I mostly used fat quarters, and I cut the initial 4" wide strips lengthwise (i.e. on the straight of grain, or perpendicular to the selvedge).


Once the alternating 4" wide strips were sewn together, I was able to cut 5 4" wide strips.  I used the extra strips to make the "rogue" blocks in my quilt top (where I have used 8 different fabrics instead of two).  I thought this was both a more efficient way to use fabric, and also a way to add interest to a super simple quilt top.


Have you ever made a quilt inspired by a TV show or a movie?  Also,  I find I really notice quilts in TV shows and movies now - have you had the same experience?

Follow on Bloglovin

Friday, 19 April 2013

Teeny tiny baby quilts

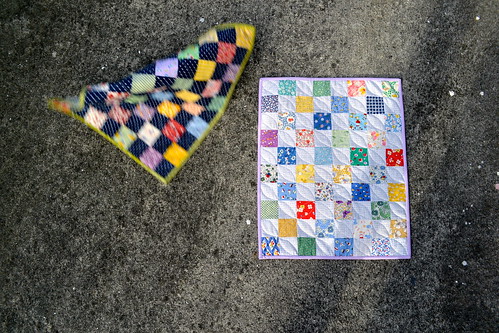
My wee little baby quilts for the neonatal ward of a local hospital are finished!

Quilts for neonatal unit

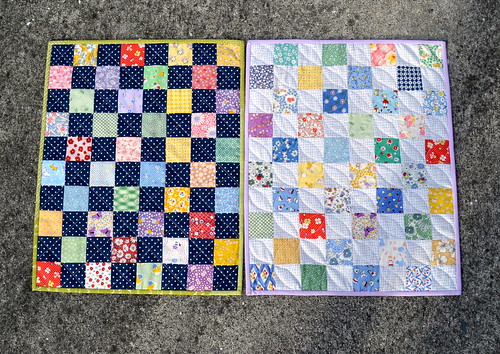
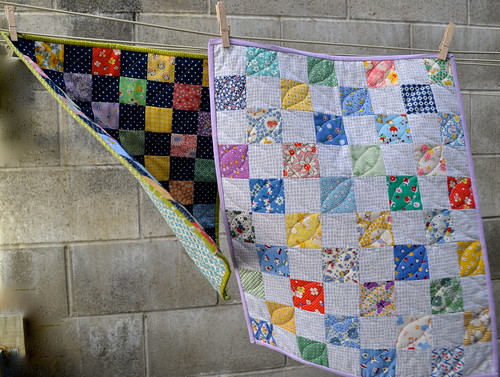
I made these two 16" by 20" quilts from squares of 1930's reproduction prints donated by a guild member who generously went through her stash and provided lots of fabric kits.

Quilts for neonatal unit

I split my kit into two lots, and added my own fabrics - navy pin-dot for one, and a grey and white tile print for the other.  It was particularly satisfying to be able use backing and binding left over from other quilts.

Orange blossom quilting

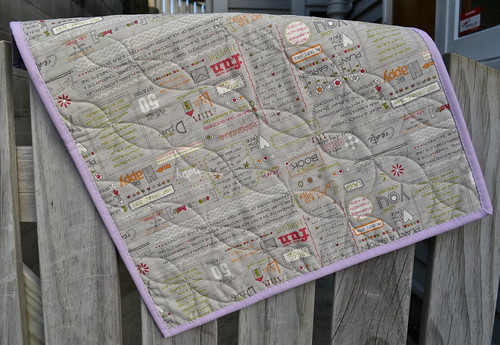
The quilt with the navy fabric received very simple cross-hatch quilting.  With the other one, I tried an experiment, using Elizabeth Hartman's Orange Peel Quilting tutorial.  I really enjoyed doing the orange peel quilting, and I'm very happy with how it turned out - it's definitely a design I will be doing again!

Quilts for neonatal unit

This is a typical quilt photo scenario for me!  Fortunately this little quilt didn't get far, but I can tell the autumnal weather will have its challenges!

It was very enjoyable to make these little quilts knowing they will go to a good cause - they didn't take much time at all, and I was able to use up a few of the extra bits and pieces that I always save and rarely find a use for.  

I have been tempted from time to time to join one of the international groups that quilts for charity (like do. Good Stitches), but it seems really inefficient to be sending stuff like this overseas.  Now that I know what size quilts the local hospitals need (these quilts are for Hutt Hospital, Wellington Hospital prefers quilts that are around 27" - 28" square), I plan to make more - they are a great size for experimenting and using up scraps!

If you make quilts for charitable causes, do you prefer to stick to local causes, or does the sense of community from being part of a charitable bee make sending quilts and blocks further afield worthwhile for you?

These two quilts are the first two finishes off my second quarter goals list - yay!

she can quilt

Linking up to finish it up friday with crazy mom quilts.

Wednesday, 3 April 2013

WIP Wednesday

On my design wall this week are these two teeny tiny baby quilts - they will finish at about 16" by 20".  One of the members of the local guilt I belong to very generously went through her stash and scraps, and made up little packages of pre-cut squares for guild members to make quilts to be used in the neonatal unit of a local hospital.  


I got a little bag of 1930's reproduction prints, which I'm really rather fond of, and I decided to split it up to make two quilts - one with a navy pin dot which is slightly more boy-ish, and one with a grey and white low volume print which, due to the light purple binding I plan to put on it, is a bit more girly.  I'm pretty happy with how these are turning out, and they should both be pretty quick finishes.

I've also been working on some plus blocks using Oakshott shot cottons and low volume fabrics.


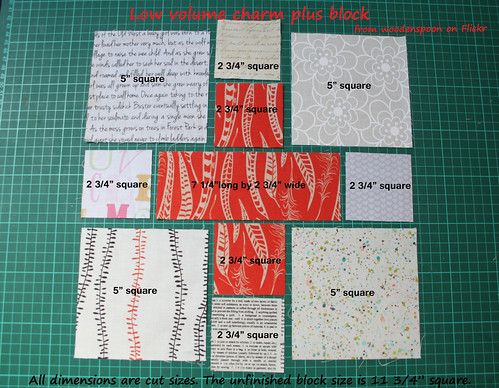
This is an idea I have totally copied from my flickr friend Rachel aka wooden spoon.  We were both part of a low volume charm swap, and she is much further through making a completely gorgeous quilt using the charms and very bright and colourful prints.

If you want to make your own plus quilt using 5" charm squares, Rachel put together this handy dandy diagram showing what size to cut the other pieces.

Dimensions for low volume charm plus block

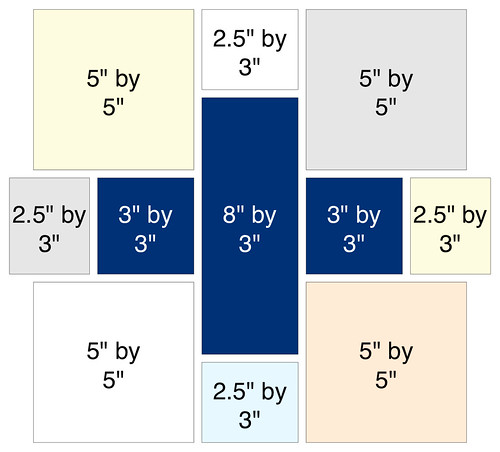
I have a psychological aversion to cutting pieces with a 1/4" or 3/4" measurement if I can avoid it, so I used slightly different measurements, as set out in the diagram below, to make unfinished blocks which are 12" square.

Low Volume Oakshott Plus Block

Of course, Rachel's quilt is inspired by this stunning Marcelle Plus Quilt from film in the fridge, which is in turn inspired by the stunning Marcelle Medallion Quilt by Alexia Abegg.

What are you working on this week?

Linking up with Lee at Freshly Pieced:

WIP Wednesday at Freshly Pieced

Monday, 18 March 2013

Splashy Stars Quilt

On Sunday morning, I got up bright and early.  Under the cover of clouds threatening the first rain we've had in weeks, I set off on a secret mission.  You see, I have been admiring this wall for a while, and thinking that it is the perfect place to photograph a quilt.  But, it's right next to my local supermarket.  The embarrassment factor is high.  However, this quilt, this wall - it was too good to pass up.  (And yes, people did look at me very strangely, but I didn't see anyone I know - win!)


So, as you've probably worked out, I finished my wonky stars quilt (you can see my initial plan for this quilt here and the quilt top before quilting here).


I free motion quilted pebbles and swirls in the blue and green background, so I am calling it Splashy Stars.  Just a little bit of straight line quilting in the white wonky stars helps define them and keep the quilt slightly flatter.


Seriously, isn't this wall great?  It's the side of a cafe, and I have to say, I think the wave and swirling sea is a vast improvement over concrete blocks.


So, this quilt is finished.  I originally made it for my sister's friend's baby boy, who was born (a week or so earlier than expected) last Wednesday.  I'm just not sure what to do with it now though - the FMQ looks good on the front, but the back is a hot mess.  I used a cotton poplin print with the perfect colours (you can catch a glimpse in the second photo above), but it did not agree with free motion quilting.  I'm going to think on how to deal with this issue for a little while - any suggestions (other than ripping out the quilting!) are welcome.

So, I have to know, where is the most embarrassing or strangest place you have taken quilt photos?!

Quilt Stats
Finished Size:  Approximately 40 inches by 49 inches.
Fabric: Assorted blue and green Kona Cottons from Robert Kaufman, FreeSpirit Designer Solid in Arctic White.
Backing: Prints Charming cotton poplin from Spotlight.
Binding: Kaffe Fasset dot.
Pieced and quilted by: me, on my domestic sewing machine.

This quilt is the fourth of my first quarter goals for the 2013 Finish-A-Long - four down, five to go!

she can quilt

Linking up with:

Plum and June Better Off Thread Fresh Poppy Design

and, of course, Finish it Up Friday at Crazy Mom Quilts.