

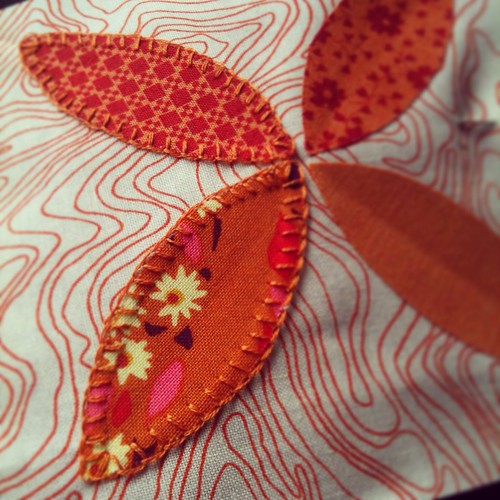
I'm using this method to create the orange peel border of my Midnight at the Oasis quilt, and I'll also use it for the other appliqué border with baskets and flowers (although I'll probably just topstitch the long bias strips in place using my sewing machine). My friend Jess at The Elven Garden is co-hosting the Midnight at the Oasis QAL and she is sharing several different appliqué techniques today - definitely head over and check them out.

In this method, the stitching is a feature, which means you get quite a different effect compared to other methods. I personally find it easier than needle turned appliqué and more relaxing than machine appliqué – although of course, because it’s done by hand, it’s not the speediest method of doing appliqué. I do most of mine on the sofa but once you've got the appliqué fused in place it's very portable so it would also be perfect for those moments when you're out and about and have time to kill.
To start off, you trace the shape you want to appliqué onto the paper side of your preferred type of fusible web. I really like Shades SoftFuse, but use whatever you prefer (or can get your hands on!). Bear in mind that the shape will be reversed when you cut out your fabric – sometimes this matters (if you are appliquéing writing, for example), and sometimes it does not. I like to trim the fusible web down so that there is just a small margin around the edge of the appliqué shape – this means that you will waste less fabric.
Fuse the webbing to the wrong side of your feature fabric, following the manufacturer’s directions. Use sharp scissors to carefully cut along the line on the back of your fusible webbing so that you have a fabric appliqué shape.
Now prepare your background fabric. I really like to cut my background fabric a bit larger than is required for the block I’m working on. This method of appliqué involves quite a lot of handling of your fabric and there is always the risk of fraying. Plus, whenever you blanket stitch (by machine or by hand), there is a chance that the stitches will pull the fabric into the centre slightly and shrink the background a little bit. This way you will be able to trim the block to the perfect size when you’re finished.
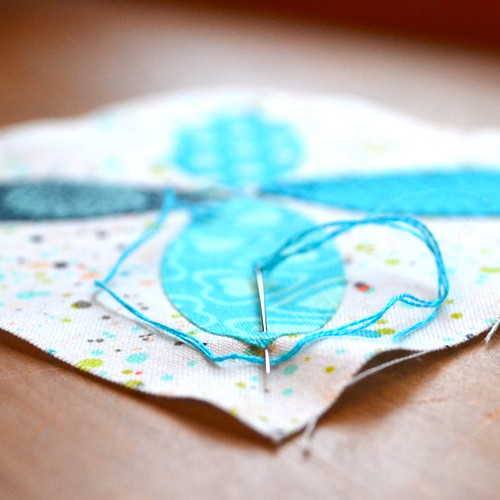
For the orange peel blocks for the Midnight at the Oasis quilt, I pressed along each diagonal of my background block so it would be easy to centre my orange peels and get them all at exactly the same angle. I worked one block at a time, arranging the petals in a pleasing way and then fusing them in place.
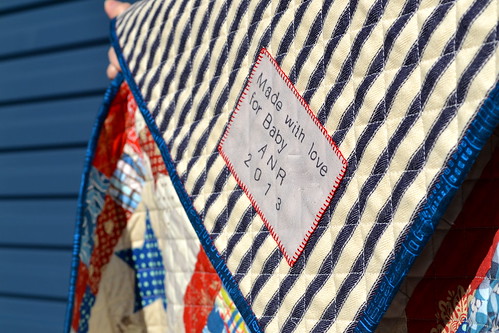
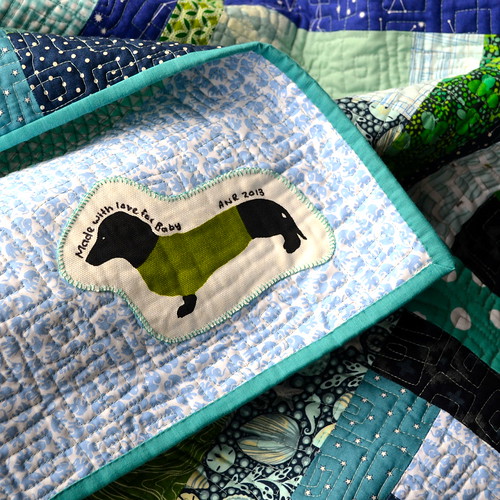
Once that's done, it’s time to blanket stitch. I use DMC embroidery threads, largely because you can buy them just about everywhere. I match the thread colour to the colour of the appliqué shape, but you are always going to see your stitches so it doesn’t matter if it doesn’t match perfectly (and sometimes it’s fun to create an outline with a completely different coloured thread like I did with this label).
When the appliqué shape is quilting cotton, I find two strands of thread just right. If it’s a thicker fabric, I think a thicker thread would be better, and of course you could definitely experiment with different weights and types of thread to see what you prefer.
 |
| This label is made from home dec fabric and I wish I used three strands of embroidery thread rather than two. |
I made a video to demonstrate the blanket stitch technique, because it’s one of those things that I had to learn by watching someone do. Of course, when I say I made a video, I mean I appeared in a video which my sister filmed and edited and did all the hard work on.
A couple of tips I didn’t cover in the video – first, to finish off, I simply take the thread to the back of the work, and then carefully pick up a couple of threads of the background fabric under the appliqué shape. You should be able to do this without it being visible on the front. Then I just bring the embroidery thread through the background fabric and tie off in the same way that you would tie off your thread when sewing binding.
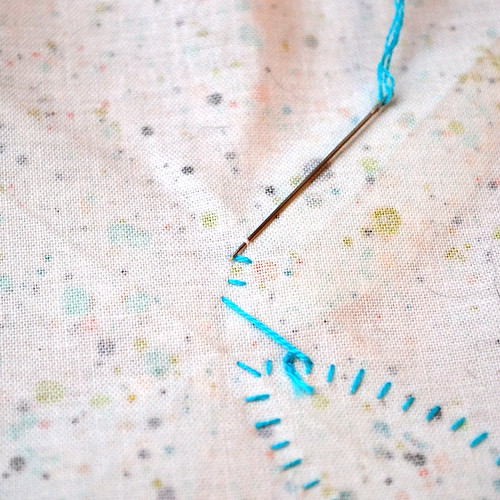 |
| Picking up a couple of threads on the back of the work |
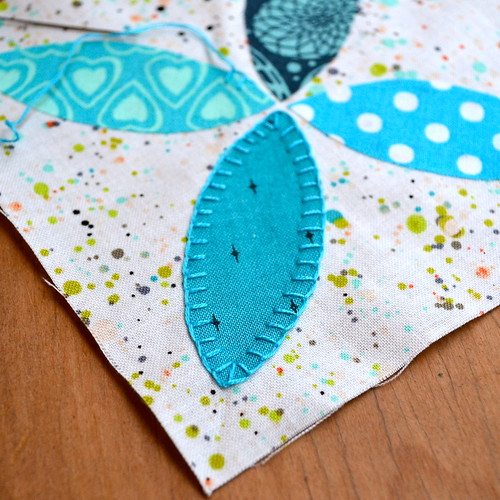
When you get to a corner, rather than making a stitch perpendicular to the edge of your appliqué shape, make a stitch that runs right through the middle of the angle of the corner.
Then make your next stitch perpendicular to the edge again. This is what a finished corner looks like.
I hope you've enjoyed my blanket stitch tutorial! Is this a technique you've ever tried? Feel free to leave me any questions and I'll try my best to answer them.

10 comments:
What a great tutorial, I've done this stitch on my machine but I'm sure going to do by hand with perle cotton next time! I have on question: does the fabric fray after washing? By the way: loved the cats in the video :-)
thank you!!! i've been trying to figure out how to do a blanket stitch with diagrams and it wasn't making any sense!!! your video is perfect!! :-) now i can finish my christmas gift stockings!! :-)
This is how I do mine too. Like you what ever needle the thread fits through gets used. Your stitches are lovely and even:)
Thanks for the tutorial. I have done blanket stitch a couple times but it has been a while and I can never remember how to get started. Also, it was so fun hearing your accent!
This is awesome Adrianne! I am writing my post now while the wee one is watching play school!
I love nice short technique videos like this one and it is nice to hear your voice.
cute video! Love the feline assistants ;-)
This looks so neat and clean, love the technique and will give it a shot - thanks for the tut!
lol your cats are so cute! Loved the video, thanks for sharing your technique. I've always wanted to try blanket stitch appliqué so now I'll really have to go it a go. Your stitches are always so even and lovely.
Oooh this is a gold mine ;) Does the fusible web help prevent fray when washed? I absolutely (clearly) love this method I would just hate for anything to happen to all that beautiful handiwork in the wash!
Post a Comment