Saturday 28 November 2015

Caturday Wisdom #148

Live in Wellington and you'll never need your hairdryer. Mila and Mojo
 
It seems appropriate that these two are on the blog today as later Adrianne and I will be going to visit them!
Mila (left) is bigger than Ralph or Ivy and she still looks miniature next to the enormous Mojo. I'm sure Adrianne will take a pic or two so keep an eye on her Instagram account for that.

Wednesday 25 November 2015

How to make a Non-Slip Sewing Machine Mat

I just realised that I wrote this tutorial for Leanne from shecanquilt but never shared it here.  So, here you go!

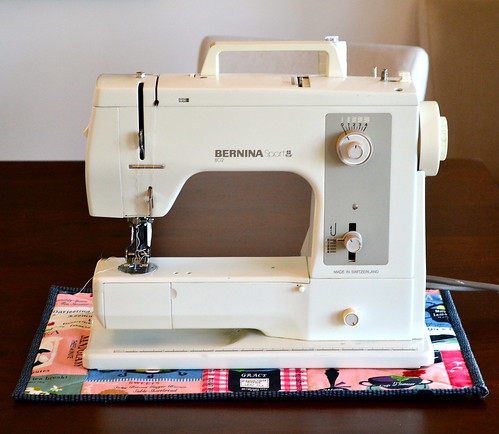
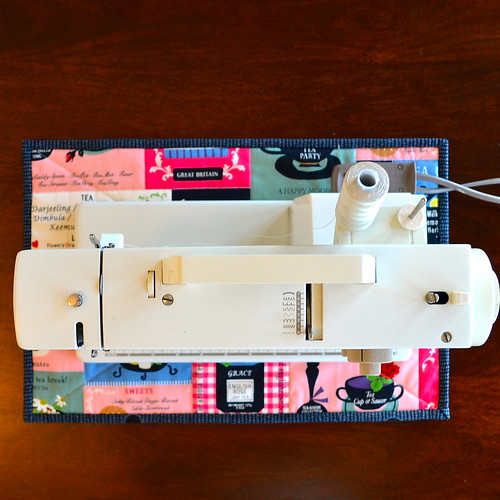
I came up with this idea after I got annoyed with my sewing machine sliding around on the table, especially when I was sewing quickly or free-motion quilting.  It makes such a difference to have a sewing machine that stays where you want it to!  It also adds a lovely personalised touch to your sewing space.

Non-Slip Sewing Machine Mat Tutorial

What you will need:

- feature fabric
- low loft cotton batting
- backing fabric
- non-slip matting
- fabric for binding
- basting pins (curved safety pins)
- sewing machine with walking foot

- usual notions like thread, rotary cutter and ruler, scissors, etc.

Tips before you start:

It's a good idea to read the full tutorial all the way through before you start.

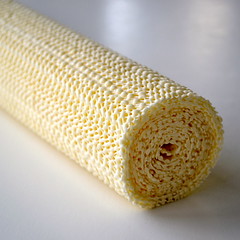
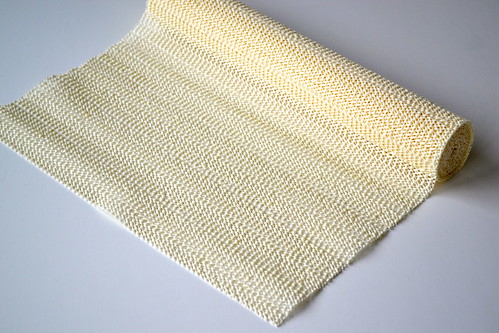
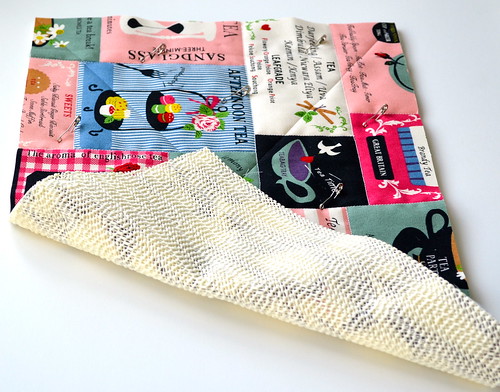
The thing that makes this mat non-slip is this non-slip matting.  It's the type of thing you might put in a cupboard or drawer to stop things sliding around.  These pictures are intended to give you a good idea of what it's like.

Non-Slip Sewing Machine Mat Tutorial Non-Slip Sewing Machine Mat Tutorial 


I bought mine at Spotlight (essentially the equivalent to Joann's), but you can also find it at hardware stores and big box homeware stores.  You can find the exact brand I bought here, and this is a version which looks pretty much the same which I found on amazon.  The colour doesn't really matter, because you won't see it once your mat is finished.

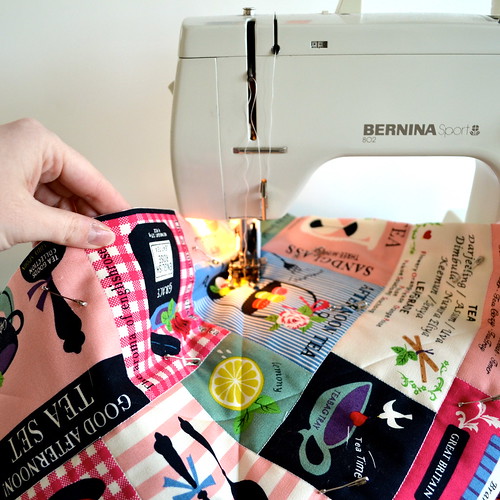
Step 1 - Create the top of your mat

First, measure your sewing machine to work out how big your mat should be.  I would recommend measuring the base of your sewing machine and then adding at least 2" on each side.  I have a fairly small sewing machine and I made mine 12" by 18".

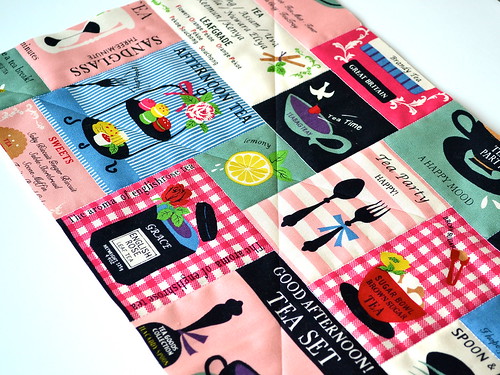
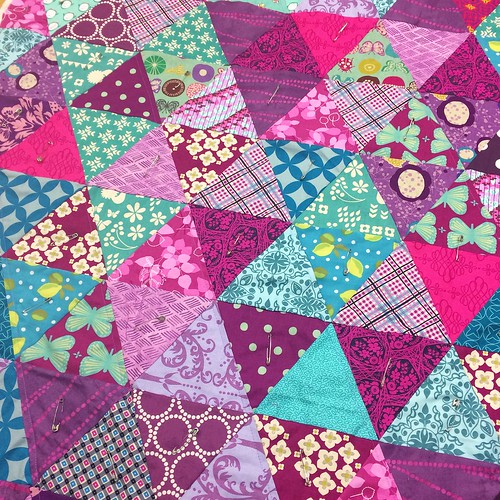
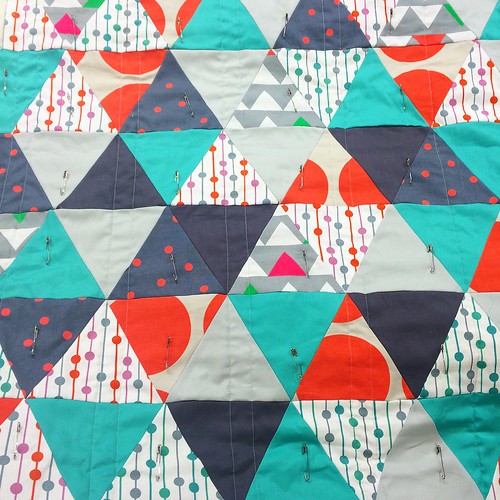
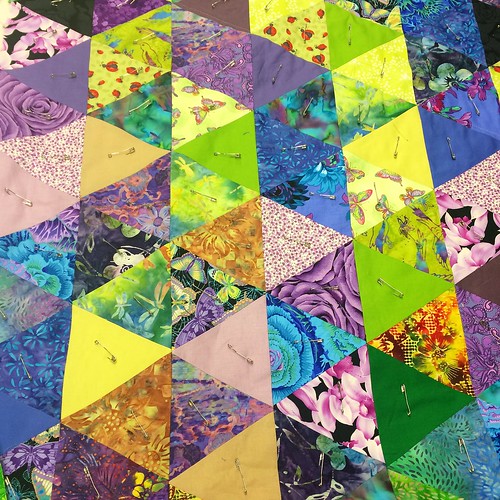
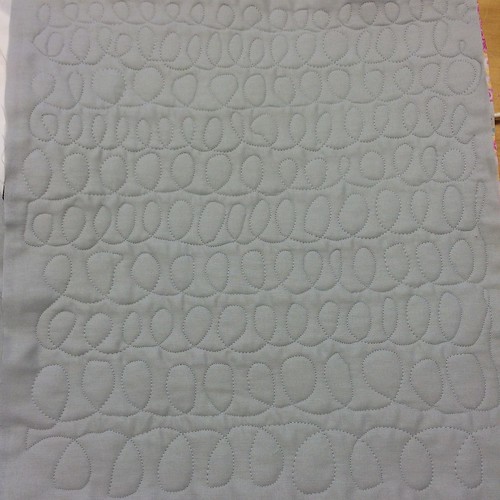
Choose the fabric you will use for the top of your sewing mat.  I used a single cheater print fabric, but you could definitely piece something if you prefer.  Make a quilt sandwich with your feature fabric, the low loft cotton batting, and your backing fabric, using your preferred method.  Quilt as desired.  I simply followed the lines of my cheater print fabric.

Non-Slip Sewing Machine Mat Tutorial

Step 2 - Mark your quilting lines

You are going to baste the non-slip matting to your quilt top, and stitch through all the layers to securely  attach it.  You don't need to quilt it densely, just enough to make sure it doesn't bubble or move around too much.  Once you have decided on your quilting lines, use your favourite method to mark them on the quilt top.


Non-Slip Sewing Machine Mat

You can see that I used a hera marker - it's absolutely my favourite way to mark quilting lines.  This is the one I have and I love it.

Step 3 - Baste on the non-slip matting

Use the curved safety pins to base the non-slip matting to your quilt top.  Place them not more than 4" apart, and if possible, avoid placing them on your quilting lines.

Non-Slip Sewing Machine Mat Tutorial

Step 4 - Quilting

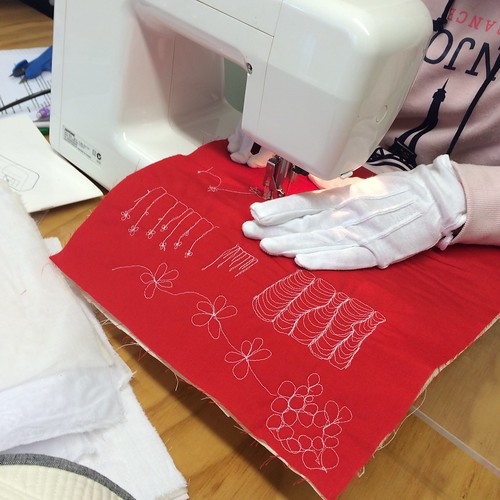
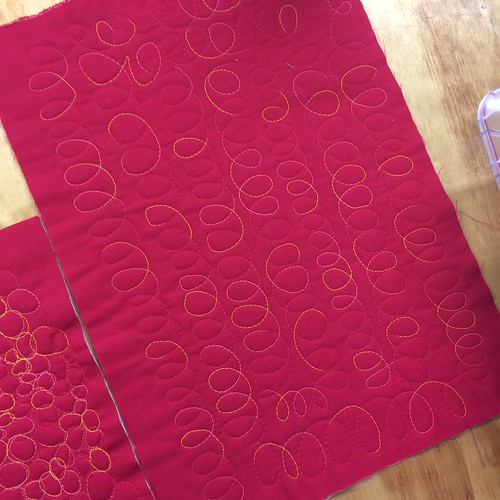
This part is a little tricky, and you will really need a walking foot, because the non-slip matting is going to want to stick to your sewing machine.  Get your quilt set up and ready to go, and drop the needle down.  You may need to lengthen the stitch length beyond what you would normally use for straight-line quilting - I set mine at about 3.75 (the maximum stitch length on my machine is 4).


Non-Slip Sewing Machine Mat Tutorial

I would normally use a flat hand to gently guide the fabric through the machine.  This will not work, because putting any pressure on the quilt will cause it to stick to the sewing machine.  What you need to do is lift the quilt up around the presser foot, and let the feed dogs and your walking foot do their job.  It will feel really strange, but if you go slowly and carefully, it will work.
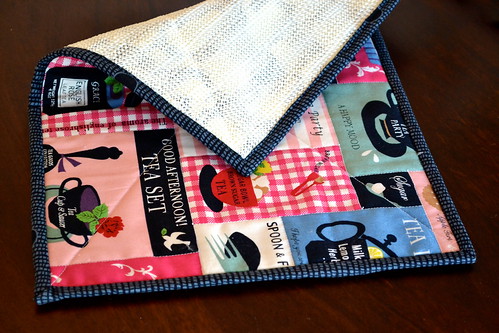
Step 5 - Binding

This project is a great candidate for machine stitching the binding.  I learned from Rita at Red Pepper Quilts, and I still think her tutorial is the best.  If you do decide to hand stitch the binding, I would recommend attaching it to the back first and hand stitching it to the front.

Non-Slip Sewing Machine Mat Tutorial

Ta da - you're finished!  Now you just need to test drive your new sewing machine mat - a perfect excuse to sew something new!

Non-Slip Sewing Machine Mat Tutorial

P.S. You will have a fair bit of the non-slip matting left over - try putting a piece under your sewing machine pedal.  It will stop creeping away from you as you sew!

Follow

Saturday 21 November 2015

Caturday Wisdom #147

Why play hide and seek when you could play hide and sleep?! Ralph

Ralph did not want to participate in my photoshoot this day. He had fallen asleep in the sun and couldn't be bothered moving away from me so in classic sun-drunk style, just hid behind a paw. I'm hoping for some more weather like this but it's not looking good.

Wednesday 18 November 2015

Fat Quarter Shop giveaway winner

Thanks everyone for your comments on my Firecrackers Quilt blog post.  It was really interesting reading about your favourite gadgets. There were a few themes running through the comments - Bloc-Loc HST rulers and clover clips were popular (these are both on my favourite gadgets lists too), as were easy angle and companion angle rulers, which I haven't tried.


Without further ado, I'm delighted to announce that the random number generator drew commenter 21, Allison, as the winner of the Creative Grids 30 degree triangle ruler,generously provided by Fat Quarter Shop.

Congratulations Allison, and thanks to everyone else who entered.

Follow

Saturday 14 November 2015

Caturday Wisdom #146

You underestimate the power of the dark side. Mojo (Darth Vader)
 
The new Star Wars trailer has clearly affected me. Mojo's owner also happens to be a big Star Wars fan too so perhaps that explains the inspiration, although mostly I just think Mojo looks like he rules the world.
Happy Saturday!

Friday 13 November 2015

Firecrackers Quilt - a Fat Quarter Shop pattern

THANKS EVERYONE FOR YOUR ENTRIES - THIS GIVEAWAY IS NOW CLOSED.

Today, I'm delighted to be sharing my version of Fat Quarter Shop's newest quilt pattern, the Firecrackers Quilt!


If you're interested in making this quilt yourself, all the resources you need are right here:

Firecrackers PDF pattern
Firecrackers video tutorial
Firecrackers quilt kit
Firecrackers backing set

Firecrackers quilt 

This quilt uses two jelly rolls, and a background fabric.  I was super lucky and managed to get my hands on not one but two fabric collections I've been jonesing for - Modern Background Paper and Modern Background Ink.  Although these fabrics have been designed as backgrounds, I wanted them to be the stars of my quilt, and chose Moda Grunge in Duchess for my background.

Firecrackers quilt 

I'm really pleased with how this quilt top has turned out.  I really liked the angles in the pattern design, and I wanted to keep the graphic nature of the quilt with my fabric choices.  I think the black, white and grey achieves that perfectly.

Firecrackers quilt 

I had a nice time making this quilt - there are a few steps to it but they are all pretty simple and perfect for doing while watching a TV show or listening to a podcast (lately I've been listening to and really enjoying Reply All).  If you're going to make this quilt, I totally recommend this rotating cutting mat for the trimming stage.  I actually bought one when I was holidaying in Auckland last year.  I was making a quilt with lots of half square triangles, and I forgot to take my other rotating cutting mat with me.  I found the Matilda's Own one in a shop up there and I haven't looked back since - it's that good.

Firecrackers quilt 

I really like the subtle texture of the Moda Grunge fabrics.  I have a few stashed but I think this is the first time I've actually used one! It has reminded me why I stashed them in the first place!

Firecrackers quilt

It was a pretty windy day when I took these photos - it always makes photographing a quilt top challenging!  Here is my tip for anyone making this quilt: once you have finished assembling the quilt top, stitch a line about 1/8" from each edge of the quilt.  This will help keep the edge stable and prevent it from stretching.

I can't wait to see the quilts made by the other bloggers who made quilts from the Firecrackers pattern!  You can find the other quilts here:

Ants to Sugar by Daisy
Silly Mama Quilts by Brooke
Happy Quilting by Melissa
627 Handworks by Julie
Must Love Quilts by Corinne
Mommy Sew by Jenn
Fly Away Quilts by Lauren

One of the things I really enjoyed about making the Firecrackers Quilt was the opportunity to use the Creative Grids 30 Degree Triangle Ruler for the first time.  I'm already a big fan of 60 degree triangles, and the 18 degree wedges that are typically used for making Dresden plates, and this ruler hits the gap in between perfectly!  I've already started a little project using some of the 30 degree triangle scraps from this quilt, which I hope to share with you soon. 


Fat Quarter Shop is very generously letting me give away a Creative Grids 30 Degree Triangle Ruler to one lucky reader.


To enter the giveaway, simply leave a comment letting me know about your favourite ruler or other quilting gadget - I'm just curious to know what people have found and love.

You can get an optional extra entry for each of the following (just leave an extra comment on this post for each that applies):

 - following my blog (through google friend connect or a feed reader like Bloglovin' or Feedly); and
 - following me on instagram (I'm there as @adrianneonthewindyside).

This giveaway is open to everyone (including international participants), but if I can't contact you, you can't win.  If you are a no-reply blogger, please leave your email address in the comment.  If you're not sure whether you're a no-reply blogger, check out my tutorial on how to stop being a no-reply blogger by clicking on the button below.

How to stop being a no-reply blogger

The giveaway will stay open until around 6 pm Tuesday 17 November at 6pm (New Zealand Time), and I will use the random number generator at random.org to pick a winner then.

THANKS EVERYONE FOR YOUR ENTRIES - THIS GIVEAWAY IS NOW CLOSED.

Follow

Saturday 7 November 2015

Caturday Wisdom #145

 This is an easy way to get extra fluffy towels. Ralph
 
Cat hair is a mysterious substance - if you have a cat you'll know this. There is not a place in our house that's free from cat hair. Not the bathtub, not the food, nothing. Once again it's lucky they're cute!

Friday 6 November 2015

Bondi Top - Nani Iro fabric

Another garment post!  Don't worry, I haven't stopped quilting (in fact I have three quilts just waiting to be bound and photographed so I can blog them), but I have been on a garment making kick lately.  

This time, I made the Bondi Top, designed by Lindsey from Sew to Grow.  I saw this top on Cath  and knew I had to make a Nani Iro version for myself.  Full disclosure - Lindsey provided me with a copy of the pdf pattern in exchange for a write up - but, as always, this review reflects my honest opinion.

Bondi Top - Nani Iro fabric 

This top really appealed to me because it's a simple, casual design, in woven fabric (easier for me to sew with since I don't have an overlocker of my own).  For this top, I used Nani Iro double gauze in En Garden Apricot, which I bought from Stitchbird Fabrics.  I really like the double gauze for this purpose - it's like wearing a cloud, and so much more flattering than quilting cotton.  It was also easy to sew with - win!  I also found the bias tape that I used for the neckline at Stitchbird - I know how to make my own bias binding but buying it was so much quicker and easier!

Bondi Top - Nani Iro fabric 

Based on my measurements, I made a size small top, which I think is the right size for me but ended up being shorter than I would really like.  I have a long torso, so I think this is my issue, rather than the pattern, and for the next version, will add an inch or so to both the front and back pieces.  The pattern contemplates a contrast yoke at the back - I just used the same fabric because 1. I am lazy and 2. this fabric is patterned enough for me as is.

Bondi Top - Nani Iro fabric

This top was really quick and easy to sew up, taking about two hours total once I had taped the printed pattern together (always the worst part of garment sewing, for me!).  I didn't have any trouble following the directions, and Lindsey has video tutorials for the bits that might be slightly harder (like adding bias tape to the neckline).  It's comfortable and cute and I've already bought fabric (more Nani Iro from Stitchbird) to make another version!

Have you found any great garment patterns lately?

Follow

Wednesday 4 November 2015

Adventures in teaching - part two

Ok, on with the rest of the classes I taught this year.

Class photos 2015 

These equilateral triangle quilts are from the equilateral triangle quilt class I taught at Stitchbird.

Class photos 2015 

This is yet another class I taught twice this year, once at Stitchbird and once at Nancy's Stitch Studio.  Unfortunately, I only have photos from the Stitchbird class, but they were both great fun and my students did an amazing job.

Class photos 2015 

The next few photos are from the free motion quilting class I taught at Stitchbird.  This was a two hour technique class, and so much fun.

Untitled 

I think free motion quilting is one of those things that is really nice to learn in person.  It's truly not that difficult, but having a little bit of encouragement and someone to make suggestions can make all the difference.

Untitled 

My students did amazingly well in this class, busting out a few of my favourite designs and then moving on to coming up with their own.  Awesome!

Untitled 

Last, but certainly not least, is my Garden for Birds class.  This one runs over six lessons, and is a form of sampler quilt, with students tackling a variety of blocks, piecing and applique. 

Garden for Birds Class Quilts 

This class is always a blast to teach, because the quilts people produce are always so different from one another.

Garden for Birds Class Quilts 

A few cats crept into these quilts, as well as other more creepy crawly creatures...

Garden for Birds Class Quilts 

I would not have thought of doing an all solids version of this quilt, but I love how graphic and modern it turned out!

Garden for Birds Class Quilts 

Another cat!  And I love this warm autumnal colour scheme!

Garden for Birds Class Quilts 

The quilt above was made for its maker's third baby, who I'm sure will love it!  A couple of people in this class (and in other classes) had only just started sewing.  I love seeing people's confidence grow as they get to grips with sewing, and I'm always delighted when I get to the end of a class and know that people are converts to quilting!  

Garden for Birds Class Quilts

In this class, everyone started quilting their quilt by the last class, which I really strive for.  I always think it's nice, especially with a first quilt, to at least start the quilting in class.

So, that was my year of teaching.  It was pretty busy (not least because I was flat out at work at the same time), but so enjoyable.  Do you have any questions about teaching patchwork and quilting?

Follow

Monday 2 November 2015

Adventures in teaching - part one

I've done quite a lot of teaching this year, and I thought it might be nice to share some of my students' work here.

Class photos 2015

First up are the ladies who took my Modern Baby Quilt class at Stitchbird.  Over the course of four sessions we covered cutting, piecing, assembling the quilt top, basting, quilting and binding.  Everyone did amazingly well, and got to the point of starting the quilting on their quilt in the last class. 

Class photos 2015

This quilt is super simple, which is perfect for beginners, but has enough happening that class participants can really put their own spin on it with fabric choices and quilting designs.  Seeing the different choices people make is one of my favourite parts of teaching.  While my students were working on this quilt, I made my own version (outside class time, of course).  You can check it out here, together with other previous versions here and here.

Class photos 2015

Next up is some of the work that came out of my foundation paper piecing class, also at Stitchbird. The pattern I've used here is, of course, Artisania's Lil' Fox pattern, and you can see my class sample cushion here.

Untitled 

 I actually ran this class twice last year, because there was so much interest after the first class, and it was a lot of fun.  It is a technique class, so only takes two hours, and participants leave with a partially completed fox block and the skills to finish it at home and tackle other foundation paper piecing projects on their own.

Untitled 

I know that a few of these foxes have made their way into finished projects - like these cushions made by Kerry and Bridget.

Class photos 2015

Another class I taught twice this year was a class based on my Soft and Stable Tote Bag tutorial.

Class photos 2015

I taught this one at both Stitchbird and Nancy's Stitch Studio, and had a blast each time.

Class photos 2015

I know, as a student, that it's so satisfying to come out of a class with a finished project, and my participants left each class with a fully completed tote bag each, which was awesome!

I was going to share all of my class photos for the year in a single post, but writing it up, there are a lot, so I think I will spread them over a couple of posts.  Come back later in the week for part two...

Follow